Category: Appetizers

  • Spooky Delight: Halloween Mummy Meatballs

    Spooky Delight: Halloween Mummy Meatballs

    Every year, I chase a new way to bring playful chaos to the dinner table. This Halloween, I decided to transform classic meatballs into tiny, adorable mummies that look like they stepped right out of a spooky movie. The smell of seasoned beef mingling with crispy prosciutto creates an irresistible aroma that fills my kitchen with festive cheer.

    It’s funny how a simple twist can turn into a riot of giggles and oohs from the kids. These mummy meatballs are more than just a treat—they’re a perfect centerpiece for any Halloween gathering. Watching everyone’s faces light up when they see these creepy-cute bites makes all the effort worthwhile.

    Halloween Mummy Meatballs

    These mummy meatballs are made by shaping seasoned ground beef into small balls, then wrapping them with crispy prosciutto strips to resemble mummies. They are baked until golden brown and have a tender interior with a crunchy exterior. The final presentation features meatballs with pieced-together prosciutto bandages and expressive eyes, perfect as a spooky centerpiece for Halloween festivities.
    Prep Time 20 minutes
    Cook Time 25 minutes
    Total Time 45 minutes
    Servings: 4
    Course: Main Course
    Cuisine: American
    Calories: 250

    Ingredients
      

    • 1 pound ground beef 80/20 blend recommended
    • 1/2 cup breadcrumbs plain or seasoned
    • 1 large egg lightly beaten
    • 2 cloves garlic minced
    • 2 teaspoons paprika optional, for flavor and color
    • to taste salt and pepper for seasoning
    • 8 slices prosciutto thinly sliced
    • 2 cups water or chicken broth for baking
    • for eyes small dots of mustard or black olive slices for facial details

    Equipment

    • Baking sheet
    • Parchment paper
    • Knife
    • Small spoon or piping bag
    • Cooking tongs

    Method
     

    1. Preheat the oven to 375°F (190°C) and line a baking sheet with parchment paper.
    2. In a large bowl, combine the ground beef, breadcrumbs, lightly beaten egg, minced garlic, paprika, salt, and pepper. Mix everything together with clean hands until evenly blended—this creates a flavorful base for your meatballs.
    3. Divide the mixture and gently shape it into small, evenly-sized meatballs, about 1 to 1.5 inches in diameter. Place each ball on the prepared baking sheet, spacing them apart to allow even baking.
    4. Wrap each meatball with a strip of prosciutto, starting at the top and overlapping slightly to resemble bandages of a mummy. Tuck the ends underneath to secure the wrap and create a spooky, wrapped look.
    5. Pour water or chicken broth into the baking sheet to create steam and keep the meatballs moist as they bake, then place the tray in the oven.
    6. Bake for about 20-25 minutes, or until the prosciutto is crispy and the meatballs are cooked through, with an internal temperature of 160°F (71°C). Keep an eye on them as they bake to prevent over-browning.
    7. Remove the baking sheet from the oven and allow the meatballs to cool slightly. Use tongs to transfer them to a serving platter.
    8. Use small dots of mustard or slices of black olive to add eyes on each mummy meatball, giving them a fun, spooky facial expression.
    9. Arrange the mummy meatballs on your serving platter and enjoy their crispy, savory exterior combined with tender, flavorful interior—perfect for a festive Halloween gathering.

    Notes

    Ensure prosciutto is thin enough to wrap easily. You can make the faces more playful or spooky by varying the eyes and mouth placement.

    These mummy meatballs are a snapshot of my holiday kitchen—chaotic, creative, and irresistibly fun. They remind me that the best recipes are the ones you mess up and then fix with a grin and a dash of improvisation. Plus, they’re a hit at parties where the kids sneak in second and third helpings.

    As the season shifts to cozy sweaters and pumpkin patches, this recipe adds a touch of spooky whimsy to the table. It’s simple enough for busy nights but special enough to wow guests. Making these mummies gives me a little cause for nostalgia, blending childhood excitement with adult cheer.

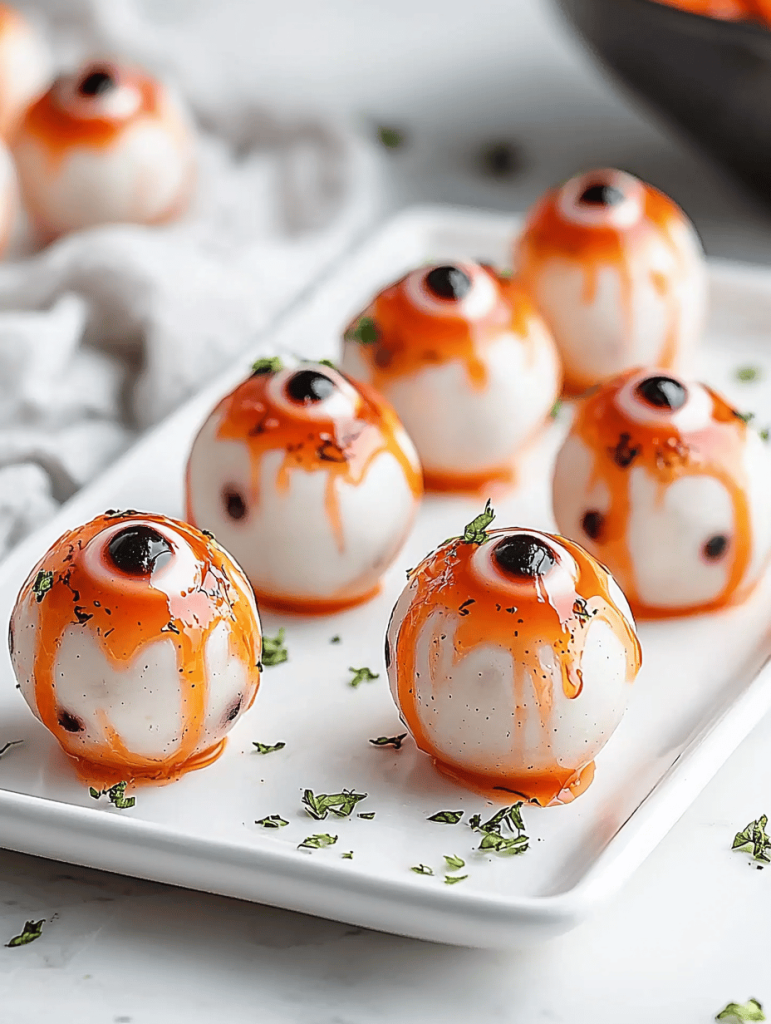
  • Spooky Yet Sophisticated: Halloween Eyeball Caprese Bites

    Spooky Yet Sophisticated: Halloween Eyeball Caprese Bites

    Whether you’re planning a Halloween dinner, a spooky cocktail party, or just want a fun way to celebrate the season, these eyeball bites are a perfect fit. They’re quick to assemble, strangely satisfying to look at, and so delicious. Plus, they make you look like the most inventive host without much effort. It’s a find I’ll keep coming back to each spooky season.

    Eyeball Bites

    Eyeball bites are fun, spooky snacks made by forming creamy cheese mixtures into round shapes and decorating them with edible embellishments like olives or cherry tomatoes to resemble eyeballs. They typically involve shaping, chilling, and decorating to achieve a realistic and eerie appearance, with a smooth and firm texture once completed. These bites are perfect for Halloween parties and add a playful touch to seasonal gatherings.
    Prep Time 15 minutes
    Total Time 15 minutes
    Servings: 8
    Course: Main Course
    Cuisine: American
    Calories: 120

    Ingredients
      

    • 8 oz cream cheese, softened
    • 1 cup shredded mozzarella cheese
    • 1 tsp garlic powder
    • 1 cup black olives or cherry tomatoes for decorating eyeballs
    • 2 tbsp sliced almonds or red pepper flakes optional for details

    Equipment

    • Mixing bowl
    • Spoon
    • Baking sheet or plate
    • Small knife or toothpick

    Method
     

    1. Combine the softened cream cheese and shredded mozzarella in a mixing bowl, stirring until smooth and creamy.
    2. Add the garlic powder to the cheese mixture, folding it in evenly for flavor.
    3. Using your hands or a spoon, scoop out small portions of the mixture and roll them into smooth, oval or round shapes that resemble eyeballs.
    4. Place the shaped eyeballs onto a platter or baking sheet lined with parchment paper.
    5. Slice the black olives or cherry tomatoes in half; these will be used for the eyeballs’ irises and pupils.
    6. Insert an olive half into the center of each cheese ball to create the iris, and use a small knife or toothpick to add smaller details, like tiny veins or pupils.
    7. If desired, sprinkle sliced almonds or red pepper flakes around the base for added detail and texture.
    8. Chill the eyeball bites in the refrigerator for about 10-15 minutes to firm up and set their shape.
    9. Once chilled, serve the spooky eyeball bites on a platter, enjoying their creepy and fun appearance and smooth, cheesy texture.

    Notes

    For extra realism, add tiny bloodshot veins using a toothpick dipped in red food coloring. You can also experiment with different toppings for varied eye effects.
    These Halloween Eyeball Caprese Bites are a fun, spooky way to jazz up your appetizer spread. The combination of fresh flavors and creepy presentation makes them a crowd favorite every year.
    They’re quick to assemble, and the kids and adults alike will get a kick out of the eerie eyes. Plus, they’re a nice balance of playful and sophisticated, perfect for embracing the spirit of the season.

  • Spooky Good: Halloween Mummy Hot Dogs That Charm and Charm

    Spooky Good: Halloween Mummy Hot Dogs That Charm and Charm

    This Halloween treat isn’t just about looks. It’s about what it brings to the table — nostalgia, chaos, and a whole lot of smiles. It’s the kind of dish that invites everyone to get messy in the kitchen and share a laugh over a plate of spooky, delicious fun.

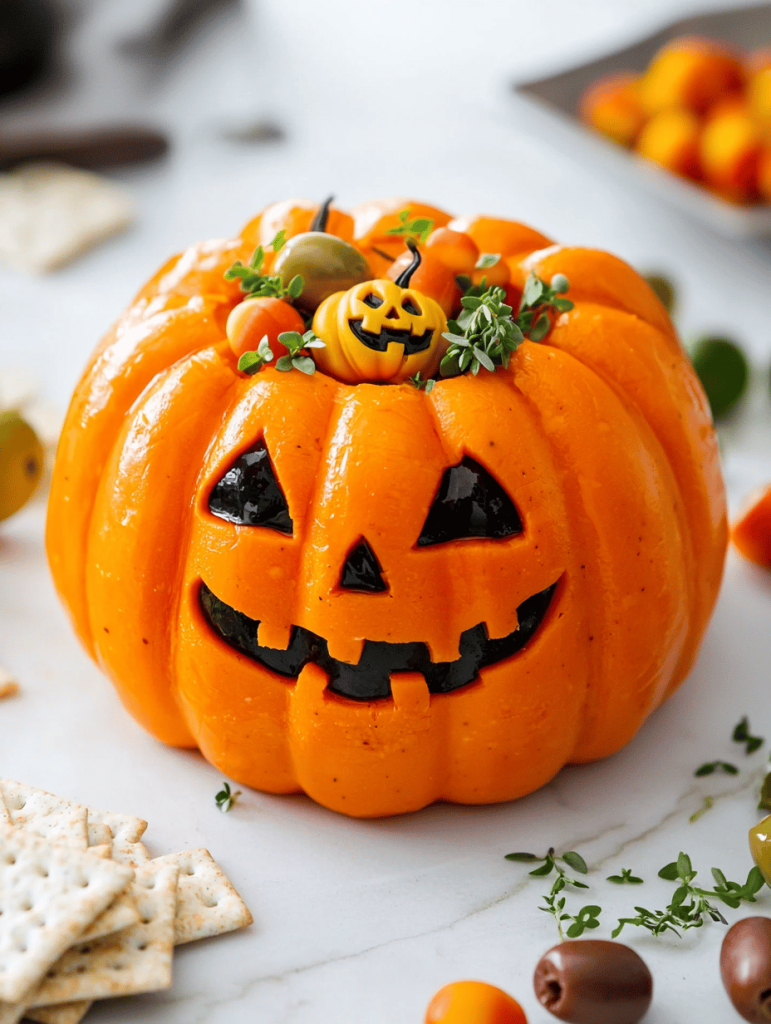
    Spooky Halloween Cheese Ball

    This Halloween cheese ball is made with cream cheese mixed with savory herbs and spices, formed into a round shape, and coated with crushed savory snacks or nuts. Decorated with googly eyes or spooky accents, it presents a creamy, crumb-coated exterior with a smooth interior, resembling a creepy, fun costume-ready centerpiece.
    Prep Time 15 minutes
    Total Time 15 minutes
    Servings: 8
    Course: Main Course
    Cuisine: Holiday
    Calories: 250

    Ingredients
      

    • 16 oz cream cheese, softened
    • 1 tsp garlic powder
    • 1 tsp dried herbs (e.g., parsley or chives)
    • 0.5 tsp black pepper
    • 1 cup crushed savory snacks, nuts or crackers for coating
    • 10 small googly eyes or edible decorations

    Equipment

    • Mixing bowl
    • Spoon or spatula
    • Plastic wrap
    • Serving platter

    Method
     

    1. Combine the softened cream cheese with garlic powder, dried herbs, and black pepper in a mixing bowl. Mix thoroughly with a spoon or spatula until the herbs are evenly distributed and the mixture is smooth and creamy.
    2. Use your hands or a spatula to shape the herb-infused cream cheese into a round ball, about the size of a large melon. Press gently to create a firm, smooth exterior.
    3. Place the assembled cheese ball on a serving platter and evenly roll or press the crushed snacks or nuts over the entire surface, creating a crumb-coated exterior that resembles a spooky camouflage.
    4. Decorate the top of the cheese ball with small googly eyes or other edible decorations to give it a spooky, characterful look. Press them gently into the coating to secure.
    5. Once decorated, chill the cheese ball for at least 30 minutes to firm up, making it easier to serve and keeping the decorations in place.
    6. Transfer the cheese ball to a serving platter, and arrange additional decorations or spooky edible accents around it for presentation. Serve alongside crackers or bread for spreading and eating.

    Notes

    For extra spooky effects, use black olives or sliced peppers for ‘fingers’ or other decorations.
    In the end, Halloween is about creating moments of joy and laughter. Whether you’re dressing up or just decorating your table, these little mummies add a sprinkle of delight and a dash of chaos to your night. Enjoy the magic, one bite at a time.

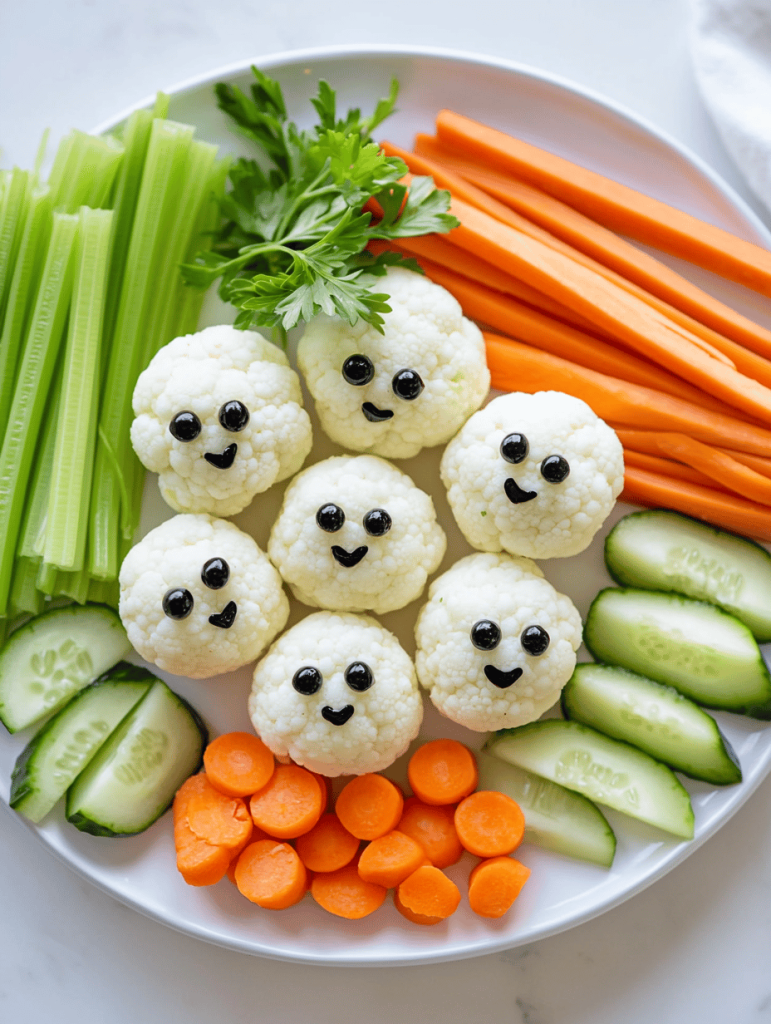
  • Spooktacular Secret: The Haunted Ghost Veggie Platter

    Spooktacular Secret: The Haunted Ghost Veggie Platter

    As a food enthusiast who loves a good challenge, I recently decided to turn my veggie platter into a haunting masterpiece that surprises both kids and adults. This isn’t just any snack; it’s a playful, spooky centerpiece that sparks conversations and sparks nostalgia. The eerie white ghosts made from simple vegetables become the star of my Halloween table.

    Creating these ghostly veggies was a delightful adventure—tearing, shaping, and assembling became part of the fun. The way the carrots and cauliflower come together to mimic tiny floating spirits makes my stomach smile just thinking about the reactions they’ll get. Plus, it’s a healthy twist on the usual Halloween treats that often lean into the sugary side.

    Spooky Ghost Veggie Platter

    This dish features carved cauliflower florets and carrot sticks shaped into small ghost figures, assembled to create a playful Halloween centerpiece. The vegetables are shaped and arranged to resemble floating spirits with simple decorations for facial features, providing a healthy and fun party snack. The final presentation is a whimsical, ghostly display perfect for festive gatherings.
    Prep Time 20 minutes
    Total Time 20 minutes
    Servings: 8
    Course: Main Course
    Cuisine: Festive
    Calories: 15

    Ingredients
      

    • 1 head cauliflower fresh, large head
    • 2-3 large carrots preferably large for easy shaping
    • Black edible marker, or small bits of nori or seaweed n/a facial features or facial stickers to decorate the ghosts

    Equipment

    • Knife
    • Cutting board
    • Toothpicks or small skewers
    • Plate

    Method
     

    1. Rinse the cauliflower and cut it into small, manageable florets suitable for ghost shapes.
    2. Peel the carrots and cut off the ends to create uniform sticks for the ghost bodies. Aim for about 2-3 inches in length.
    3. Shape the cauliflower florets by gently tearing or trimming them to resemble small ghost figures, roughly rounding the tops to look like heads.
    4. Skewer a cauliflower floret onto a carrot stick or attach them together with a toothpick for stability, creating a tiny ghost figure with a head and body.
    5. Repeat the process, shaping and assembling as many ghost figures as needed for your platter.
    6. Arrange the assembled ghosts on a serving plate, spacing them out to look like they are floating.
    7. Use a black edible marker or small bits of nori to add facial features—two eyes and a mouth—on each ghost for a spooky expression.
    8. Optionally, place the vegetables on a bed of greens or a decorative plate to enhance the presentation.
    9. Carefully transport your spooky ghost veggie platter to the table, ready to surprise and delight guests of all ages.

    Notes

    Use fresh, firm vegetables for best shaping. Ensure facial features are securely attached if using stickers or markers. This dish is best served immediately for facial features to stay visible.
    This ghost veggie platter isn’t just a playful way to enjoy your healthy greens. It’s a simple, no-fuss idea that adds a splash of charm and whimsy to any Halloween gathering. As the evening winds down, I love seeing kids and grown-ups alike marvel at these little spectral bites. Sometimes, a little extra effort turns ordinary into unforgettable.

  • Spooky Bats and Creepy Guac: Halloween Snack Attack!

    Spooky Bats and Creepy Guac: Halloween Snack Attack!

    Halloween is the only time when chaos meets creativity in the kitchen. This year, I wanted to craft something that would make both kids and adults squeal with delight—while also satisfying that irresistible craving for something savory and fun. The secret? A vibrant green guacamole accented with playful bat-shaped tortilla chips that look as wicked as they taste.

    Transforming simple ingredients into a comic horror scene takes a little bit of visualization and a dash of daring. I love how this recipe invites you to get a little messy—perfect for a spooky, spirit-lifting gathering or a cozy night of fright movies. Plus, it’s quick to assemble, letting you focus on the costume chaos while the kitchen fills with aromas of garlic, lime, and smoky chipotle.

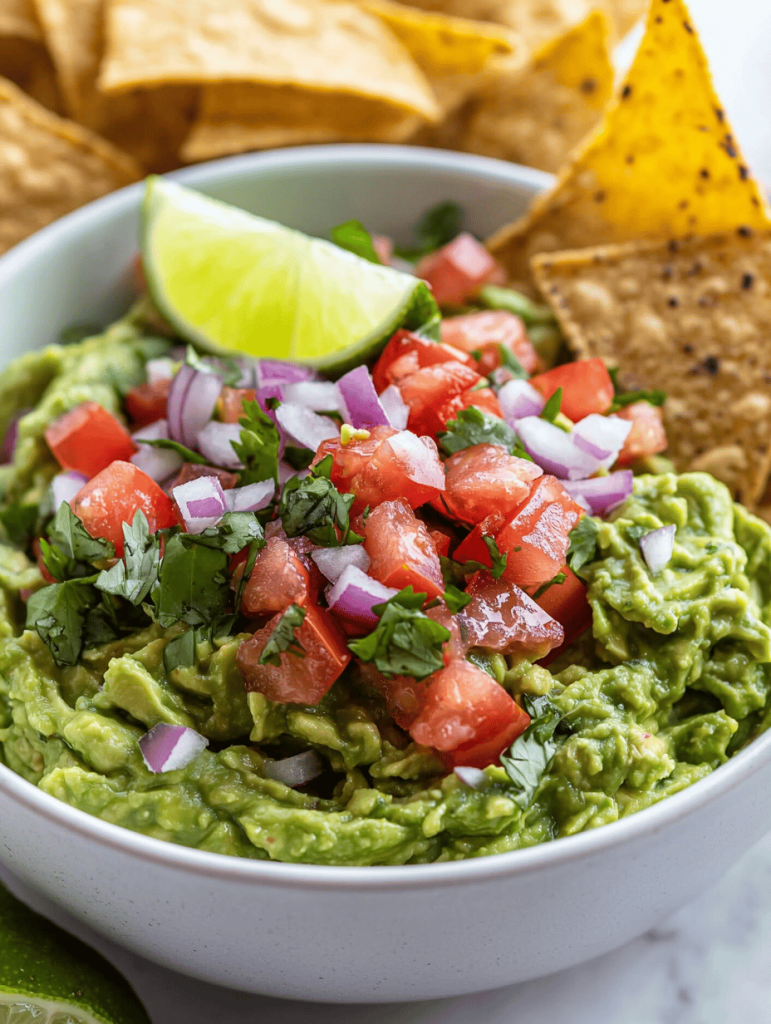
    Green Guacamole with Bat-Shaped Tortilla Chips

    This dish features a creamy, vibrant green avocado-based guacamole, mashed to a smooth or chunky consistency. It is complemented by crunchy, bat-shaped tortilla chips made from lightly baked or fried tortillas, creating a playful and visually striking appetizer or snack.
    Prep Time 10 minutes
    Cook Time 10 minutes
    Total Time 20 minutes
    Servings: 4
    Course: Main Course
    Cuisine: Mexican
    Calories: 180

    Ingredients
      

    • 2 ripe avocados halved, pitted
    • 1 lime lime juice freshly squeezed
    • 1 small red onion finely chopped
    • 1 clove garlic minced
    • 1 small tomato seeded and diced
    • 1 teaspoon smoked chipotle chili powder adjust to taste
    • to taste salt
    • 4 small corn tortillas preferably white or yellow
    • 2 tablespoons olive oil for baking or frying

    Equipment

    • Mixing bowl
    • Fork or potato masher
    • Baking sheet
    • Knife
    • Cutting board
    • Cookie cutters in bat shape
    • Frying pan or oven

    Method
     

    1. Scoop out the flesh of the avocados into a mixing bowl, then mash with a fork or potato masher until reaching your desired chunky or creamy texture.
    2. Stir in freshly squeezed lime juice, finely chopped red onion, minced garlic, diced tomato, and smoked chipotle chili powder. Season with salt to taste, mixing everything until well combined and vibrant green.
    3. Preheat the oven to 375°F (190°C) or prepare a frying pan with a bit of olive oil for frying. If baking, brush tortillas lightly with olive oil and place on a baking sheet. For frying, cut tortillas into bat shapes using cookie cutters and fry in hot oil until crispy and golden.
    4. If baking, bake the tortilla shapes for about 8-10 minutes, or until crisp and lightly browned. If frying, cook each bat shape for 2-3 minutes per side until crispy and golden.
    5. Remove the chips from the oven or oil, then transfer to a paper towel-lined plate to drain any excess oil and cool slightly.
    6. Arrange the crispy bat-shaped chips on a serving platter, creating a spooky display. Serve the fresh guacamole on the side or dolloped on the chips for dipping.
    7. Enjoy immediately as a fun, festive appetizer or snack during your Halloween gathering.

    Notes

    For extra fun, add small food-safe face markings on the bat chips with black icing or melted chocolate. Adjust spice levels by varying smoked chili powder. You can prepare the guacamole ahead of time but assemble the chips just before serving for optimal crunch.
    In the end, this Halloween guacamole with bat-shaped chips isn’t just about the flavors—it’s about creating moments of joyful chaos in your kitchen. Watching everyone dive into the spooky snack reminds us all that cooking is just another kind of playful rebellion. Whether you’re hosting a party or just craving a fun treat, this recipe is sure to be a hit.

    As the evening winds down and the last of the tortilla bats are devoured, I always feel a little proud of my spooky handiwork. It’s a reminder that sometimes, simple ingredients can turn into the most memorable moments of the season.

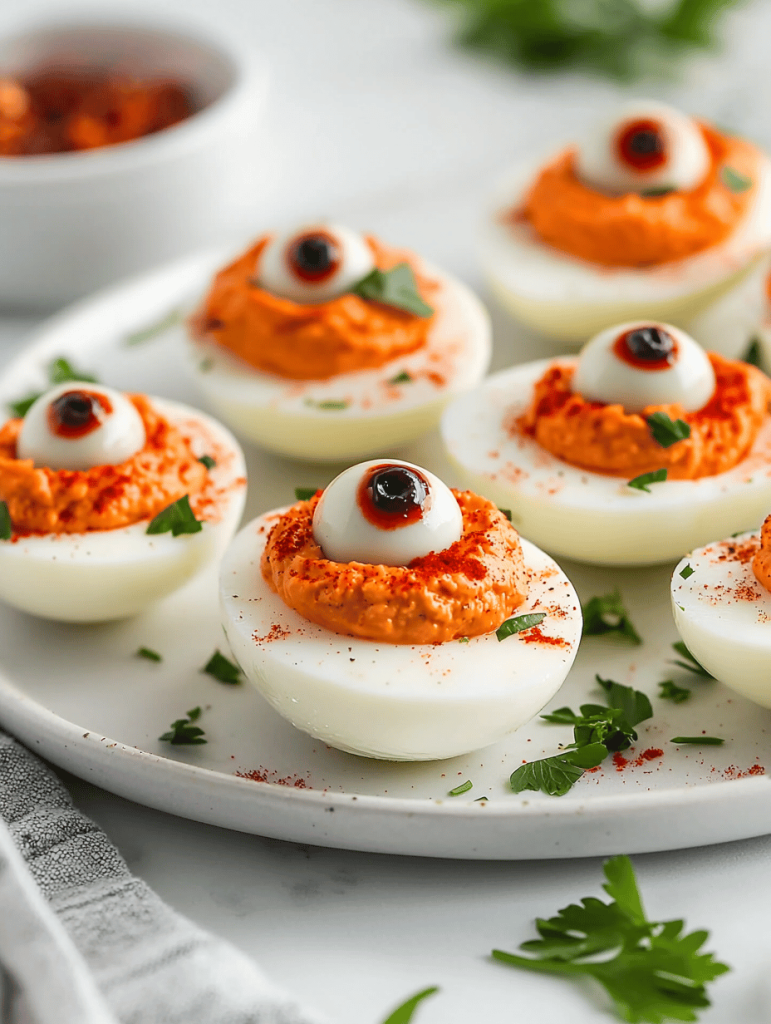
  • Spooky Bite-Sized Horror: Halloween Deviled Egg Eyeballs

    Spooky Bite-Sized Horror: Halloween Deviled Egg Eyeballs

    As the haunted season rolls in, I love transforming simple ingredients into ghoulish delights that spark both joy and a bit of chaos at the table. These Halloween Deviled Egg Eyeballs are perfect for those who crave a little creepy fun with every bite. The moment you cut into one, the eerie red and veiny detail revealing a gooey yolk center never fails to get a squeal or giggle from guests.

    I’ve recently started viewing food presentations as mini theatrical productions—this recipe is my favorite new act. The way the bright whites mimic eyeballs, complete with a touch of red paprika and olive for the bloodshot look, makes it seem like a tiny horror scene. Plus, it’s a playful way to get kids involved in the kitchen, even if it’s just to squish an olive or sprinkle paprika with their little hands.

    Halloween Deviled Egg Eyeballs

    These deviled eggs are decorated to resemble eerie eyeballs, with bright white egg whites filled with creamy yolk mixture topped with bloodshot details of paprika, a sliced olive for the iris, and veiny red accents. The dish involves boiling, halving, mixing, and decorating to create a spooky, fun appetizer with a smooth, creamy texture and visually striking appearance.
    Prep Time 20 minutes
    Cook Time 10 minutes
    Total Time 30 minutes
    Servings: 12
    Course: Main Course
    Cuisine: Halloween/Party Food
    Calories: 70

    Ingredients
      

    • 6 large eggs for boiling
    • 2 tablespoons mayonnaise for filling
    • 1 teaspoon yellow mustard adds tang to yolk filling
    • to taste salt and pepper for seasoning
    • 1/2 teaspoon paprika for bloodshot look and coloring
    • 12 small green olives pitted, sliced for irises
    • 1 small red candy or jalapeño slices for veiny bloodshot effect

    Equipment

    • Saucepan
    • Mixing bowl
    • Whisk
    • Small knife
    • Spoon
    • Plate

    Method
     

    1. Place the eggs in a saucepan and cover with cold water. Bring to a boil over medium-high heat, then lower the heat and simmer for 10 minutes. Remove eggs and transfer them to a bowl of ice water to cool completely.
    2. Once cooled, peel the eggs carefully and slice them in half lengthwise. Gently remove the yolks and place them in a mixing bowl.
    3. Add mayonnaise, mustard, salt, and pepper to the yolks. Whisk until the mixture is smooth and creamy, adjusting seasoning to taste. This creates the filling that will resemble gooey eyeball centers.
    4. Spoon or pipe the yolk mixture back into the hollowed egg whites, filling them generously so they look like eyeballs. Place the filled eggs on a serving plate.
    5. Slice the green olives crosswise to create irises for each eyeball. Gently press an olive slice into the center of each filled egg to resemble the pupil.
    6. Using a small knife, make small veins by attaching thin red candy or jalapeño slices across the egg whites, radiating outward for a veiny bloodshot look. Sprinkle a pinch of paprika around the edges for an eerie bloodshot effect.
    7. Arrange all the decorated deviled eggs on a platter, ensuring each looks like a creepy eyeball. Chill for 15 minutes before serving to let the presentation set.

    Notes

    For extra creepy effect, add some red food coloring to the yolk mixture before filling.

    These eyeball deviled eggs are more than just creepy snacks—they’re a conversation starter that adds personality to any Halloween spread. The crispy, creamy textures paired with the vivid colors make it a fun, memorable centerpiece. Plus, they’re quick to prepare, which means you can focus on other spooky details of your celebration.

    As autumn’s chill seeps in and the nights grow longer, there’s something joyful about whipping up these eerie treats. They serve as a reminder that Halloween is all about unleashing your creativity—messy, silly, and spectacular. So go ahead, craft these eyeballs and let your spooky spirit shine through your culinary mischief.

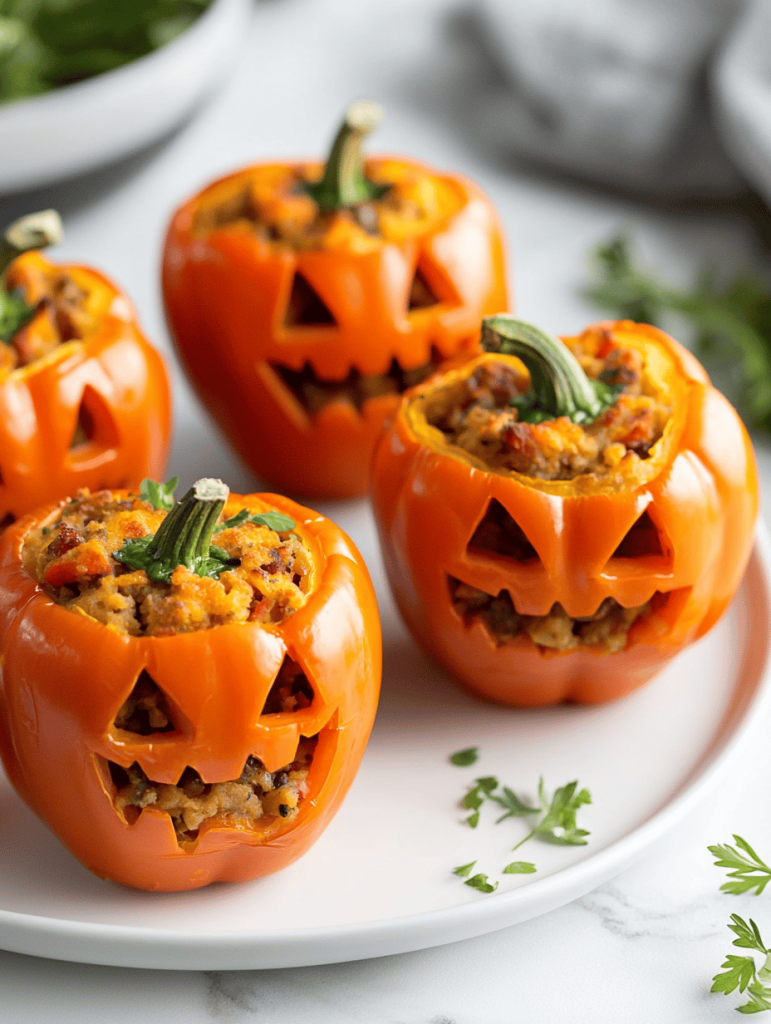
  • Spooky Savory: Halloween Jack-o’-Lantern Stuffed Peppers

    Spooky Savory: Halloween Jack-o’-Lantern Stuffed Peppers

    Halloween is not just about the costumes and candies; it’s about turning ordinary ingredients into eye-catching masterpieces. These stuffed bell peppers shaped like mini Jack-o’-Lanterns add a fun, festive twist to your dinner table, making the holiday even more memorable.

    Imagine the aroma of roasted peppers mingling with seasoned cheese and savory filling, all glowing under candlelight. The unique shape gives kids and adults alike a nostalgic thrill, while still providing a wholesome, veggie-filled meal. It’s a perfect blend of spooky fun and hearty satisfaction.

    This recipe turns humble bell peppers into Halloween icons that double as a meal and decoration. They’re super adaptable—stuff with anything from spicy sausage to veggie medleys—and are sure to spark conversations. Expect smiles and a few playful screams as you serve these to your ghoulish guests.

    Halloween Stuffed Bell Peppers (Mini Jack-o’-Lanterns)

    This dish features bell peppers hollowed out and shaped with carved faces to resemble mini Jack-o’-Lanterns, stuffed with a savory filling that combines seasoned cheese and cooked grains or meat. The peppers are roasted until tender and the cheese is melted, resulting in a colorful, festive presentation with a slightly crispy exterior and soft interior.
    Prep Time 20 minutes
    Cook Time 30 minutes
    Total Time 50 minutes
    Servings: 4
    Course: Main Course
    Cuisine: Halloween
    Calories: 250

    Ingredients
      

    • 4 large bell peppers preferably orange or yellow for a pumpkin-like appearance
    • 1 cup cooked rice or quinoa as a base for the filling
    • 1/2 cup shredded cheese cheddar or mozzarella work well
    • 1 cup cooked ground meat or beans optional for added protein
    • 1 tbsp olive oil for roasting peppers
    • to taste salt and pepper

    Equipment

    • Chef’s Knife
    • Baking sheet
    • Spoon
    • Small paring knife
    • Mixing bowl

    Method
     

    1. Preheat your oven to 375°F (190°C). Slice the tops off each bell pepper and carefully scoop out the seeds and membranes, creating a hollow cavity to fill.
    2. Using a small paring knife, carve faces into each pepper to resemble mini Jack-o’-Lanterns, making eyes, a nose, and a jagged mouth for a festive look.
    3. Place the carved peppers on a baking sheet and drizzle them lightly with olive oil, then season with salt and pepper inside and out.
    4. Fill each hollowed pepper with the cooked rice or quinoa, then top with a portion of the cooked ground meat or beans and shredded cheese, pressing gently to pack the filling inside.
    5. Arrange the filled peppers on the baking sheet and bake in the oven for about 25-30 minutes, until the peppers are tender and slightly blistered, and the cheese is melted and bubbly.
    6. Remove from the oven and let cool slightly. Serve these pumpkin-like mini Jack-o’-Lanterns warm, enjoying the visual fun and savory aroma.
    Creating these Halloween stuffed peppers is a delight for both cook and party guest. Watching everyone marvel at your spooky presentation is a small thrill that makes the effort worthwhile.

    Plus, cleanup stays simple since you’re working with just a few ingredients and minimal dishes. As the season shifts into full spooky mode, these peppers keep your menu fun, festive, and full of flavor. Only the crackling of the oven will remind you this was a recipe born from the joy of Halloween.

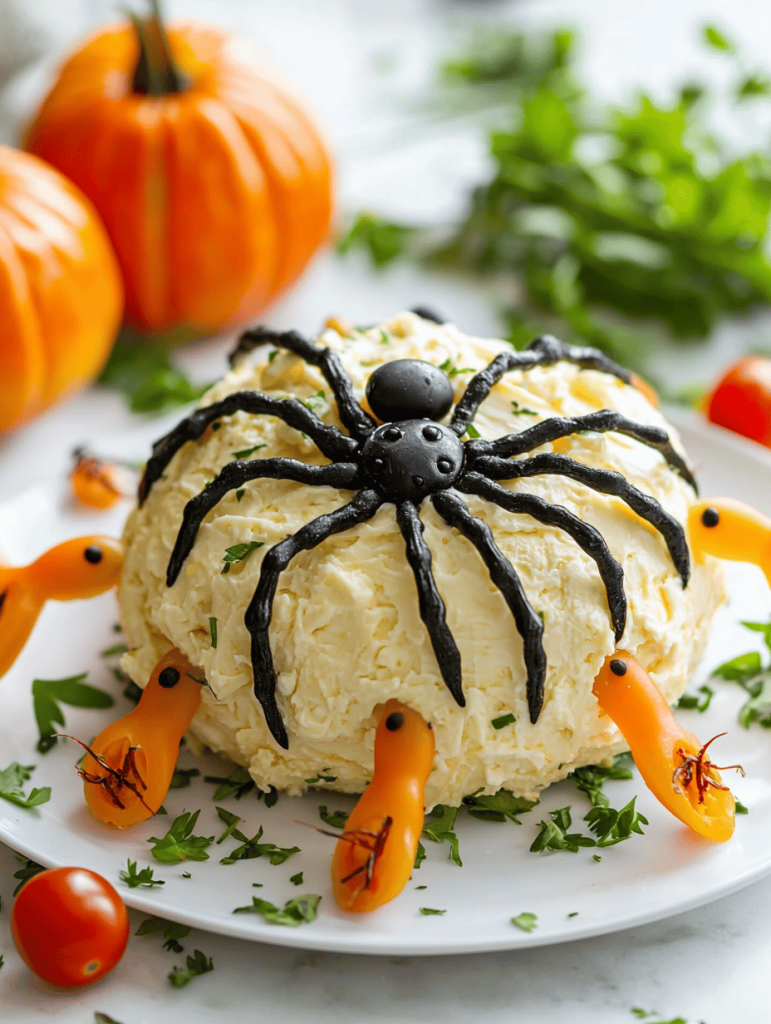
  • Spooky Spider Cheese Ball: A Ghoulishly Good Party Staple

    Spooky Spider Cheese Ball: A Ghoulishly Good Party Staple

    Halloween parties are all about the fun and the fright, but sometimes it’s the little creepy details that steal the show. This Halloween Spider Cheese Ball transforms a classic appetizer into a terrifyingly adorable centerpiece that everyone will remember. Its spooky spider design is surprisingly simple to make but instantly screams holiday spirit.

    Choosing this recipe was inspired by a desire to add a dash of chaos to the typical cheese platter. The texture of the creamy cheese mixed with crunchy bits and the striking appearance of the spider legs crackling under a knife make each bite a tiny thrill. Plus, it’s versatile enough to be made vegan or with full-fat cream cheese, depending on your mood.

    Halloween Spider Cheese Ball

    This Halloween-themed cheese ball features a creamy mixture shaped into a round form with crunchy bits mixed in, resembling a spider’s body. The design is completed with crisp, leg-like pretzels arranged to mimic a spider crawling on a platter, creating a striking and playful appetizer for spooky parties.
    Prep Time 15 minutes
    Total Time 15 minutes
    Servings: 8
    Course: Main Course
    Cuisine: American
    Calories: 220

    Ingredients
      

    • 16 oz cream cheese, softened
    • 1 cup shredded cheddar cheese
    • 1/2 cup crushed pretzels or crushed crunchy bits adds texture and visual interest
    • to taste salt and pepper
    • 12 pretzel sticks pretzel sticks or crunchy sticks for spider legs

    Equipment

    • Mixing bowl
    • Spatula
    • Serving plate
    • Pretzel sticks or similar crunchy sticks
    • Plastic wrap or parchment paper

    Method
     

    1. Mix the softened cream cheese and shredded cheddar cheese in a bowl until smooth and well combined.
    2. Add crushed pretzels, a pinch of salt, and pepper to the cheese mixture, folding gently to incorporate the crunchy bits evenly throughout.
    3. Transfer the cheese mixture onto a piece of plastic wrap or parchment paper and shape it into a tight, round ball for the spider’s body.
    4. Wrap the ball tightly and refrigerate for at least 30 minutes to help it firm up.
    5. Once firm, remove the cheese ball from the fridge and place it on a serving plate.
    6. Arrange the pretzel sticks around the cheese ball, mimicking spider legs radiating outward and pressing slightly into the surface for stability.
    7. Adjust the pretzels to create a balanced, spider-like appearance, ensuring the legs are evenly spaced for a dramatic effect.
    8. Serve immediately or keep refrigerated until ready to display and enjoy.

    Notes

    For a vegan version, substitute vegan cream cheese and dairy-free shredded cheese. Adjust the quantity of crunchy bits to suit your texture preference.
    Whether you’re hosting a ghostly gathering or just embracing the spooky season, this cheese ball adds that perfect touch of whimsy and creepiness. It’s fast, fun, and guaranteed to spark giggles and gasps alike. As you carve out space on your table for this spider-shaped delight, enjoy the playful chaos it brings to your Halloween feast.