Category: Beverages

  • Spooky Sips: The Halloween Monster Mash Punch You Can’t Resist

    Spooky Sips: The Halloween Monster Mash Punch You Can’t Resist

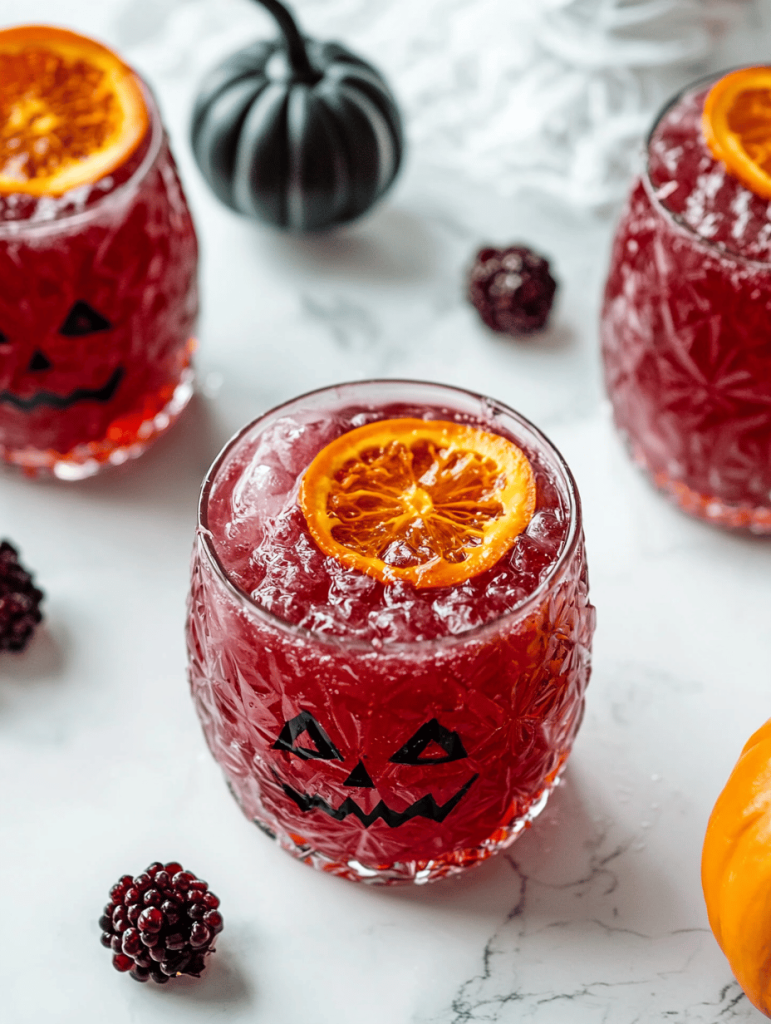
    As the leaves turn fiery and the nights grow longer, I find myself craving potions that stir up childhood memories. This Halloween, I decided to craft a punch that’s more than just a drink—it’s a bubbling cauldron of chaos, joy, and nostalgic fun. The secret? A surprisingly simple mix of fruity, fizzy ingredients that look just as eerie as they taste.

    Imagine a glass filled with swirling purple hues, glittering with edible shimmer like a creature from the depths. It’s perfect for spilling over at costume parties or just delighting little goblins and witches in your own backyard. So, let’s embrace the madness and turn ordinary ingredients into something spectacularly spooky.

    Spooky Halloween Punch

    This Halloween punch is a bubbly, colorful beverage made with fruity juices and soda, designed to resemble a cauldron of bubbling chaos. It features swirling purple hues and edible shimmer, creating an eye-catching, frothy final appearance. The drink combines sweet, fizzy ingredients for a fun and festive party centerpiece.
    Prep Time 10 minutes
    Cook Time 5 minutes
    Total Time 15 minutes
    Servings: 8
    Course: Main Course
    Cuisine: Halloween
    Calories: 150

    Ingredients
      

    • 4 cups fruit punch preferably purple or berry-flavored
    • 2 cups lemon-lime soda chilled
    • 1 cup grape juice for added color and depth
    • 1 tbsp edible glitter preferably purple or silver
    • to taste ice cubes for serving

    Equipment

    • Large pitcher
    • Stirring spoon

    Method
     

    1. Pour the fruit punch into a large pitcher, filling about three-quarters full to leave room for fizz and shimmer.
    2. Add the grape juice to the pitcher, pouring it slowly so it swirls visibly into the fruit punch, creating a layered, swirling effect.
    3. Pour in the chilled lemon-lime soda gently over the fruit punch mixture, causing sudsy bubbles and a fizzy, frothy surface to develop.
    4. Sprinkle the edible glitter over the top of the punch, watching it shimmer and swirl as it catches the light with an eerie glow.
    5. Add ice cubes to individual glasses or the pitcher to keep the punch cold and enhance the bubbling, frosty look.
    6. Serve the punch immediately in glasses, allowing the shimmering, bubbly beverage to delight guests with its vibrant color and festive sparkle.

    Notes

    For extra spookiness, add gummy worms or floating eyeball candies.

    This Monster Mash Punch isn’t just a recipe; it’s a celebration of spooky season’s flair and flavor. Its vibrant look and playful presentation make it a hit with kids and adults alike, creating moments of giggles and awe. As the autumn air fills with pumpkin spice and crackling leaves, this punch will add a splash of fun to any Halloween gathering.

    Mix it up, add your own wicked twists, and enjoy the chaos of flavor and color. It’s a simple way to make your Halloween feel a little more magical—and a lot more memorable. Cheers to the wild, wonderful spirit of Halloween in every bubbly, monstrous sip!

  • Spooky Spirits: A Haunted Bloody Mary for Halloween

    Spooky Spirits: A Haunted Bloody Mary for Halloween

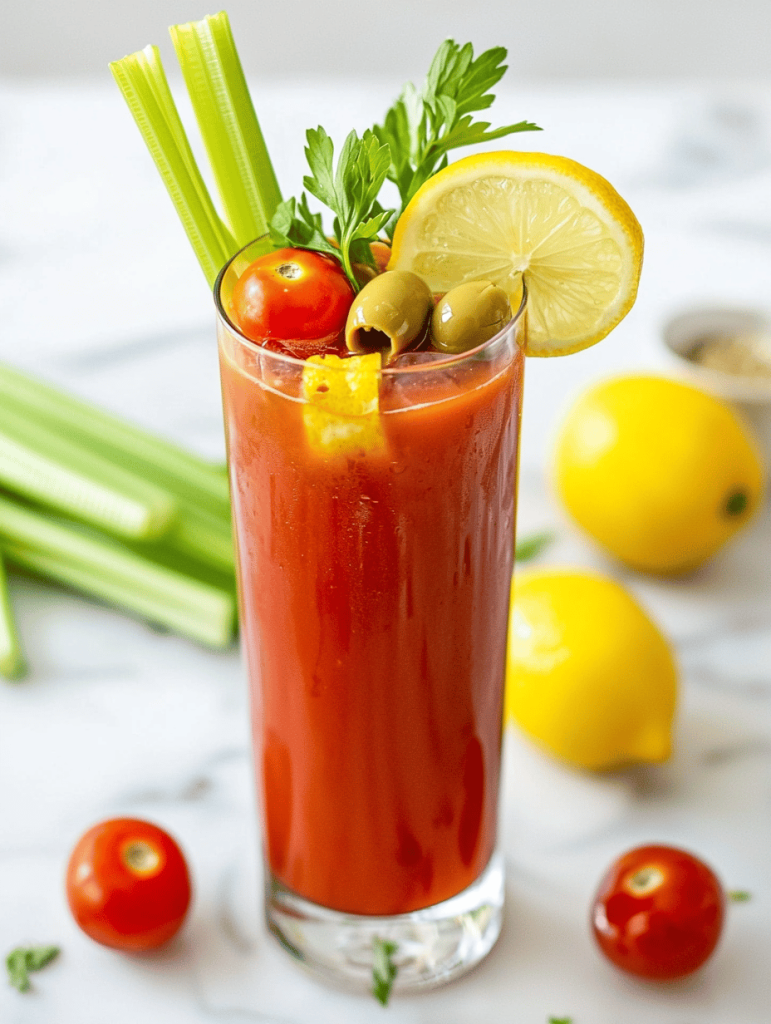
    Halloween is the one night when culinary chaos is celebrated in full swing. This Bloody Mary cocktail, with its eerie crimson hue, transforms a classic brunch staple into a festive potion. What makes this version special is the addition of smoky spices and a splash of something unexpected, making it a perfect drink to surprise your ghoul friends.

    As I stir this up, I love imagining the smell of spicy horseradish and tangy tomato mingling in the air, creating a haunting aroma that’s both inviting and mischievous. The appearance alone sparks conversations as everyone guesses what creepy garnish I’ve added this time. It’s fun, flavorful, and a little freaky—a treat for the senses.

    Bloody Mary Cocktail

    This Bloody Mary cocktail features a spicy, tangy tomato base infused with smoky spices and horseradish, creating a vibrant crimson hue. The drink is served over ice with festive garnishes, resulting in a smooth, flavorful beverage with a slightly thickened texture from the added ingredients. Its appearance is bright red with garnishes that add visual interest and texture.
    Prep Time 10 minutes
    Total Time 10 minutes
    Servings: 1
    Course: Main Course
    Cuisine: American
    Calories: 150

    Ingredients
      

    • 4 oz tomato juice
    • 1 oz vodka
    • 0.5 oz lemon juice freshly squeezed
    • 0.25 oz Worcestershire sauce
    • 0.25 oz hot sauce such as Tabasco
    • 0.25 oz horseradish prepared
    • pinch smoked paprika for smoky flavor
    • to taste salt and pepper
    • ice cubes ice
    • garnishes as desired garnishes celery stalk, lemon wedge, olives

    Equipment

    • Cocktail shaker
    • Tall glass
    • Stirring spoon
    • Measuring jigger

    Method
     

    1. Fill a cocktail shaker with ice cubes.
    2. Add the tomato juice, vodka, lemon juice, Worcestershire sauce, hot sauce, horseradish, smoked paprika, and a pinch of salt and pepper to the shaker.
    3. Secure the lid tightly and shake vigorously for about 10 seconds, until the mixture is well chilled and slightly frothy.
    4. Remove the shaker lid and fill a tall glass with fresh ice cubes.
    5. Strain the mixture from the shaker into the prepared glass, allowing the vibrant red liquid to cascade over the ice.
    6. Garnish with a celery stalk, lemon wedge, and olives for a festive presentation.

    Notes

    For a spicier drink, add more hot sauce or horseradish. Adjust salt and pepper to taste. Serve immediately for the best flavor and appearance.

    This cocktail isn’t just about the spooky vibes; it’s a reminder that the best Halloween moments come from a touch of creative chaos. Sharing this drink with friends turns a simple evening into a memorable event filled with laughter and playful screams.

    As the night winds down, the lingering scent of spices and the vibrant red glow of the glass make a perfect closing note. Easy to make, yet undeniably festive, this Bloody Mary embodies the spirit of Halloween in every sip. Cheers to embracing the weird and wonderful this season!

  • Chill Out with a Frozen Pi Colada Twist

    Chill Out with a Frozen Pi Colada Twist

    Imagine the tropical escape you can create right in your freezer. The pi colada slushie blends the creamy sweetness of coconut and pineapple into a icy, delightful treat that practically shouts summer. This isn4t the usual cocktail or smoothie; it4s a nostalgic burst of flavor combined with the fun of a frozen dessert.

    In a world obsessed with instant gratification, this recipe offers a quick escape. It4s perfect for unexpected guests or a solo moment of indulgence. Its vibrant aroma of toasted coconut and ripe pineapple will fill your kitchen with a sweet, tropical promise, even on the chilliest days.

    Piña Colada Slushie

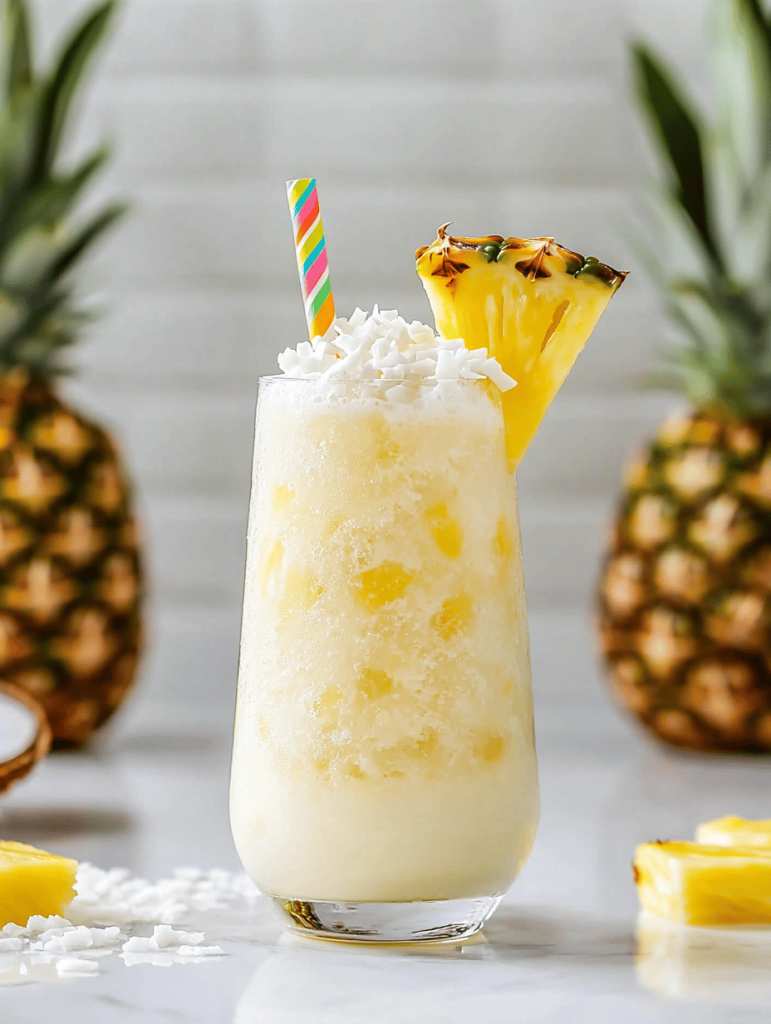
    A piña colada slushie is a frozen beverage that combines the creamy sweetness of coconut and the tropical flavor of pineapple. It is blended until smooth and icy, resulting in a refreshing, dessert-like treat with a thick, slushy consistency and a vibrant, appetizing appearance.
    Prep Time 10 minutes
    Total Time 10 minutes
    Servings: 4
    Course: Main Course
    Cuisine: Tropical
    Calories: 180

    Ingredients
      

    • 1 cup frozen pineapple chunks preferably peeled and cored
    • 1 cup coconut milk full-fat for creaminess
    • 1/2 cup shredded toasted coconut for added flavor and texture
    • 2 tablespoons granulated sugar optional, adjust sweetness to taste
    • 1 cup ice cubes roughly crushed for easier blending

    Equipment

    • Blender
    • Measuring cups and spoons
    • Knife
    • Cutting board

    Method
     

    1. Measure out the frozen pineapple chunks, coconut milk, toasted shredded coconut, granulated sugar, and ice cubes.
    2. Add the frozen pineapple, coconut milk, toasted coconut, sugar, and ice cubes into the blender.
    3. Secure the lid on the blender and blend on high speed until all ingredients are smooth and the mixture is thick, about 30-45 seconds. You should hear the ice cracking and see a creamy, icy texture forming.
    4. Stop the blender and check the consistency. If it’s too thick, add a splash more coconut milk; if too runny, add a few more ice cubes and blend briefly again.
    5. Pour the slushie into glasses, using a spoon to help fill if needed, and garnish with extra toasted coconut if desired.
    6. Serve immediately with a straw or spoon, enjoying the icy, tropical flavors and smooth, thick texture.

    Notes

    For an extra tropical twist, add a splash of rum or garnishes like pineapple slices or maraschino cherries.
    This pi colada slushie is more than just a cold drink; it4s a little slice of vacation in a glass. It captures the carefree spirit of beach days and the warmth of sunny beaches, no matter where you are. Keep it handy as a quick fix for craving those sunny, tropical vibes.

    Diving into this recipe reminds us that sometimes, simple pleasures bring the biggest smiles. It4s an easy way to sweeten up your routine, especially when the weather calls for something cool and cheerful.

  • Chill Out with a Unique Chocolate Slushie Twist

    Chill Out with a Unique Chocolate Slushie Twist

    Nothing screams summer refreshment like a cool, frosty treat that sparks joy with every sip. But today, I want to take you beyond the typical chocolate milkshake and introduce a twist that celebrates childhood chaos and adult nostalgia alike. This chocolate slushie isn’t just a drink; it’s a tiny rebellion against the ordinary, blending intense cocoa with a surprising crunch.

    Imagine biting into a slushy explosion that instantly transports you into a carefree backyard summer, while also satisfying that deep chocolate craving. It’s perfect for spontaneous gatherings or those quiet evenings when only something icy and richly chocolatey will do. The best part? It’s an easy, no-fuss recipe that turns simple ingredients into an unexpected delight.

    Chocolate Slushie with Crunchy Topping

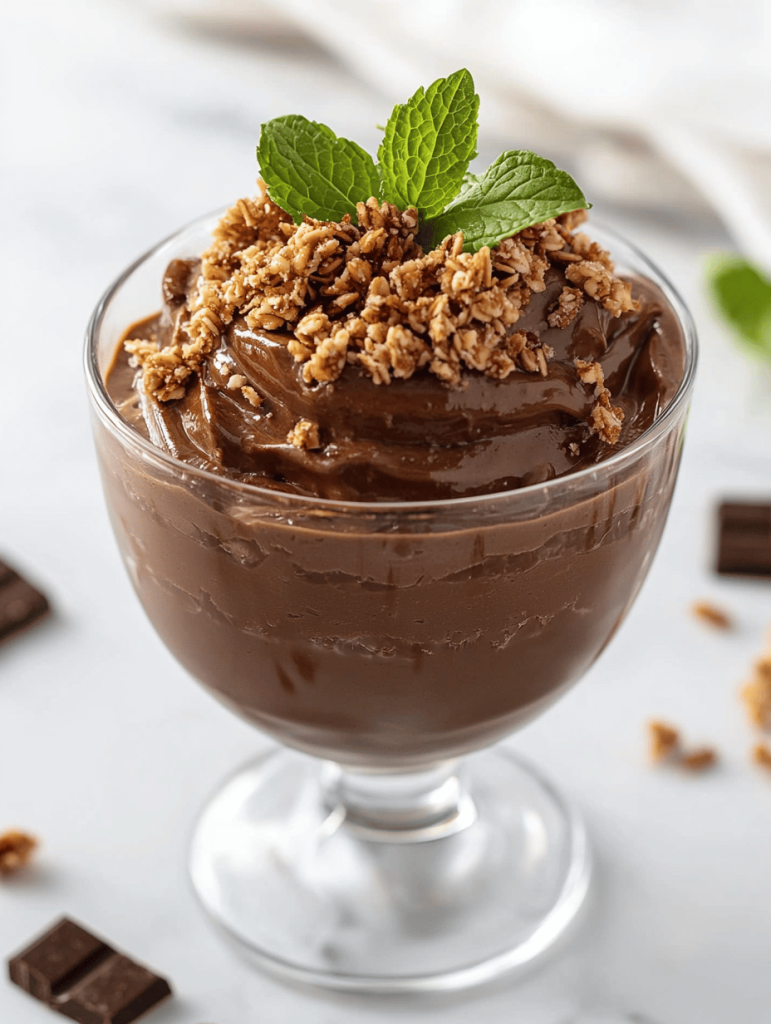
    This chocolate slushie combines rich cocoa and sweetened milk blended into a thick, icy beverage with a smooth texture. The drink is finished with a crunchy topping that adds a surprising textural contrast, creating an indulgent, visually appealing treat. It’s perfect for hot days or nostalgic moments, blending frozen ingredients into a frosty, chocolatey delight.
    Prep Time 10 minutes
    Total Time 10 minutes
    Servings: 2
    Course: Main Course
    Cuisine: Dessert
    Calories: 250

    Ingredients
      

    • 2 cups frozen chocolate ice cubes prepared by freezing blended chocolate milk
    • 1/2 cup milk any type, preferably chilled
    • 2 tbsp cocoa powder unsweetened
    • 2 tbsp sugar adjust to taste
    • 1/2 cup crushed graham crackers for the crunchy topping
    • optional chocolate chips or chopped chocolate for extra richness

    Equipment

    • Blender
    • Measuring cups and spoons

    Method
     

    1. Combine the cocoa powder, sugar, and milk in a blender, blending until smooth and slightly frothy, about 30 seconds.
    2. Add some chopped chocolate or chocolate chips if using, then blend briefly just to incorporate.
    3. Pour the mixture into a shallow freezer-safe dish and freeze until firm, about 2-3 hours, stirring halfway through to prevent large ice crystals.
    4. Once frozen, break the chocolate ice into chunks and transfer them to a blender with the milk and remaining ingredients.
    5. Blend the frozen chunks with the milk mixture until smooth, thick, and scoopable, about 30-45 seconds.
    6. Spoon the creamy, chocolate slushie into glasses and top with crushed graham crackers for added crunch.
    7. Garnish with extra chocolate chips if desired, and serve immediately with a straw or spoon for the ultimate cool treat.

    Notes

    For an extra decadent touch, top with whipped cream or a drizzle of chocolate syrup.

    The beauty of this chocolate slushie lies in its simplicity and adaptability. It’s perfect for hot days when everyone craves something cold but refuses to sacrifice flavor. Plus, it’s a versatile canvas—try adding a pinch of chili powder or a swirl of caramel to customize each batch.

    Whether you’re sharing it at a summer party or enjoying a solo moment of bliss, this drink offers a moment of cool serenity amid chaos. It’s a reminder that sometimes, the best recipes are the ones that bring a little joy and a lot of flavor—all in a single, icy sip.

  • The Magic of Blue Raspberry: Chilling Secrets for a Perfect Slushie

    The Magic of Blue Raspberry: Chilling Secrets for a Perfect Slushie

    Imagine a summer afternoon where the air is thick with heat, and the only relief is a cold, vibrant drink that turns even the gloomiest day into a celebration. Blue raspberry slushie isn’t just a refreshment; it’s a nostalgic escape wrapped in electric blue hues. I discovered this gem when I needed something that sparkled in both flavor and color, a playful twist on a classic.

    This recipe isn’t your average frozen treat. It’s a vibrant splash of childhood memories mixed with a modern obsession for bold, eye-catching food. I’m excited to share the secrets behind its bright color and intensely fruity flavor, which make it stand out at any get-together or lazy afternoon. Let’s dive into the frozen magic.

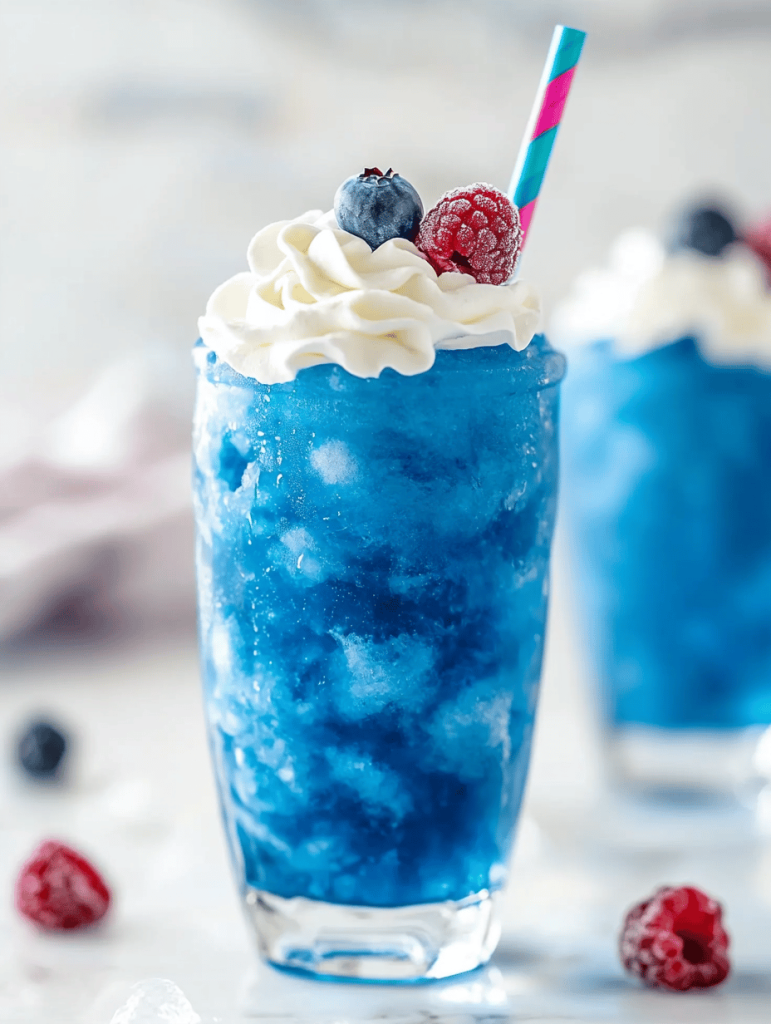
    Blue Raspberry Slushie

    A blue raspberry slushie is a frozen beverage made by blending ice with blue raspberry syrup and juice, resulting in a vibrant, icy drink with a smooth, slushy texture. The mixture is processed until it reaches a thick, spoonable consistency and served cold, showcasing an electric blue hue and intensely fruity flavor.
    Prep Time 5 minutes
    Total Time 5 minutes
    Servings: 2
    Course: Main Course
    Cuisine: American
    Calories: 150

    Ingredients
      

    • 2 cups ice cubes preferably crushed or chipped for blending
    • 1/2 cup blue raspberry syrup
    • 1/2 cup blue raspberry juice or flavored water for extra flavor and color

    Equipment

    • Blender
    • Measuring cups and spoons

    Method
     

    1. Place the ice cubes, blue raspberry syrup, and blue raspberry juice into the blender.
    2. Start blending on low speed, gradually increasing to high, until the mixture is shaved and becomes thick, smooth, and slushy, about 30-40 seconds.
    3. Pause briefly to check the texture, and blend again if necessary until the mixture is evenly blended and has a vibrant blue color.
    4. Pour into glasses, using a spoon if needed to serve the thickest parts.
    5. Optionally, garnish with a few extra ice chips or berries for presentation.
    6. Enjoy immediately with a straw or spoon for a cooling, fruity treat.
    Whether you’re cooling down after a long day or just craving something fun and fruity, this blue raspberry slushie hits the spot. It’s easy to customize with different fruit juices or add a splash of lemon for extra tang. The next time you want a drink that’s as lively as your summer spirit, this slushie is your go-to.

    Remember, the best part about making this at home is tweaking it to match your perfect icy texture or flavor intensity. Grab your blender, some vibrant blue syrup, and let the icy adventure begin. Your taste buds will thank you for the burst of cool, fruity joy.

  • The Secret Charm of Rum Slushies on Hot Summer Days

    The Secret Charm of Rum Slushies on Hot Summer Days

    When the heat hits its peak, I turn to an old favorite: rum slushies that pack a punch of flavor and nostalgia. Unlike typical cocktails, these icy drinks hold a childhood joy but with a spirited twist. Making them reminds me of summer vacations and late-night gatherings under string lights.

    This recipe offers a surprising way to elevate a simple frozen drink with a hint of spice and citrus, delivering a cool escape from the scorching sun. It’s perfect for sundown parties or relaxed weekends where the only thing you need is cold sweetness and a splash of rum. The best part? You can customize the sweetness and strength to perfectly match your mood.

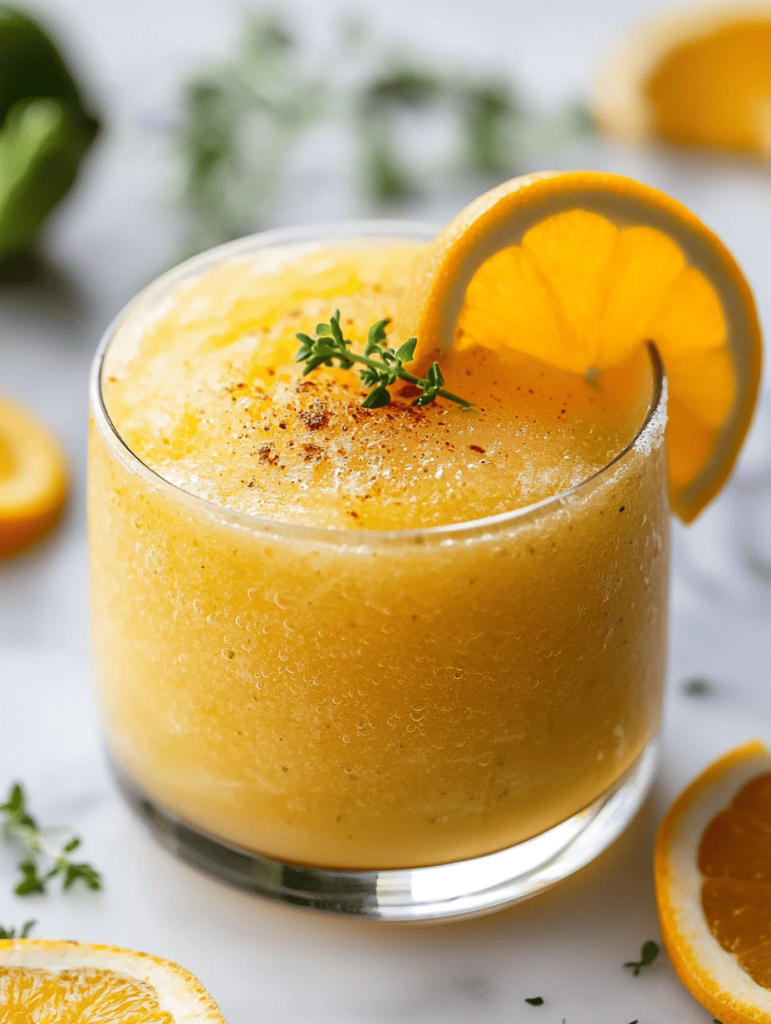
    Rum Slushies with a Spicy Citrus Twist

    This recipe produces icy frozen drinks made by blending rum, citrus juice, and sweeteners until smooth and slushy. The mixture has a bright, refreshing appearance with a slightly granular texture that melts smoothly in the mouth. A hint of spice and citrus elevates the classic frozen cocktail for a summer-friendly treat.
    Prep Time 10 minutes
    Total Time 10 minutes
    Servings: 4
    Course: Main Course
    Cuisine: Various
    Calories: 200

    Ingredients
      

    • 1 cup rum white or amber rum, depending on preference
    • 1 cup fresh citrus juice orange and lime juice combined
    • 0.5 cup simple syrup adjust sweetness as desired
    • 0.25 teaspoon ground cinnamon adds warmth and spice
    • 3 cups ice cubes preferably crushed for easier blending

    Equipment

    • Blender
    • Measuring cups and spoons
    • Knife
    • Citrus Juicer

    Method
     

    1. Juice fresh oranges and limes using a citrus juicer, then combine the juices in a measuring cup.
    2. Pour the citrus juice into the blender, followed by the rum and simple syrup. Add the ground cinnamon for a hint of spice.
    3. Add the ice cubes to the blender to create a chilled, slushy mixture.
    4. Blend on high speed for 30-45 seconds until the mixture is smooth and icy, with a texture similar to granular snow.
    5. Stop the blender and check the texture; it should be thick and slushy but pourable. If needed, blend a few seconds longer.
    6. Pour the frosty mixture into glasses, garnishing with a citrus slice or a sprinkle of cinnamon if desired.
    7. Enjoy immediately with a straw or spoon for a cool, refreshing treat that captures summery zest with a spirited kick.

    In the end, rum slushies aren’t just a beverage; they’re a mini mental vacation in a glass. As the summer days stretch on, this recipe will be your go-to for quick refreshment and fun. Sharing it with friends makes the moment even sweeter, adding a little splash of joy to the season.

    So, next time the heat feels relentless, remember there’s a simple icy solution waiting in your freezer. It’s an easy crowd-pleaser and a personal treat rolled into one. Cheers to cooling down with a bit of rum and a whole lot of cheer!

  • Chilling Charm: The Unexpected Allure of Caramel Slushies

    Chilling Charm: The Unexpected Allure of Caramel Slushies

    Imagine the cool embrace of a slushie, but amp it up with a sweet, buttery caramel twist. This recipe transforms a simple frozen treat into a nostalgic escape, perfect for spontaneous summer cravings or lazy afternoons. The aroma alone, warm caramel mingled with icy freshness, whips up a sensory party that’s hard to resist.

    Crafting this caramel slushie isn’t just about blending flavors; it’s about celebrating the chaos of childhood joy mixed with grown-up indulgence. The silky caramel syrup drizzled over crushed ice makes every sip a reminder of simpler days, now with a luxurious edge. It’s a quick refresher with a whisper of decadence, a perfect little cheat on a warm day.

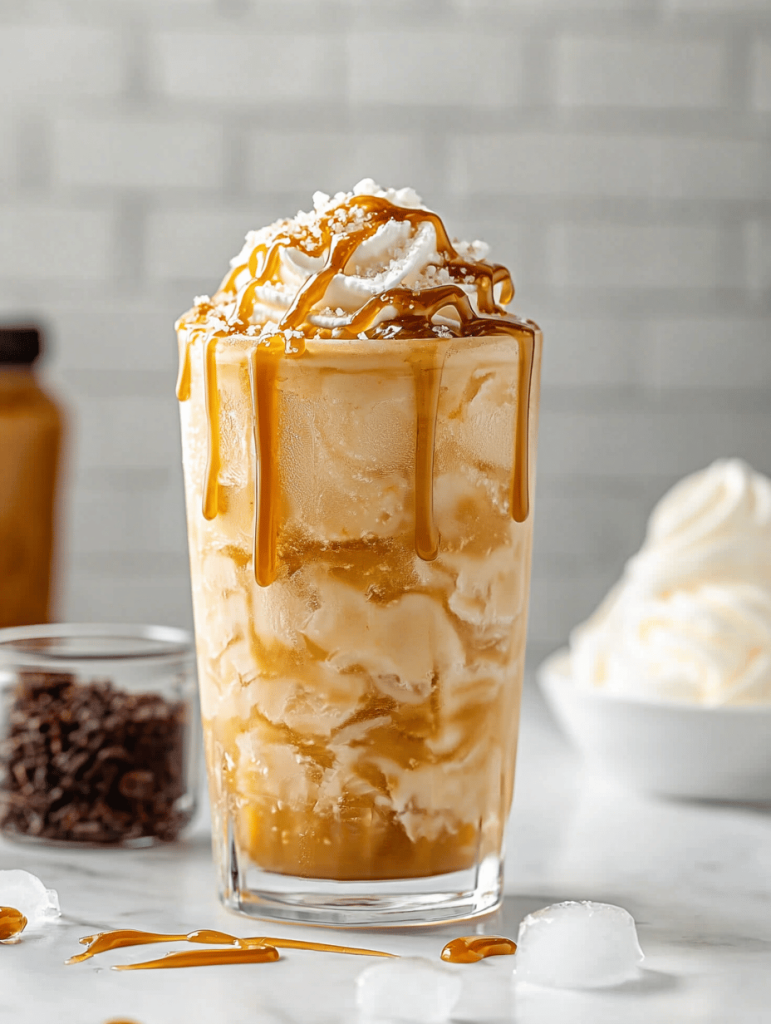
    Caramel Slushie

    A caramel slushie is a frozen beverage that combines crushed ice with sweet, buttery caramel syrup, resulting in a refreshing treat with a smooth, icy texture and a rich, caramel flavor. The mixture is blended until slushy and served immediately, showcasing a glossy appearance with a textured, icy finish.
    Prep Time 10 minutes
    Total Time 10 minutes
    Servings: 2
    Course: Main Course
    Cuisine: Dessert
    Calories: 180

    Ingredients
      

    • 2 cups crushed ice preferably made by crushing ice in a blender or a bag
    • 1/2 cup caramel syrup store-bought or homemade caramel syrup

    Equipment

    • Blender
    • Measuring cups and spoons

    Method
     

    1. Measure out the crushed ice and caramel syrup, placing them nearby for quick access.
    2. Add the crushed ice to the blender, filling it about three-quarters full to allow room for blending.
    3. Secure the lid on the blender and blend on high speed for about 30-45 seconds, until the mixture becomes thick, slushy, and well combined.
    4. Stop the blender, and check the texture; it should look icy and smooth, with a glossy, caramelized appearance.
    5. Pour the sticky, caramel-slushie mixture into glasses, using a spoon if needed to scoop out the last bits.
    6. Serve immediately to enjoy the icy, creamy texture with a rich caramel flavor and a glossy finish.

    This recipe reminds us that comfort can be beautifully simple and oddly sophisticated. It’s a refreshing escape that doesn’t demand much fuss but offers plenty of smiles, especially when served in a favorite glass. Whether you’re cooling down after a long day or just craving something sweet and cold, this caramel slushie fits right in.

    Made with pantry staples and a few minutes of blending, it proves that delight can often be found in the simplest forms. Plus, the lingering caramel scent, a hint of toasted sugar in the air, makes the moment even more special. Sometimes, the best summer memories are just a sip away.

  • Chill & Thrill: The Art of the Milkshake Slushie

    Chill & Thrill: The Art of the Milkshake Slushie

    Imagine a warm summer day, you crave something cold but can’t decide between a milkshake or a slushie. Now, what if I told you there’s a way to combine the creamy decadence of a milkshake with the icy crunch of a slushie? Welcome to the world of milkshake slushies — a surprisingly simple recipe with a delightful twist.

    This recipe is a secret weapon for spontaneous gatherings or a quick pick-me-up after a long day. You don’t need fancy equipment, just a few ingredients and a love for cold, sweet treats. It’s about transforming everyday ingredients into a frozen spectacle that excites every sense.

    From the first frosty sip, you’ll notice how the smooth, rich flavor of milk and ice blends seamlessly with your favorite toppings. This isn’t just a dessert; it’s an experience. Ready to elevate your frozen snack game? Let’s dive in.

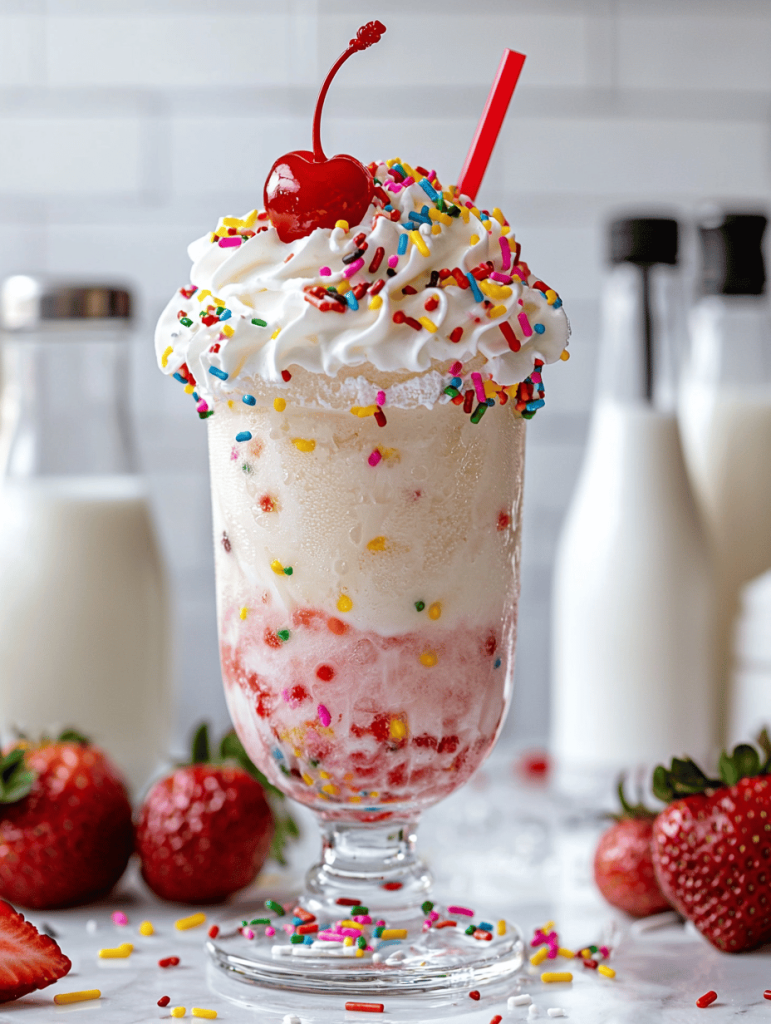
    Milkshake Slushies

    Milkshake slushies blend the creamy richness of milkshakes with the icy texture of a slushie through blending and freezing techniques. Main ingredients include milk, ice, and sweeteners, resulting in a cold, semi-frozen treat with a smooth yet crunchy appearance. The final dish is a visually appealing, frosty beverage with a thick, slushy consistency suitable for scooping or sipping.
    Prep Time 10 minutes
    Total Time 10 minutes
    Servings: 2
    Course: Main Course
    Cuisine: Fusion
    Calories: 150

    Ingredients
      

    • 1 cup milk
    • 2 cups ice cubes
    • 2 tablespoons sugar or sweetened condensed milk
    • 1 teaspoon vanilla extract

    Equipment

    • Blender
    • Measuring cups and spoons

    Method
     

    1. Add the milk, ice cubes, sugar or sweetened condensed milk, and vanilla extract into the blender.
    2. Secure the lid on the blender and blend on high speed for about 30-45 seconds until the mixture is thick, frosty, and the ice is finely crushed.
    3. Check the consistency; it should be creamy with a slightly crunchy texture from the ice. If it’s too soft, add a few more ice cubes and blend briefly again.
    4. Stop the blender and give the mixture a quick stir with a spoon if needed, to ensure even distribution of ice and sweetness.
    5. Scoop the milkshake slushie into glasses or serve directly from the blender for a more rustic look.
    6. Enjoy the chilled, icy-smooth texture of your milkshake slushies immediately, with optional toppings like whipped cream or sprinkles if desired.

    Notes

    For a richer flavor, substitute some milk with flavored syrups or add fruit puree before blending.

    In a world full of complex desserts, this milkshake slushie keeps things refreshingly simple and endlessly customizable. It’s perfect for lazy weekends or last-minute cravings, offering a cool, satisfying escape without fuss. As the summer heat continues to press on, this treat will always be your go-to.

    So, next time you’re hunting for something chilly yet comforting, remember this easy recipe. It’s a playful mix of nostalgia and innovation that never fails to bring a smile. Enjoy crafting your own icy masterpiece, one sip at a time.

  • Cherry Slushie: A Cool, Nostalgic Burst in Your Glass

    Cherry Slushie: A Cool, Nostalgic Burst in Your Glass

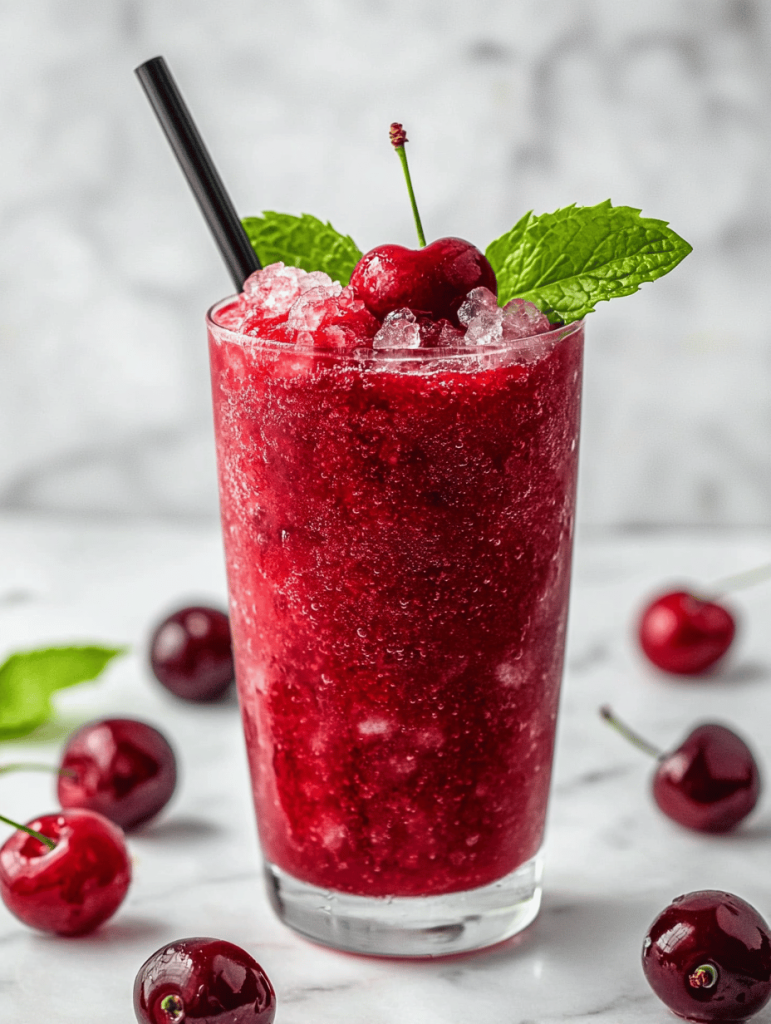
    Sweet, tangy cherries frozen into a frosty delight—this cherry slushie takes me back to childhood summer days. What makes this recipe stand out is its simplicity paired with that vibrant, summery flavor. It’s perfect for breaking through the heat with a splash of tartness and icy refreshment.

    This isn’t just any frozen drink; it’s a playful blend of ripe cherries and a hint of citrus, served in a glass that beckons you to sip and smile. The eye-catching crimson hue instantly lifts spirits, especially when you’re craving something deliciously nostalgic yet effortlessly cool.

    WHY I LOVE THIS RECIPE?

    • I adore the pop of fresh cherry flavor that hits just right.
    • The vibrant red color makes it feel like a celebration in a glass.
    • It’s a rush of cold joy, perfect for quick cool-downs or weekend treats.
    • The simplicity of ingredients makes me feel clever with minimal effort.
    • It reminds me of childhood summers, carefree and full of sunshine.

    AVOID MY DISASTER (You’re Welcome)

    • FORGOT to blend cherries well? Ended up with chunks. Just pulse again for puree smoothness.
    • DUMPED sugar accidentally? Rinse, taste, then add gradually to suit your tartness preference.
    • OVER‑TORCHED the syrup? Cool it quickly under cold water before mixing again.
    • MISSED the lemon juice? Adds brightness and balances sweetness—don’t skip it.

    QUICK FIXES THAT SAVE YOUR DAY

    • When too thick, add a splash of cold water or juice and blend well.
    • SHAKE in a spoon of vanilla for extra depth of flavor.
    • When cherries release too much juice, freeze some for a thicker texture.
    • SPARKLE it up with a sprinkle of edible glitter or a dash of lemon zest.
    • When missing fresh cherries, use a good quality cherry preserves for quick flavor boost.

    Cherry Frozen Slushie

    This cherry frozen slushie combines ripe cherries blended with citrus juice and sweetener to create a vibrant, icy beverage. The mixture is processed until smooth and icy, resulting in a bright red, slushy texture perfect for hot days.
    Prep Time 10 minutes
    Total Time 10 minutes
    Servings: 2
    Course: Main Course
    Cuisine: modern
    Calories: 120

    Ingredients
      

    • 2 cups frozen cherries pitted and stemmed
    • 1 cup citrus juice (lemon or lime) freshly squeezed preferred
    • 2 tablespoons honey or simple syrup adjust to taste

    Equipment

    • Blender
    • Measuring cups and spoons

    Method
     

    1. Measure out the frozen cherries and place them into the blender.
    2. Add freshly squeezed citrus juice to the cherries in the blender.
    3. Pour in the honey or simple syrup to sweeten the mixture naturally.
    4. Secure the lid and blend on high speed until the mixture is smooth and icy, about 30-45 seconds. You should hear a consistent whir and see the mixture turn a vibrant red.
    5. Stop the blender and check the texture; if it’s too thick, add a splash of additional citrus juice or water and blend briefly until you reach your desired consistency.
    6. Pour the icy cherry slushie into glasses, allowing the vibrant color and frosty texture to show off the final look.
    7. Serve immediately with a straw or garnish with a fresh cherry or citrus wedge for a fun touch.

    Notes

    Feel free to experiment with different citrus or sweeteners to suit your taste. Using frozen cherries ensures a thick, icy texture without needing extra ice. For an extra flavor boost, add a splash of vanilla or a sprig of fresh mint.
    This cherry slushie is an ode to those simple summer joys we sometimes forget. Bright, refreshing, and bursting with flavor, it’s ideal for hot days when you need a quick pick-me-up. I find that sharing these chilled bursts of happiness makes any day feel a bit brighter.

    Plus, it’s a flexible recipe—adapt it with other berries or citrus flavors depending on what you have. No matter how you customize it, that icy crunch and fruit-forward kick will always feel just right. It’s the kind of treat that pairs perfectly with lazy weekends or spontaneous gatherings when everyone needs a cool respite.

  • Spine-Chilling Sparkle: Halloween Poison Apple Martini Magic

    Spine-Chilling Sparkle: Halloween Poison Apple Martini Magic

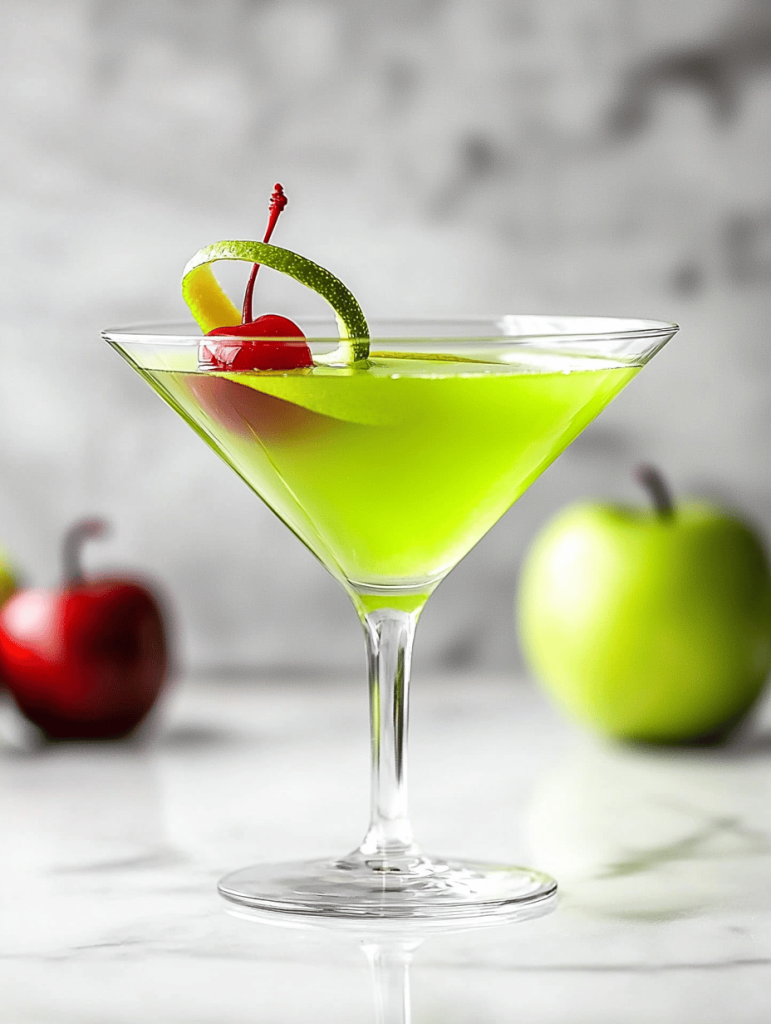
    Every October, as leaves crunch underfoot and pumpkin-shaped candies fill store aisles, I find myself yearning for something both eerie and elegant. The Halloween Poison Apple Martini captures that perfect spell of mystique and festivity. Its shimmering green hue and hauntingly crisp apple aroma turn any gathering into a spectral celebration.

    This recipe flips the typical cocktail on its head, blending spectral aesthetics with a bite that’s as sharp as a witch’s grin. The moment the tart apple hits your lips, an intoxicating swirl of flavors awakens memories of haunted harvest nights and bonfires flickering in the dark. It’s a potion that invites both chaos and charm.

    WHY I LOVE THIS RECIPE?

    • It’s a nostalgic nod to childhood treats disguised as adult elixirs with a twist of chaos.
    • The bubbling green shimmer feels like potion magic, perfect for Halloween decor.
    • The crisp apple taste balances sweetness and tartness flawlessly.
    • The vibrant color sparks conversations and curiosity at every sip.
    • Creating it is a quick mix, but it impresses with seasonal flair.

    AVOID MY DISASTER (You’re Welcome)

    • FORGOT to strain the icy shards? Ended up with a slushy mess—remember the fine mesh!
    • DUMPED too much absinthe? The drink turned bitter—add more apple juice to fix.
    • OVER-TORCHED the sugar rim? It turned black and bitter—use a lighter touch next time.
    • FORGOT the garnish? The presentation looked dull, but a simple candy apple saved it.

    QUICK FIXES THAT SAVE YOUR DAY

    • When the green glow dulls, add a splash of tonic water for shimmer.
    • Splash a little more lemon juice if the flavor feels flat.
    • Patch bitterness by stirring in a dash of simple syrup.
    • Shield the rim with colored sugar for an eye-catching effect.
    • When in doubt, toss in a few edible glitter flakes—instant wow factor.

    As Halloween night approaches, this Poison Apple Martini feels like the perfect alliance of nostalgia and modern flair. Its mesmerizing look and balanced flavors make it a standout at any costume party or spooky get-together. Whether you’re serving it to witches or mortals, it’s sure to enchant.

    The beauty of this cocktail is how effortlessly it captures the spooky season’s essence while offering a taste that’s both fresh and familiar. It’s a reminder that a little chaos and creativity can turn an ordinary night into something memorable. The glow of your drinks will surely set the mood for an unforgettable haunted evening.

    Halloween Poison Apple Martini

    This cocktail features a vibrant green hue and crisp apple aroma, achieved by blending tart apple juice, absinthe, and sour mix. The drink is shaken with ice until well-chilled and served with a shimmering glow, creating a striking, spectral appearance with a smooth, refreshing texture.
    Prep Time 5 minutes
    Total Time 5 minutes
    Servings: 2
    Course: Main Course
    Cuisine: Beverages
    Calories: 120

    Ingredients
      

    • 3 oz green apple juice preferably fresh or high-quality
    • 1 oz absinthe for a haunting green shimmer
    • 1 oz sour mix adds tartness and balances flavors
    • 0.5 oz lemon juice freshly squeezed preferred
    • Ice cubes Ice enough to fill the shaker

    Equipment

    • Cocktail shaker
    • Fine mesh strainer

    Method
     

    1. Measure the green apple juice, absinthe, sour mix, and lemon juice into a cocktail shaker.
    2. Add plenty of ice cubes to the shaker, filling it about halfway to ensure proper chilling.
    3. Secure the lid and shake vigorously for about 15-20 seconds until the mixture is cold and the outside of the shaker feels frosty.
    4. Strain the chilled cocktail into a glass, using a fine mesh strainer to catch any ice shards or pulp, ensuring a smooth, clear drink.
    5. Watch as the vibrant green liquid glows softly, reminiscent of a magical potion, ready to serve at your Halloween gathering.

    Notes

    For extra spooky effect, rim the glass with colored sugar or edible glitter. Garnish with a candy apple or mini witch hat for presentation.

    Making the Halloween Poison Apple Martini is a ritual that sparks joy, chaos, and a bit of mischief. The crisp apple aroma and shimmering green glow create a sensory escape into the spirit of the season. It’s a cocktail that delights and surprises with each sip, perfect for celebrating October’s mysterious charm.

    As the night winds down, these drinks leave a lingering sparkle—just like those magical moonlit nights of childhood. Sharing this recipe adds a little extra fun and flair to your spooky festivities, making every toast a moment to remember. Cheers to embracing the eerie, the elegant, and the utterly enchanting.