Category: Desserts

  • Spooky Fun: Halloween Dirt Cake with Gummy Worms

    Spooky Fun: Halloween Dirt Cake with Gummy Worms

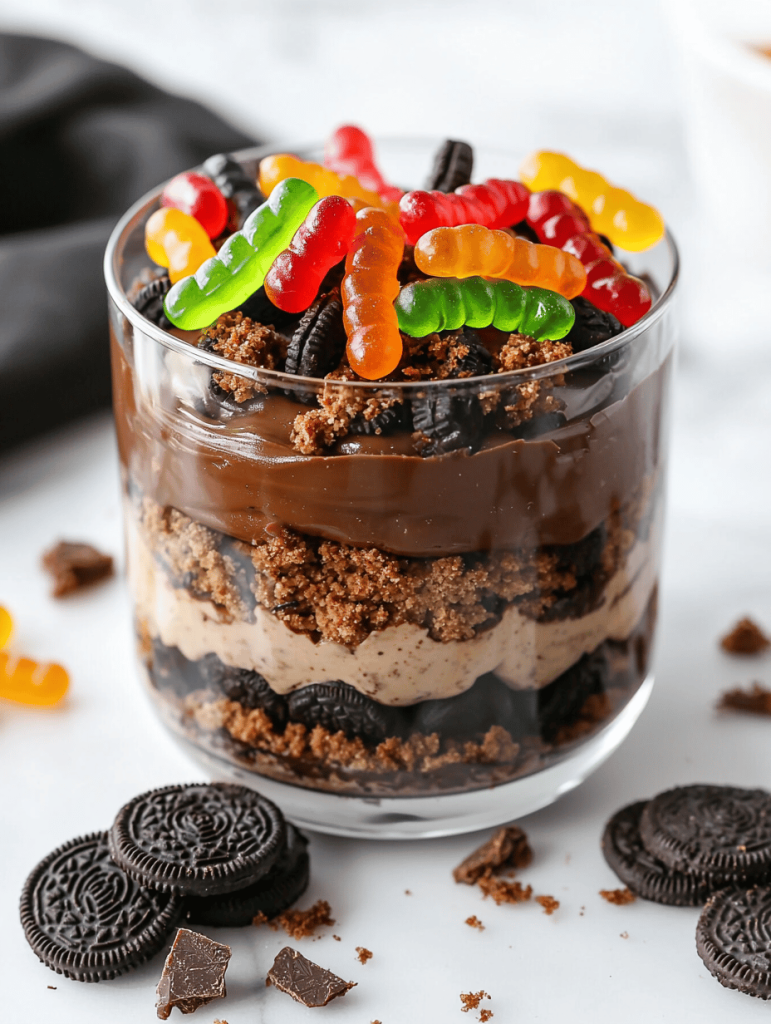
    Every October, I find myself craving that perfect balance of chaos and nostalgia that only Halloween flavors can bring. This Dirt Cake with Gummy Worms does exactly that—it’s messy, fun, and surprisingly simple to make. Plus, the bright, squishy worms add a playful twist that kids and adults alike find irresistible.

    The best part? I can prep most of it ahead of time, leaving me free to enjoy the festivities without last-minute stress. As the rich chocolate layers meld and the gummy worms squirm their way to the surface, I feel a rush of childhood joy. It’s a dessert that sparks giggles and messy faces at my Halloween parties.

    Halloween Dirt Cake with Gummy Worms

    This Dirt Cake with Gummy Worms is a layered chocolate dessert that combines crushed cookies, creamy pudding, and a playful topping of gummy worms. The mixture results in a rich, chocolatey treat with a crumbly texture and visual appeal from the bright, squirming worms on top. The dish is assembled in layers, creating a fun and messy presentation ideal for Halloween festivities.
    Prep Time 20 minutes
    Cook Time 10 minutes
    Total Time 30 minutes
    Servings: 8
    Course: Main Course
    Cuisine: American
    Calories: 310

    Ingredients
      

    • 15 oz chocolate sandwich cookies such as Oreos, with filling removed
    • 3.4 oz instant chocolate pudding mix
    • 2 cups cold milk
    • 8 oz cream cheese softened
    • 1/2 cup granulated sugar
    • 1 tsp vanilla extract
    • 1 cup Gummy worms

    Equipment

    • Mixing bowls
    • Whisk
    • Food processor or zip-top bag and rolling pin
    • 8×8 inch serve dish or trifle bowl
    • Spatula

    Method
     

    1. Place the chocolate sandwich cookies in a food processor or seal them in a zip-top bag and use a rolling pin to crush them into fine crumbs. Set aside about 1/4 cup of crumbs for garnish.
    2. In a large mixing bowl, beat the softened cream cheese with sugar and vanilla extract until smooth and creamy, about 2-3 minutes. This creates a rich, fluffy base for the pudding layers.
    3. Gradually add the cold milk to the pudding mix, whisking constantly until the pudding is thickened and smooth, about 2 minutes. This creates the chocolate pudding layer.
    4. Gently fold the prepared pudding into the cream cheese mixture until well combined and smooth. This blends the creamy and chocolate layers seamlessly.
    5. Spread half of the cookie crumbs in an even layer at the bottom of your serving dish. Top with half of the pudding mixture, spreading it out smoothly with a spatula.
    6. Add the remaining cookie crumbs in an even layer over the pudding, then top with the rest of the pudding mixture. Smooth the top to create an even surface.
    7. Refrigerate the assembled dirt cake for at least 2 hours to allow the flavors to meld and the layers to set.
    8. Before serving, sprinkle the reserved cookie crumbs over the top for a finishing crumbly look. Immediately garnish generously with gummy worms crawling over the surface and hanging off the sides, creating a playful, messy appearance.
    9. Serve the dirt cake chilled, with gummy worms squirming on top and the layered chocolate look inside. Enjoy the messy, fun dessert with friends and family.

    In the whirlwind of October festivities, this dirt cake stands out as a showstopper that doesn’t require hours in the kitchen. Its quirky appearance and decadent flavor make it perfect for both fright night and fall family gatherings. Each spoonful carries a crackle of crushed cookies and a burst of chocolate, topped with gummy worms that wiggle on contact.

    Whether you’re hosting a haunted house or just want a playful sweet treat, this dessert brings a spark of chaos to your table. It’s the kind of recipe that invites laughter, messy hands, and a splash of childhood magic to any celebration. Enjoy every spoonful—mess and all.

  • Unconventional Pumpkin Cheesecake: A Spiced Surprise

    Unconventional Pumpkin Cheesecake: A Spiced Surprise

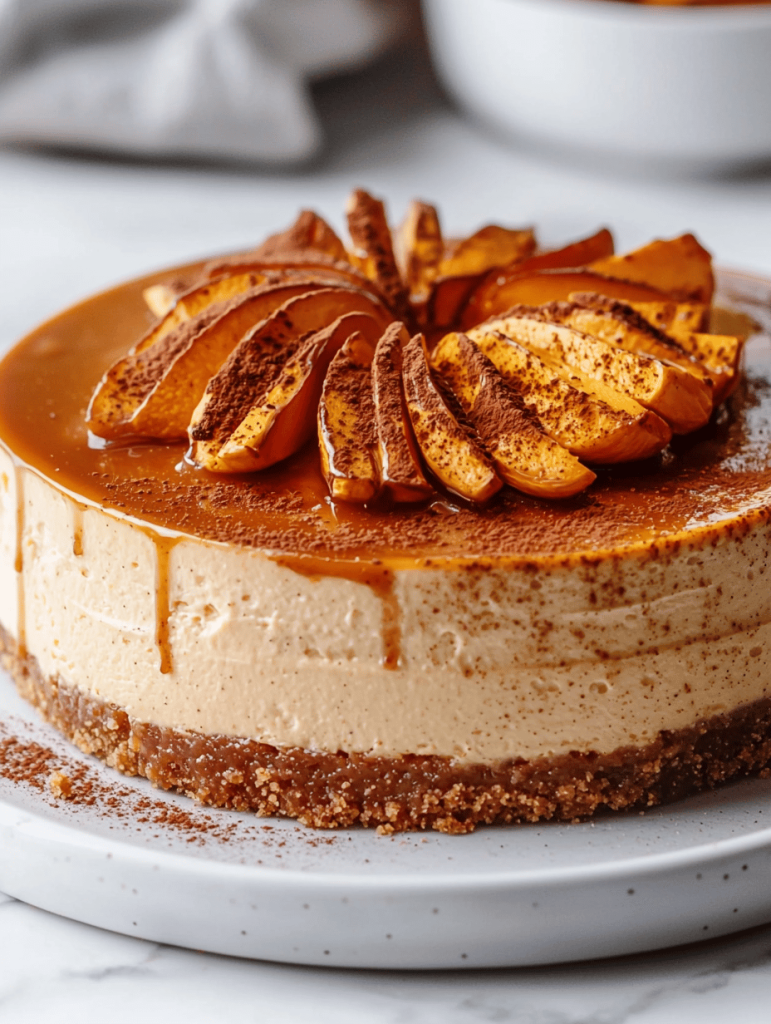
    If you think pumpkin cheesecake is just a fall staple, think again. Today, I want to share a twist that transforms this classic into an unexpected delight. It’s all about infusing a hint of chai spice into the creamy filling, creating a flavor profile that feels cozy yet refreshingly new.

    This recipe was born from a love of surprising friends at autumn dinner parties. The fragrant blend of cinnamon, cardamom, and ginger carries a hint of nostalgia, but the smooth, velvety texture keeps things modern. Every bite offers a sweet, spicy warmth that’s perfect for chilly evenings.

    While traditional pumpkin cheesecake stays rooted in simplicity, this version invites a small adventure. The delicate spice swap turns an everyday dessert into something memorable. It’s less about the label and more about the experience of each luxurious forkful.

    Chai-Spiced Pumpkin Cheesecake

    This pumpkin cheesecake features a creamy filling infused with warm chai spices like cinnamon, cardamom, and ginger, blended into a smooth, velvety texture. The dessert has a dense yet tender crumb with a toasted crust, offering a harmonious balance of spice and sweetness in each bite.
    Prep Time 20 minutes
    Cook Time 1 hour
    Total Time 1 hour 20 minutes
    Servings: 8
    Course: Main Course
    Cuisine: American
    Calories: 450

    Ingredients
      

    • 1 1/2 cups graham cracker crumbs or digestive biscuit crumbs
    • 1/4 cup granulated sugar
    • 1/2 cup unsalted butter melted
    • 16 oz cream cheese softened
    • 1 cup packed light brown sugar
    • 1 1/2 cups canned pumpkin puree
    • 3 large eggs room temperature
    • 1 1/2 teaspoons ground cinnamon
    • 1/2 teaspoon ground ginger
    • 1/4 teaspoon ground cardamom
    • 1/4 teaspoon ground cloves optional
    • 1/2 teaspoon vanilla extract

    Equipment

    • Mixing bowls
    • Electric Mixer
    • 9-inch springform pan
    • Rubber spatula
    • Measuring cups and spoons
    • Oven

    Method
     

    1. Preheat your oven to 325°F (160°C). Mix the graham cracker crumbs and granulated sugar in a bowl, then stir in the melted butter until the mixture resembles wet sand. Press this mixture firmly into the bottom of a 9-inch springform pan to form an even crust.
    2. Bake the crust for about 10 minutes until lightly fragrant and set aside to cool slightly.
    3. In a large mixing bowl, beat the softened cream cheese and light brown sugar together with an electric mixer until smooth and creamy, about 2-3 minutes.
    4. Add the pumpkin puree and vanilla extract to the cream cheese mixture; beat until fully incorporated and smooth.
    5. One at a time, beat in the eggs, mixing just until combined after each addition. The mixture should be smooth with no streaks.
    6. In a small bowl, mix cinnamon, ginger, cardamom, and cloves. Add these spices to the batter and beat until evenly distributed, creating a fragrant, well-spiced filling.
    7. Pour the spicy pumpkin filling over the cooled crust, smoothing the top with a spatula for an even surface.
    8. Bake the cheesecake in the center of the oven for 60 minutes, or until the edges are set but the center slightly jiggles when shaken.
    9. Turn off the oven and let the cheesecake cool inside for about an hour to prevent cracks, then transfer to a wire rack to cool completely.
    10. Once cooled, refrigerate the cheesecake for at least 4 hours or overnight to fully set and develop flavors before serving.
    11. Slice the chilled cheesecake with a sharp knife, and enjoy the rich, spiced flavor with a dollop of whipped cream if desired.

    Notes

    For best results, ensure cream cheese is softened and eggs are at room temperature to achieve a smooth filling. Adjust spice levels according to taste preferences.

    Once you try this chai-spiced pumpkin cheesecake, it might become a new seasonal favorite. It’s a comforting dessert that invites conversations and shared smiles, especially when served warm from the oven with a dollop of whipped cream.

    As the leaves turn and the air crisps up, I find it’s the perfect treat to mark the changing season. The rich aroma of spices filling your kitchen makes every baking moment special. This cheesecake isn’t just a dessert—it’s a small celebration of fall’s vibrant flavors.

  • Spooktacular Halloween Monster Eyeball Cake Pops

    Spooktacular Halloween Monster Eyeball Cake Pops

    Halloween is the perfect time to embrace the spooky and the silly. Instead of typical treats, I love crafting edible monsters that make guests giggle before they take a bite. These Monster Eyeball Cake Pops turn a simple dessert into a visual spectacle that’s as fun to make as it is to eat.

    The best part? Their grotesque yet adorable appearance is surprisingly easy to achieve with just a few ingredients. Plus, creating little bloodshot veins or oozing green goo adds a playful chaos to the kitchen. It’s a mischievous way to bring some Halloween magic to your dessert table.

    Monster Eyeball Cake Pops

    These cake pops are made by shaping rich cake crumbs mixed with frosting into small balls, then coating them with chocolate. They feature gooey, colorful decorations that resemble grotesque eyeballs, with detailed veins and bloodshot effects for a spooky Halloween look. The final product has a firm outer shell with a soft, cake-like interior and eye-catching, realistic details.
    Prep Time 30 minutes
    Cook Time 10 minutes
    Total Time 40 minutes
    Servings: 12
    Course: Main Course
    Cuisine: Halloween
    Calories: 150

    Ingredients
      

    • 1 box store-bought cake (or homemade cake, crumbled) any flavor you like
    • 1/2 cup frosting preferably vanilla or cream cheese
    • 200 grams dark chocolate or melting chocolate
    • red food coloring gel or liquid for bloodshot veins
    • white chocolate or candy coating for eyeballs
    • green icing or candy for oozing goo optional, for fun effect
    • toothpicks or small brushes for detailing

    Equipment

    • Mixing bowls
    • Chocolate melting pot or microwave-safe bowl
    • Bake sheet
    • Parchment paper
    • Lollipop sticks
    • Food-safe coloring brushes
    • Small piping bags or toothpicks

    Method
     

    1. In a large bowl, crumble the cake into fine crumbs and mix in the frosting until the mixture is soft, moldable, and holds together when pressed.
    2. Shape the mixture into small, uniform balls about the size of a golf ball, then place them on a parchment-lined sheet. Chill in the refrigerator for 15-20 minutes to firm up.
    3. Melt the dark chocolate in a microwave-safe bowl or using a double boiler until smooth and glossy. Dip each chilled cake ball into the melted chocolate, ensuring it’s fully coated, then insert a lollipop stick through the center and set back onto the parchment to dry.
    4. Once the chocolate coating is set, melt the white chocolate or candy coating and dip each eyeball partway, leaving space for the ‘pupil’. Allow them to cool until the coating hardens.
    5. Use food-safe coloring brushes or small piping bags to draw bloodshot veins with red gel or liquid food coloring across the white surface for a creepy effect.
    6. Attach tiny black or dark-colored candies or use black icing to create pupils in the center of each eye, giving a piercing stare.
    7. If desired, pipe small amounts of green icing or place tiny candy pieces to resemble oozing goo around the eyeball for added gross-out effect.
    8. Finish by placing the cake pops on a clean platter, arranging them creatively for a spooky display, and let them sit until everything is fully set.

    Notes

    For extra creepy effects, experiment with different vein patterns or add tiny blood droplet details. Use gloves or toothpicks for precise decorating.
    These eyeball cake pops are more than just a treat — they’re a conversation starter, a picture-perfect moment, and a little dose of holiday horror fun. When you see those tiny orbs staring back at you, all doubts about spooky sweets melt away.

    Crafting these monster eyes turns simple ingredients into edible art that captures the spirit of Halloween. It’s a chaos of color and texture that makes your celebration memorable. Enjoy creating this creepy, charming centerpiece and watch as everyone marvels at your spooky baking skills.

  • Spooky Sweetness: Halloween Graveyard Pudding Cups

    Spooky Sweetness: Halloween Graveyard Pudding Cups

    Every October, I find myself craving something that combines the thrill of Halloween with a little indulgent chaos. These Graveyard Pudding Cups do just that—they turn simple desserts into a spooky scene straight out of a haunted yard. The best part? They’re quick to assemble, making them perfect for last-minute party surprises.

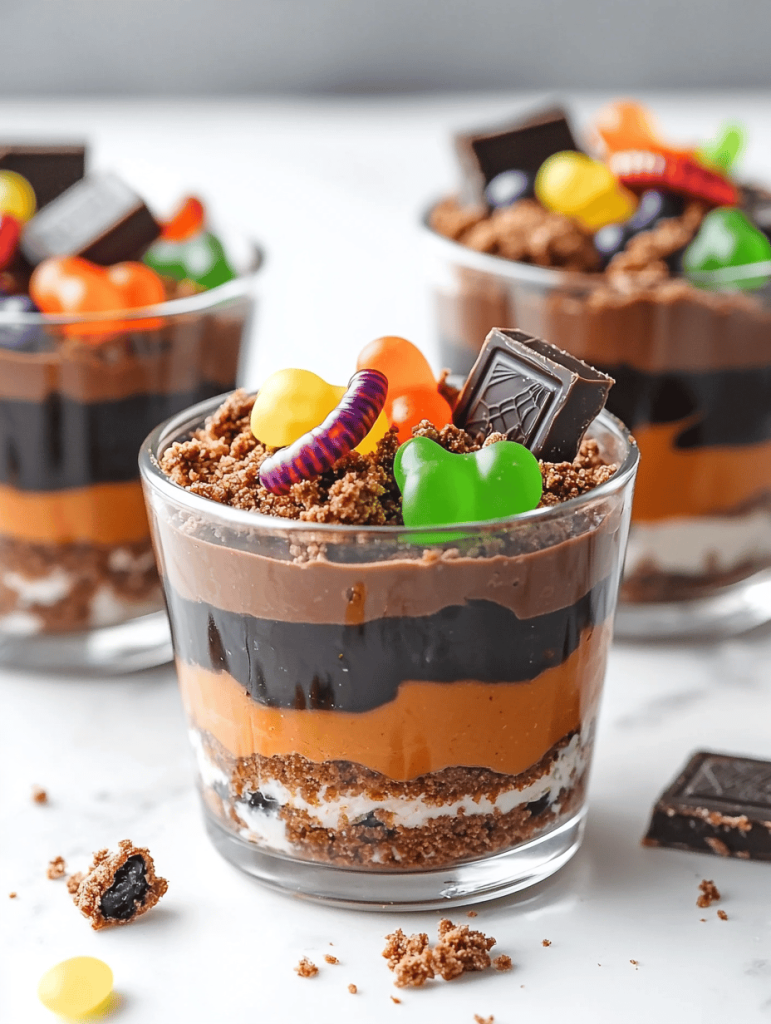
    Imagine biting into a chocolate pudding graveyard, with crushed cookies for dirt and candy all around—each spoonful a little adventure. The mix of textures and flavors sparks nostalgic childhood memories of Halloween trick-or-treating. Plus, they add a playful, eerie vibe to any spooky celebration.

    Graveyard Pudding Cups

    Graveyard Pudding Cups are layered desserts featuring chocolate pudding, crushed cookies for dirt, and candy decorations to create a spooky, haunted scene. The dessert is assembled in individual cups, offering a combination of creamy, crunchy, and chewy textures with a visually eerie appearance. Perfect for Halloween parties, they are quick to prepare and visually striking.
    Prep Time 10 minutes
    Total Time 10 minutes
    Servings: 4
    Course: Main Course
    Cuisine: Halloween
    Calories: 250

    Ingredients
      

    • 1 box chocolate pudding mix prepare according to package instructions
    • 1 1/2 cups milk for pudding mix
    • 1 cup crushed chocolate cookies for dirt layer
    • 1/2 cup candy eyes or smarties for decorations
    • Optional candy bones or mini candy figures for extra decoration

    Equipment

    • Mixing bowl
    • Serving cups or small jars
    • Spoon or spatula
    • Food processor or plastic bag and rolling pin

    Method
     

    1. Start by preparing the chocolate pudding mix according to the package instructions, whisking until smooth and thickened. Pour the pudding into a large bowl and refrigerate for a few minutes if needed to firm up slightly.
    2. While the pudding chills, crush the chocolate cookies into coarse crumbs using a food processor or by placing them in a plastic bag and smashing with a rolling pin. This will resemble loose dirt.
    3. Spoon or pipe the firm chocolate pudding evenly into individual cups or small jars, filling them about two-thirds full. This creates the base of your graveyard scene.
    4. Sprinkle a generous layer of crushed cookies over the pudding to resemble dirt covering a graveyard. Use the back of a spoon to spread evenly and press lightly to settle the crumbs.
    5. Decorate the top with candy eyes to mimic tombstones or spooky accents, placing them randomly for an eerie effect. Add any candy bones or figures for a more haunted appearance if desired.
    6. Repeat the layering process for additional cups if making more, finishing with a cookie dirt layer and creepy decorations on top.
    7. Once decorated, chill the pudding cups in the refrigerator for at least 10 minutes to allow flavors to meld and decorations to set lightly.
    8. Serve the Graveyard Pudding Cups chilled, revealing the layered dirt and spooky decorations just before enjoying this creepy treat.

    Notes

    For extra spookiness, add candy bones, gummy worms, or fake spiders atop the crushed cookies before serving.

    These pudding cups are more than just treats; they’re little story starters at your party table. Watching guests’ faces as they uncover the mini gravestones and bones is half the fun. Plus, they remind us how some of the simplest ingredients can craft the most memorable moments.

    As the season shifts and Halloween décor floods the stores, it’s nice to have a dessert that’s both fun and spoiler-proof. No matter how much chaos surrounds your prep, these cups bring joy and a dash of spooky charm to the night. They’re proof that sometimes, eerie and adorable go hand in hand.

  • Hidden Spice Secrets of Pumpkin Cookies

    Hidden Spice Secrets of Pumpkin Cookies

    Even as the leaves turn and the air grows crisp, there’s something magical about baking cookies that carry a hint of autumn. These pumpkin cookies go beyond basic spice, infusing a subtle warmth that feels like wrapping yourself in a favorite sweater. The secret? A dash of ground ginger and a pinch of cinnamon that awakens the senses with every bite.

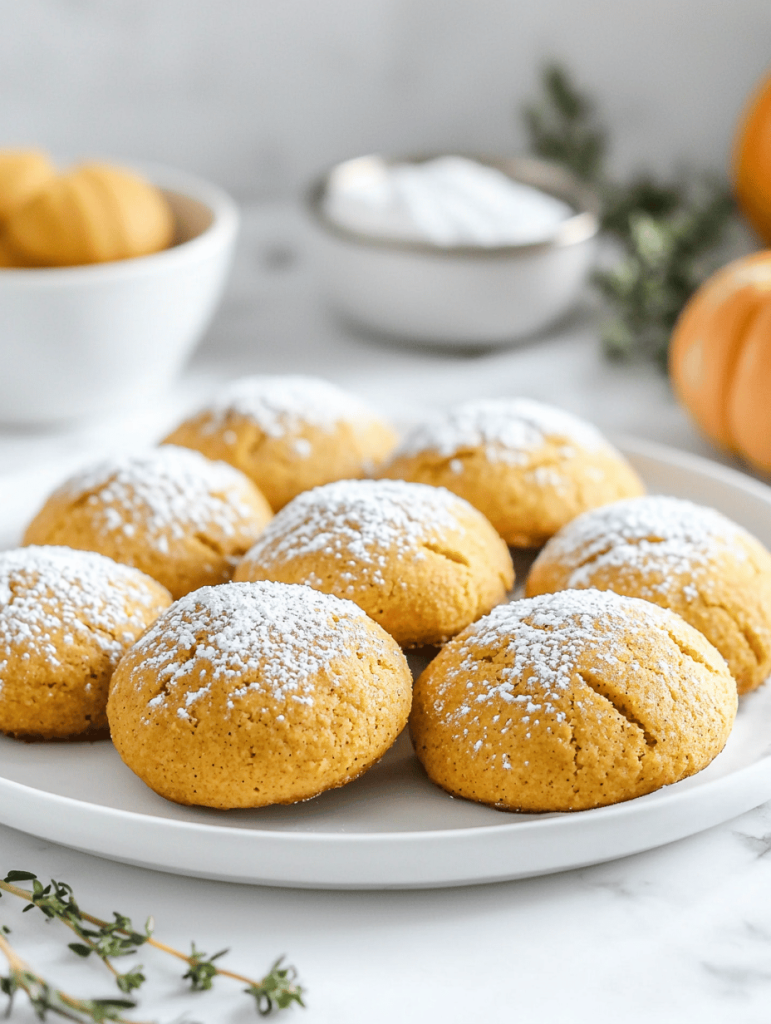
    As I mix the dough, the smell of roasted pumpkin fills the kitchen, reminding me of cozy afternoons and pumpkin patches. These cookies are not just treats—they’re a journey into the comfort of fall flavors, perfect for sharing or keeping all to yourself on a lazy weekend. The texture? Crispy edges with a soft, pumpkin-rich center that melts in your mouth.

    Pumpkin Cookies

    These pumpkin cookies are baked treats that feature a soft, moist center encased in crispy edges. Made with pureed pumpkin, spices like ginger and cinnamon, and a simple dough, they develop a golden-brown exterior with a tender interior that melts in the mouth. The cookies showcase warm fall flavors and a appealing visual contrast between their crisp top and soft core.
    Prep Time 20 minutes
    Cook Time 15 minutes
    Total Time 35 minutes
    Servings: 12
    Course: Main Course
    Cuisine: American
    Calories: 150

    Ingredients
      

    • 1 ½ cups all-purpose flour
    • ½ cup granulated sugar
    • ½ cup brown sugar
    • ½ cup unsalted butter softened
    • ½ cup unsweetened pumpkin puree
    • 1 large egg
    • 1 ½ teaspoons ground ginger
    • ½ teaspoon ground cinnamon
    • ½ teaspoon baking powder
    • ¼ teaspoon salt

    Equipment

    • Mixing bowls
    • Whisk
    • Measuring cups and spoons
    • Baking sheet
    • Parchment paper
    • Cooling rack

    Method
     

    1. Preheat your oven to 350°F (175°C) and line a baking sheet with parchment paper.
    2. In a large mixing bowl, whisk together the flour, ground ginger, cinnamon, baking powder, and salt until well combined.
    3. In a separate bowl, cream the softened butter with both sugars until the mixture becomes light and fluffy, and the sugars are dissolved.
    4. Add the egg and pumpkin puree to the butter mixture, then whisk until smooth and fully incorporated.
    5. Gradually fold the dry ingredients into the wet mixture using a spatula, mixing just until a sticky dough forms.
    6. Use a spoon or cookie scoop to portion out twelve rounded mounds of dough onto the prepared baking sheet, spacing them about 2 inches apart.
    7. Bake the cookies in the preheated oven for 12-15 minutes, until the edges are golden brown and the centers look set.
    8. Remove the baking sheet from the oven and let the cookies cool on the sheet for 5 minutes before transferring them to a wire rack to cool completely.
    9. Once cooled, the cookies will have a crispy edge with a soft, moist center, ready to serve and enjoy.
    Baking these pumpkin cookies is about celebrating the fleeting beauty of the season. They’re a great way to enjoy fresh flavors without fuss, perfect for quick gatherings or just a quiet moment of indulgence.

    Each batch reminds me why I fell in love with seasonal baking: it’s simple, nostalgic, and always a little bit surprising. As these cookies cool on the rack, I can’t help but think how they’ll bring joy to anyone lucky enough to taste them, season after season.