Category: Main Course

  • Layered Comfort: The Art of Making Lasagna Soup with a Twist

    Layered Comfort: The Art of Making Lasagna Soup with a Twist

    Imagine the cozy aroma of a simmering pot, rich with herbs and melted cheese, but in soup form. Thats what makes Lasagna Soup so irresistible. It captures all the familiar flavors of the classic Italian dish, yet its quicker and easier to prepare, perfect for weeknights.

    Today, I want to explore this dish from a new angle: how it combines the soul of lasagna with the simplicity of a hearty broth. Youll love how the melty cheese, tender noodles, and robust sauce come together in one comforting bowl. Plus, it adapts seamlessly to whatever you have in your pantry, making it a true kitchen MVP.

    Lasagna Soup

    Lasagna Soup combines the flavors of classic lasagna into a hearty, brothy dish. It features tender noodles, rich tomato sauce, melted cheese, and fresh herbs, creating a comforting and visually appealing bowl with a vibrant color and layered textures. The dish is cooked through simmering and topped with cheese for a melt-in-your-mouth finish.
    Prep Time 10 minutes
    Cook Time 30 minutes
    Total Time 40 minutes
    Servings: 4
    Course: Main Course
    Cuisine: Italian
    Calories: 350

    Ingredients
      

    • 1 tablespoon olive oil
    • 1 small yellow onion finely chopped
    • 3 cloves garlic minced
    • 1 can (28 oz) crushed tomatoes use good quality or fire-roasted if available
    • 4 cups beef or vegetable broth
    • 8 oz dry pasta shells or any short pasta
    • 1 cup mozzarella cheese shredded
    • 1/2 cup Parmesan cheese grated
    • 1 teaspoon dried basil
    • 1/2 teaspoon red pepper flakes optional, for a little heat
    • to taste salt and pepper

    Equipment

    • Large pot or Dutch oven
    • Wooden spoon or spatula

    Method
     

    1. Heat the olive oil in a large pot over medium heat until shimmering. Add the chopped onion and sauté, stirring occasionally, until it becomes translucent and fragrant, about 5 minutes.
    2. Add the minced garlic to the pot and cook for another minute, until fragrant and slightly golden, stirring constantly to prevent burning.
    3. Pour in the crushed tomatoes along with their juices, stirring to combine with the onion and garlic mixture. Bring the sauce to a gentle simmer and cook for 10 minutes to develop flavor.
    4. Stir in the broth and season with dried basil, red pepper flakes (if using), salt, and pepper. Bring the mixture to a boil over medium-high heat.
    5. Add the dry pasta shells to the boiling soup, stirring to prevent sticking. Reduce the heat slightly and cook uncovered until the pasta is tender, about 8-10 minutes.
    6. Once the pasta is cooked and the soup has slightly thickened, stir in the shredded mozzarella cheese until melted and creamy.
    7. Sprinkle the grated Parmesan cheese over the soup and give it a gentle stir to distribute the cheesy goodness evenly.
    8. Taste the soup and adjust the seasoning with more salt and pepper if needed. Allow it to simmer for another minute to meld all flavors.
    9. Remove the pot from heat and ladle the steaming, cheesy soup into bowls. Garnish with additional Parmesan or fresh herbs if desired.
    10. Serve hot, enjoying the comforting layers of tomato, cheese, and pasta in each spoonful.

    This Lasagna Soup is more than just a meal; its a reminder that comfort doesnt have to be complicated. It brings back nostalgic flavors with a modern twist, perfect for cozy nights. Whether hosting friends or savoring solo, its a dish that feels like a warm welcome every time.

    As seasons shift and the craving for hearty, familiar food grows, this soup offers a quick refuge. Its versatility means you can customize ingredients, making every bowl uniquely yours. In the end, its about enjoying those simple, flavorful moments amid busy days.

  • The Secret Ingredient That Turns Taco Soup Into a Family Favorite

    The Secret Ingredient That Turns Taco Soup Into a Family Favorite

    When I first stumbled upon taco soup, I never imagined how a simple mix of beans, ground meat, and spices could evoke such a nostalgic wave. This dish has become my go-to comfort food, especially during chilly evenings when the aromas drift through the entire house, stirring memories of simpler times.

    What makes this recipe stand out isn’t just its bold flavor but how adaptable it is to whatever I have in the pantry. It’s a whirlwind of textures: tender beans, savory meat, and crispy tortilla chips sprinkled on top. Each spoonful feels like a warm hug with a kick.

    Taco Soup

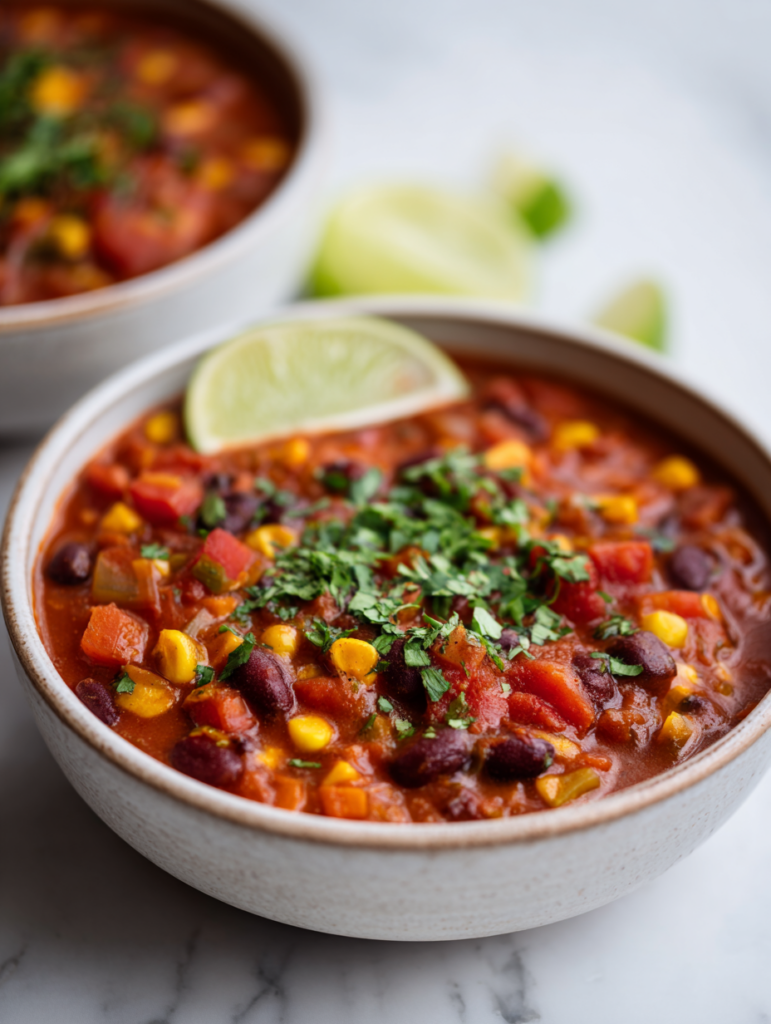
    Taco soup is a hearty dish made by simmering ground meat with beans, tomatoes, and spices, creating a thick, flavorful broth. The soup is typically topped with crunchy tortilla chips and optional garnishes, offering a combination of tender, chunky ingredients and crispy textures in each spoonful.
    Prep Time 15 minutes
    Cook Time 30 minutes
    Total Time 45 minutes
    Servings: 6
    Course: Main Course
    Cuisine: American
    Calories: 350

    Ingredients
      

    • 1 pound ground beef
    • 1 can (15 oz) black beans
    • 1 can (14.5 oz) diced tomatoes
    • 1 cup corn kernels frozen or canned
    • 1 packet (1 oz) taco seasoning mix
    • 4 cups chicken or beef broth
    • to taste salt and pepper
    • bowl of tortilla chips tortilla chips for topping

    Equipment

    • Large pot or Dutch oven
    • Wooden spoon or spatula
    • Knife
    • Cutting board

    Method
     

    1. Heat a large pot over medium heat and add the ground beef, breaking it apart with a wooden spoon. Cook until browned and cooked through, about 5-7 minutes, until you notice it turning a rich brown color and hearing a sizzle as it cooks.
    2. Add the diced tomatoes (with their juices), black beans, and corn to the pot. Stir everything together and let it simmer for 5 minutes, allowing the flavors to meld and the mixture to warm through.
    3. Sprinkle the taco seasoning evenly over the mixture, then pour in the broth. Stir well to incorporate the spices and ensure everything is evenly coated. Bring the soup to a gentle boil, then reduce the heat to low and let it simmer uncovered for about 20 minutes, stirring occasionally, until thickened slightly and vibrant in flavor.
    4. Taste the soup and season with salt and pepper as needed to enhance the flavors. The soup should be hearty, with a thick broth and tender ingredients, ready for serving.
    5. Ladle the hot soup into bowls and top generously with crunchy tortilla chips. The chips will add a crispy contrast to the tender ingredients and flavorful broth, creating a satisfying texture combination.
    6. Serve immediately while hot, and enjoy the comforting, savory flavors that make this taco soup a perfect easy meal.
    This taco soup has journeyed from my humble kitchen to becoming a staple pot that everyone begs for. It’s a reminder that sometimes, the most unassuming recipes hide the most delightful surprises.

    Sharing this with family or friends transforms it into more than just a meal—it becomes an experience, a small celebration of flavors and quick, cozy cooking. As the nights get cooler, I’m grateful for a recipe that’s as effortless as it is satisfying.

  • The Hidden Power of Homemade Chicken Noodle Soup

    The Hidden Power of Homemade Chicken Noodle Soup

    Few comfort foods carry the same quiet significance as a bowl of chicken noodle soup made from scratch. This recipe transforms simple ingredients into a warm embrace against chilly days or tired evenings. What makes this version stand out is the secret ingredient that amplifies the broth’s flavor—think roasted garlic or a splash of apple cider vinegar.

    Every spoonful offers more than just nourishment; it sparks memories of kitchen chaos and family warmth, all wrapped up in a fragrant, steamy bowl. The process is surprisingly forgiving, making it perfect for nights when perfection isn’t your priority—just a bowl of tender chicken, noodles, and flavorful broth.

    WHY I LOVE THIS RECIPE?

    • baking a homemade broth fills the house with an irresistible aroma of roasted herbs and chicken.
    • It’s a chaos-free way to enjoy comfort food without hours of prep.
    • The noodles absorb the broth’s rich flavors, making every bite a tiny celebration.
    • leftovers taste even better the next day, with flavors deepening overnight.
    • It connects me to childhood memories of chilly evenings and mom’s cooking.

    Homemade Chicken Noodle Soup

    This chicken noodle soup features tender shredded chicken, soft noodles, and a flavorful broth infused with roasted garlic and herbs. The soup is simmered until the ingredients meld into a comforting and hearty dish with a clear, steaming appearance and a savory aroma.
    Prep Time 15 minutes
    Cook Time 45 minutes
    Total Time 1 hour
    Servings: 4
    Course: Main Course
    Cuisine: Comfort Food
    Calories: 350

    Ingredients
      

    • 2 pounds bone-in chicken thighs or breasts, skin removed
    • 1 head garlic whole head for roasting
    • 2 carrots large carrots peeled and sliced
    • 2 stalks celery sliced
    • 8 cups chicken broth preferably homemade
    • 8 ounces egg noodles wide or medium
    • 1 teaspoon dried thyme
    • 2 tablespoons olive oil
    • to taste Salt and pepper for seasoning

    Equipment

    • Large Soup Pot
    • Sharp knife

    Method
     

    1. Preheat your oven to 400°F (200°C). Place the whole head of garlic on a baking sheet, drizzle with a teaspoon of olive oil, wrap in foil, and roast for about 40 minutes until fragrant and golden. Once cooled, squeeze out the roasted garlic cloves and set aside.
    2. While the garlic roasts, heat a large soup pot over medium heat and add a tablespoon of olive oil. Season the chicken thighs with salt and pepper, then brown them in the hot oil for about 5-7 minutes per side until golden and cooked through. Remove the chicken and set aside to cool slightly.
    3. Shred the cooked chicken into bite-sized pieces using two forks or your hands. Pour out any excess fat from the pot, leaving behind the flavorful browned bits.
    4. Add sliced carrots and celery to the same pot and cook for about 5 minutes, stirring occasionally, until the vegetables begin to soften and become fragrant.
    5. Pour in the chicken broth and add the dried thyme. Bring the mixture to a gentle boil, then lower the heat and simmer for 15 minutes, allowing the flavors to meld.
    6. Add the shredded chicken back into the soup along with the roasted garlic cloves, stirring to distribute the flavors evenly.
    7. In a separate pot, cook the egg noodles according to package instructions until al dente, then drain and rinse with cold water to stop the cooking process.
    8. Add the cooked noodles to the soup pot and stir well. Let everything simmer together for another 5 minutes, allowing the noodles to soak up some of the broth’s savory flavor.
    9. Taste the soup and adjust seasoning with salt, pepper, and additional thyme if desired. Once seasoned to your liking, remove from heat and serve hot, garnished with fresh herbs if preferred.

    Notes

    For a richer flavor, let the soup sit for a few hours or overnight; the flavors develop even more with time. You can also add vegetables like spinach or peas near the end of cooking for extra freshness.

    This Chicken Noodle Soup isn’t just a meal; it’s a small ritual that turns a simple ingredients list into something special. It reminds us that comfort food doesn’t have to be complicated or time-consuming. Sometimes, a bowl of warm soup can be the perfect pause in a hectic day.

    As the seasons change and chilly days settle in, this soup offers both warmth and a touch of nostalgia. It’s a humble reminder that the best meals often come from the simplest ideas and a little love in the kitchen.

  • Chili Conquered: My Chaos-Driven Secret to Heartwarming Comfort

    Chili Conquered: My Chaos-Driven Secret to Heartwarming Comfort

    Cooking chili isn’t just about combining beans and spices; it’s a ritual that unexpectedly echoes childhood memories of tapping into my grandma’s spicy magic. Today’s recipe is born from my chaotic kitchen moments—when I accidentally discovered a secret ingredient that makes this chili irresistibly smoky and rich. The aroma alone, a blend of roasted peppers and simmered beef, can turn even the gloomiest day around.

    What makes this particular chili stand out is its embrace of imperfect ingredients—sometimes a splash of coffee or a sprinkle of cocoa turns ordinary into extraordinary. It’s a dish that appreciates the unexpected, much like my own kitchen where mistakes often lead to the best flavors. So, I invite you to join me in this messy, flavorful adventure that only gets better with love and a little chaos.

    Hearty Smoked Chili

    This chili is made by simmering ground beef with beans, peppers, and spices to develop deep, robust flavors. The dish features a thick, chunky consistency with a smoky aroma, finished with a rich, meaty taste and a slightly spicy kick.
    Prep Time 15 minutes
    Cook Time 45 minutes
    Total Time 1 hour
    Servings: 6
    Course: Main Course
    Cuisine: American
    Calories: 350

    Ingredients
      

    • 1 lb ground beef preferably lean
    • 1 can (15 oz) kidney beans drained and rinsed
    • 1 can (15 oz) black beans drained and rinsed
    • 1 large red bell pepper seeded and chopped
    • 1 medium onion diced
    • 3 cloves garlic minced
    • 2 tbsp olive oil
    • 1 tbsp chili powder adjust to taste
    • 1 tsp ground cumin
    • 1/2 tsp smoked paprika adds smoky flavor
    • 1/4 tsp cocoa powder optional, enhances richness
    • 1 cup beef broth
    • 1 tbsp coffee richens the flavor, optional
    • Salt and pepper to taste

    Equipment

    • Large pot or Dutch oven
    • Knife
    • Cutting board
    • Wooden spoon or spatula
    • Can Opener

    Method
     

    1. Heat the olive oil in a large pot over medium-high heat. Add the diced onion and chopped bell pepper, sautéing until softened and fragrant, about 5 minutes, with the mixture bubbling and the vegetables turning translucent.
    2. Add the minced garlic to the pot and cook for another minute, until fragrant and slightly golden.
    3. Stir in the ground beef, breaking it apart with your spoon, and cook until browned all over, about 8 minutes, until the mixture is bubbling and the beef develops a deep color.
    4. Mix in the chili powder, cumin, smoked paprika, cocoa powder, and a pinch of salt and pepper; cook for 1-2 minutes to toast the spices and deepen their aroma.
    5. Pour in the beef broth and coffee, stirring well to deglaze the bottom of the pot and incorporate all flavors, letting it bubble up.
    6. Add the drained kidney and black beans, and stir the mixture to evenly distribute the ingredients.
    7. Reduce the heat to low and let the chili simmer uncovered for about 30 minutes, stirring occasionally, until the mixture thickens slightly and the flavors meld, with a rich smoky aroma filling the kitchen.
    8. Taste the chili and adjust the seasoning with salt and pepper as needed, ensuring a balanced and bold flavor.
    9. Serve the chili hot, garnished with your favorite toppings, and enjoy the deep, smoky, and hearty flavors.

    This chili isn’t just a meal; it’s a story told through spices and slow simmering. It reminds me that sometimes, the best comfort food comes from embracing the imperfections and surprises along the way. When served with a side of crusty bread or a sprinkle of sharp cheddar, it feels like a warm, familiar hug.

    In a season where hearty, soul-warming dishes are most needed, this chili offers both nostalgia and a creative twist. It’s a dish that can be assembled with pantry staples in under an hour, yet tastes like it’s been simmering all day. The true magic is in how it brings people together, no matter the chaos behind the scenes.

  • Spook-tacular Mummy Pizza: Halloween’s Chewiest Delight

    Spook-tacular Mummy Pizza: Halloween’s Chewiest Delight

    Every October, I find myself craving the playful chaos that Halloween brings. This year, I decided to blend my love for funny-faced foods with a nostalgic twist—Mummy Pizza! The smell of toasted crust mingling with bubbling cheese and spicy pepperoni instantly takes me back to childhood trick-or-treat adventures.

    What makes this recipe truly special is its quirky presentation. Wrapping cheese and toppings in pizza dough feels like preparing tiny, edible scarecrows. It’s a perfect way to make mealtime fun for kids and adults alike, all while showcasing your baking skills with a spooky flair.

    Mummy Pizza

    Mummy Pizza features a classic pizza crust topped with bubbling cheese and spicy pepperoni, shaped to resemble bandaged mummies for a playful Halloween presentation. The dish involves assembling and baking the decorated pizzas until the crust is golden and the cheese is melted and bubbly, resulting in a fun and flavorful kid-friendly meal with a crispy exterior and gooey topping.
    Prep Time 20 minutes
    Cook Time 15 minutes
    Total Time 35 minutes
    Servings: 4
    Course: Main Course
    Cuisine: American
    Calories: 250

    Ingredients
      

    • 1 package pizza dough store-bought or homemade
    • 1 cup shredded mozzarella cheese for topping
    • 50 grams pepperoni slices for eyes and decoration
    • 1 tablespoon olive oil optional, for brushing crust
    • 1 teaspoon dried oregano optional, for extra flavor

    Equipment

    • Baking sheet
    • Rolling pin
    • Oven
    • Cooking knife
    • Parchment paper

    Method
     

    1. Preheat the oven to 400°F (200°C) and line a baking sheet with parchment paper.
    2. Lightly flour a clean surface and roll out the pizza dough into a rectangle about ¼ inch thick. Use a rolling pin to get an even layer.
    3. Transfer the rolled dough onto the prepared baking sheet. Brush the edges with a bit of olive oil to give the crust a shiny finish.
    4. Spread the shredded mozzarella evenly over the dough, leaving about an inch around the edges for the crust.
    5. Arrange slices of pepperoni across the cheese in a playful pattern, leaving space for ‘bandages’ and eyes.
    6. Use extra strips of dough or cheese to create bandage-like strips across the pizza, wrapping over the toppings to resemble mummy wrappings.
    7. Place small pepperoni slices on the ends or in the gaps to resemble eyes. You can also add a tiny piece of cheese or olive for added detail.
    8. Bake the pizza in the preheated oven for about 12-15 minutes, or until the crust is golden and the cheese is bubbling and slightly browned.
    9. Remove the pizza from the oven and allow it to cool for a couple of minutes; the cheese will set slightly and make slicing easier.
    10. Slice the mummy pizza into portions and serve hot, showcasing the playful bandaged look with gooey cheese and pepperoni eyes.

    Halloween is all about embracing the macabre and the merry. These mummies aren’t just a snack—they’re a conversation starter at any spooky gathering. Plus, they come together quickly, making them an ideal project for last-minute party prep.

    So next time you want to impress with some edible Halloween decor, pull out this easy, cheesy recipe. Their mischievous faces will turn any table into a festive spectacle, and your kitchen will smell like a bakery haunted by delicious spirits.

  • Unexpected Twist on Turkey Chili: The Cinnamon Secret

    Unexpected Twist on Turkey Chili: The Cinnamon Secret

    My obsession with chili started in childhood, but I recently realized I’ve been missing a key flavor element. This recipe adds an unexpected dash of cinnamon, transforming traditional turkey chili into a warm, intriguing dish. It’s perfect for cozy evenings when you want comfort with a twist.

    Using ground turkey makes the dish lighter, yet packed with savory richness. I love how the cinnamon mingles with smoky paprika and cumin, creating a complex aroma that fills the kitchen. It’s a surprising upgrade you might not see coming, but will eagerly crave again and again.

    Turkish-Style Cinnamon Turkey Chili

    This chili combines ground turkey with smoky spices and a dash of cinnamon, cooked through sautéing and simmering methods. The dish develops a hearty, slightly thickened texture with fragrant aroma and vibrant flavors. The final appearance is a chunky, richly colored chili with visible spices and tender meat.
    Prep Time 15 minutes
    Cook Time 30 minutes
    Total Time 45 minutes
    Servings: 4
    Course: Main Course
    Cuisine: Turkish
    Calories: 290

    Ingredients
      

    • 1 tablespoon olive oil for sautéing
    • 1 small onion finely chopped
    • 2 cloves garlic minced
    • 1 pound ground turkey lean
    • 1 teaspoon smoked paprika
    • 1/2 teaspoon cumin
    • 1/4 teaspoon cinnamon adds a warm depth
    • 1 can (14 oz) diced tomatoes undrained
    • 1 cup chicken or vegetable broth
    • 1 can (15 oz) kidney beans drained and rinsed
    • to taste salt and pepper for seasoning

    Equipment

    • Large skillet or Dutch oven
    • Wooden spoon or spatula

    Method
     

    1. Heat a large skillet over medium heat and add the olive oil, allowing it to warm until shimmering.
    2. Add the finely chopped onion to the skillet and sauté until translucent and fragrant, about 3-4 minutes. The onions should soften and become slightly golden around the edges.
    3. Stir in the minced garlic and cook for another minute until fragrant, the garlic becoming fragrant and slightly golden.
    4. Add the ground turkey to the skillet, breaking it apart with a spoon. Cook until it is browned and cooked through, about 5-7 minutes, stirring occasionally.
    5. Sprinkle in the smoked paprika, cumin, and cinnamon, stirring well to coat the meat evenly with the spices. Cook for another minute until the spices release their aroma.
    6. Pour in the diced tomatoes with their juices and the broth, stirring to combine all ingredients. Bring to a gentle simmer.
    7. Reduce the heat slightly and let the chili simmer uncovered for 20 minutes, stirring occasionally, until the mixture thickens and flavors meld.
    8. Add the drained kidney beans to the skillet and stir to incorporate. Cook for another 5 minutes to heat beans through.
    9. Season with salt and pepper to taste, stirring again to distribute the seasoning evenly.
    10. Remove from heat once the chili has thickened to your desired consistency and the flavors are well combined.
    11. Serve hot, garnished with your favorite toppings if desired, and enjoy the warm, aromatic chili with a hint of cinnamon.

    Whether you’re serving it for a weeknight meal or feeding a crowd, this chili offers warmth and depth with a hint of surprise. It’s a reminder that small changes—like a pinch of cinnamon—can make a familiar dish feel new and exciting. Plus, it’s quick enough for busy days and bold enough to impress.

    Now, whenever I make this chili, I deliberately double the batch. Packing leftovers into containers means I get to enjoy that fragrant, spicy aroma all over again. It’s a simple way to bring a little joy and anticipation to the busiest of days.

  • Unusual Stuffed Peppers with a Global Twist

    Unusual Stuffed Peppers with a Global Twist

    Stuffed peppers are classic comfort food, but I decided to give them an unexpected twist by incorporating flavors from around the world. Imagine the smoky warmth of paprika from Hungary paired with a tangy twist of preserved lemon, all nestled in tender bell peppers. This recipe started as a simple idea but quickly turned into a journey of discovery in my own kitchen.

    Every time I make these, I think about the stories behind each ingredient—how a pinch of saffron connects to Persian markets or how a dash of oregano recalls Mediterranean sunsets. The aroma alone can transport you. It’s like a mini world tour, right from your stovetop and dinner table.

    Global-Flavor Stuffed Peppers

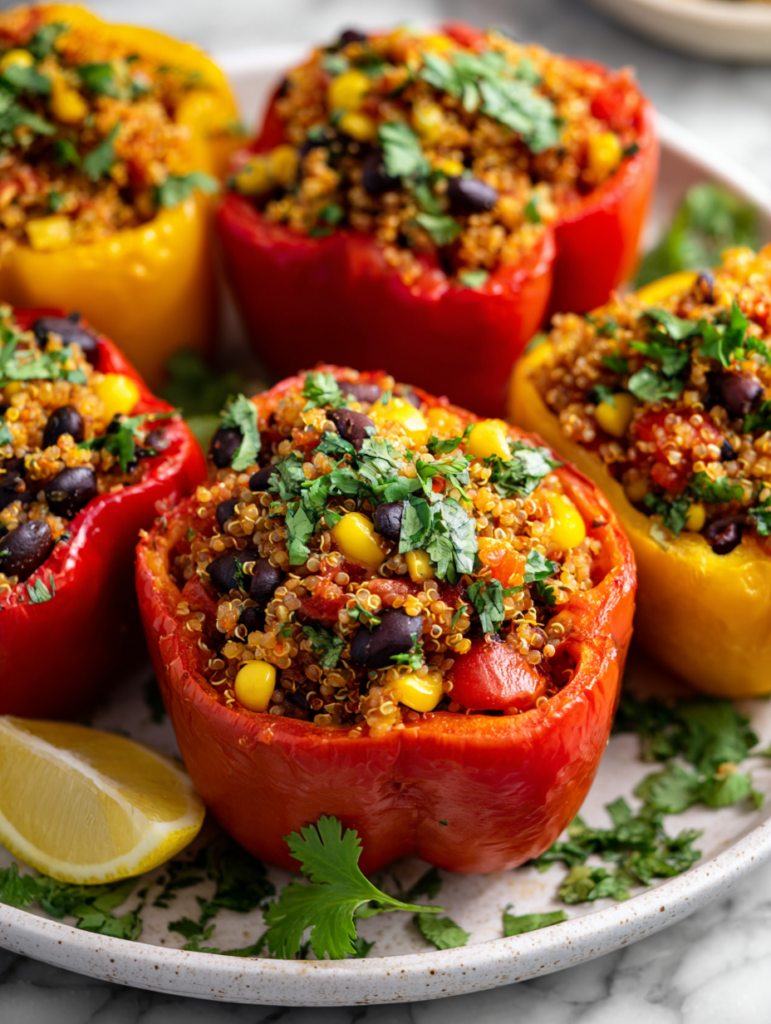
    These stuffed peppers are baked with a filling that combines smoky paprika, tangy preserved lemon, and aromatic herbs, creating a dish with tender peppers and flavorful, slightly creamy filling. The peppers are halved, stuffed, and baked until bursting with color and softness, resulting in a visually appealing and hearty meal.
    Prep Time 20 minutes
    Cook Time 30 minutes
    Total Time 50 minutes
    Servings: 4
    Course: Main Course
    Cuisine: Global
    Calories: 250

    Ingredients
      

    • 4 large bell peppers halved and seeded
    • 1 cup cooked rice white or brown rice, cooled
    • 1/2 cup preserved lemon finely chopped
    • 2 teaspoons smoked paprika
    • 2 cloves garlic minced
    • 2 tablespoons olive oil
    • 1/4 cup fresh parsley chopped
    • to taste salt and pepper
    • 1 cup shredded cheese optional, such as feta or mozzarella

    Equipment

    • Baking Dish
    • Chef’s Knife
    • Cutting board
    • Mixing bowl
    • Spoon or spatula

    Method
     

    1. Preheat your oven to 375°F (190°C). Rinse the bell peppers, then carefully cut them in half lengthwise and remove the seeds and membranes.
    2. In a mixing bowl, combine the cooked rice, chopped preserved lemon, smoked paprika, minced garlic, chopped parsley, and a pinch of salt and pepper. Drizzle with olive oil and stir everything together until evenly mixed; this creates the flavorful filling.
    3. Spoon the filling generously into each bell pepper half, pressing down slightly to pack it in and ensure the peppers are well filled.
    4. Place the stuffed peppers in a baking dish, arranging them so they sit upright comfortably.
    5. If using cheese, sprinkle it over the top of each stuffed pepper for a cheesy, browned finish.
    6. Bake in the preheated oven for about 25-30 minutes, or until the peppers are tender and the filling is heated through with a slightly golden top if cheese was added.
    7. Remove from the oven and let cool for a few minutes. Serve warm, garnished with extra chopped parsley if desired.

    Notes

    Feel free to customize the filling with additional herbs or spices to suit your taste. Using different cheeses can also add different flavor profiles.

    This dish is a celebration of vibrant flavors and comforting textures, perfect for a cozy dinner or a small gathering. The versatility allows you to adapt with what’s in your pantry, making each batch uniquely yours. It’s a reminder that even familiar favorites can be reimagined with a little creativity and a dash of adventure.

    Sharing this recipe feels like sharing a secret map to new culinary territories. It’s fulfilling to see loved ones react to the unexpected layers of taste—smoky, citrusy, herby. Sometimes, a simple plate can spark the most memorable conversations and moments around the table.

  • The Cozy Charm of White Chicken Chili: A Winter Must-Have

    The Cozy Charm of White Chicken Chili: A Winter Must-Have

    Imagine a bowl that whispers comfort with every swirl, especially on chilly evenings when the cold outside makes the bones ache. White chicken chili isn’t just a dish; it’s a warm hug wrapped in a blanket of tender chicken, creamy beans, and a hint of spice that awakens the senses. The best part? Its versatility lets you tweak the heat and creaminess to suit your mood.

    This recipe takes you beyond the usual chili, embracing a tangy, herbaceous twist on classic comfort food. Its smooth, velvety texture feels like a gentle caress of flavor that settles comfortably in your stomach. Perfect for quick weeknight dinners or improvised gatherings, it’s a dish that invites stories and smiles around the table.

    White Chicken Chili

    White chicken chili is a comforting soup made with tender shredded chicken, creamy white beans, and a flavorful broth infused with spices and herbs. It has a velvety, thick texture with a tangy, herbaceous flavor profile, finished with a smooth and inviting appearance. The dish is quick to prepare and perfect for cozy evenings or weeknight dinners.
    Prep Time 15 minutes
    Cook Time 30 minutes
    Total Time 45 minutes
    Servings: 4
    Course: Main Course
    Cuisine: American
    Calories: 350

    Ingredients
      

    • 1 lb boneless, skinless chicken breasts or thighs, cooked and shredded
    • 2 cups white beans canned, drained and rinsed
    • 1 medium yellow onion finely chopped
    • 3 cloves garlic minced
    • 4 cups chicken broth
    • 1 teaspoon ground cumin
    • 1/2 teaspoon chili powder
    • 1/2 teaspoon oregano
    • 1 tablespoon olive oil
    • 1/2 cup sour cream for optional richness
    • Salt and pepper to taste

    Equipment

    • Large pot or Dutch oven
    • Sharp knife

    Method
     

    1. Start by seasoning the chicken breasts with a pinch of salt and pepper, then cook them in a large pot with a splash of olive oil over medium heat until they are golden brown and cooked through, about 8-10 minutes. Remove the chicken and let it rest for a few minutes before shredding it into bite-sized pieces.
      1 lb boneless, skinless chicken breasts
    2. In the same pot, add a little more olive oil if needed and sauté the chopped onion until soft and translucent, about 5 minutes. The onion should become fragrant and slightly caramelized.
      1 lb boneless, skinless chicken breasts
    3. Add the minced garlic to the pot and cook for another 30 seconds until fragrant, stirring constantly to prevent burning.
      1 lb boneless, skinless chicken breasts
    4. Pour in the chicken broth and bring the mixture to a gentle simmer. Stir in the cumin, chili powder, and oregano, allowing the flavors to meld for about 5 minutes.
      1 lb boneless, skinless chicken breasts
    5. Add the drained white beans and shredded chicken into the broth. Stir everything together and let it simmer uncovered for another 10-15 minutes, until the chili has thickened slightly and the flavors are well combined.
      1 lb boneless, skinless chicken breasts
    6. Taste the chili and adjust seasoning with salt and pepper as needed. If you like it creamier, stir in the sour cream until fully incorporated and smooth.
      1 lb boneless, skinless chicken breasts
    7. Once the chili is hot and the flavors are balanced, remove it from heat. Serve the white chicken chili in bowls, garnished with fresh herbs or a dollop of sour cream if desired.
    As the aroma of cumin and garlic fills your kitchen, it’s clear this white chicken chili is more than just a meal. It’s a small celebration of simple ingredients coming together with warmth and ease. Every spoonful carries the promise of cozy nights and shared conversations.

    So, next time you’re craving something hearty yet light, remember this recipe. It’s a reminder that comfort food can be quick, nourishing, and just a little bit special. Enjoy crafting your own bowl of soothing goodness, one tender bite at a time.

  • Spooky Fun: Halloween Monster Burgers You Can’t Resist!

    Spooky Fun: Halloween Monster Burgers You Can’t Resist!

    Halloween is perfect for unleashing your wildest food ideas, and these Monster Burgers turn the ordinary into something delightfully monstrous. Using everyday ingredients, you transform a classic burger into a creature feature that’s as tasty as it is terrifying. This approach gives a playful twist to your spooky feast, sparking joy with every monstrous bite.

    There’s an unexpected charm in customizing burgers with ghoulish eyes, creepy tongues, and wild, messy hair made from toppings. I love how simple ingredients—eggs, olives, cheese—become the magic components of a costume for your meal. Plus, the chaos of decorating these burgers is half the fun, especially when kids and adults alike get involved.

    Monster Burgers

    Monster Burgers are playful, visually striking sandwiches made by transforming classic beef patties into imaginative creatures using simple ingredients like cheese, olives, and eggs. The burgers are assembled with toppings and decorated to resemble ghouls and monsters, creating a fun and spooky presentation. The final appearance features a juicy patty dressed with colorful, quirky adornments that evoke a monstrous face.
    Prep Time 20 minutes
    Cook Time 15 minutes
    Total Time 35 minutes
    Servings: 4
    Course: Main Course
    Cuisine: American
    Calories: 650

    Ingredients
      

    • 1 pound ground beef 80% lean for juicy burgers
    • 4 slices cheddar cheese for melting over patties
    • 1 large egg hard boiled, for eyes
    • a few black olives black olives pitted, for eyes and decorations
    • 4 small hot dog buns or burger buns, toasted
    • 2 tablespoons ketchup for monster tongues or decoration
    • 1 small red bell pepper for tongues
    • 1 small onion for messy hair, optional
    • to taste salt and pepper for seasoning

    Equipment

    • Grill or Skillet
    • Spatula
    • Knife
    • Cutting board
    • Toothpicks or Skewers

    Method
     

    1. Preheat your grill or skillet over medium-high heat, preparing it for cooking the beef patties.
    2. Divide the ground beef into four equal portions and gently shape each into a round patty, about half an inch thick. Season with salt and pepper on both sides.
    3. Place the patties onto the hot grill or skillet. Cook for about 4-5 minutes per side, until they develop a nicely browned crust and are cooked through.
    4. While the patties are cooking, cut the cheddar cheese into small squares to melt over the hot patties, and slice the red bell pepper into thin strips for monster tongues.
    5. Once the burgers are cooked, place a cheese square on each patty during the last minute of cooking to melt slightly.
    6. While the burgers rest briefly, hard boil the egg, then peel and cut it into small slices or rounds for monster eyes.
    7. Toast the buns lightly until golden, then set aside.
    8. Assemble each monster burger by placing the cooked patty inside each toasted bun. Decorate with egg slices for eyes, inserting a black olive or two into each egg slice to mimic pupils.
    9. Use strips of red bell pepper or ketchup to create spooky tongues hanging from the burgers, and add messy hair made from thin onion slices on top for a wild look.
    10. Finish the monster faces with additional olives or small toppings for extra creepy details. Secure decorations with toothpicks or skewers if needed.
    11. Serve the Monster Burgers immediately with your favorite sides and enjoy these fun, spooky creations!

    Notes

    Feel free to get creative with your monster features! Additional toppings like lettuce, tomatoes, or cheese shreds can add more character and flavor.

    As Halloween draws near, these Monster Burgers offer a perfect blend of fun, flavor, and a touch of spooky chaos. They’re great for parties, family dinners, or just a mischievous night craving something different. Every bite is a small adventure, packed with familiar tastes and creepy fun.

    Adapting this recipe is easy—glance over your pantry, and you’ll find the perfect “monster parts” to craft your own edible creature. Whether it’s for a quick fright night snack or a centerpiece for your haunted table, these burgers bring the celebration to life with laughter and a little mess. Enjoy the spooky season with a dish everyone will remember.

  • Spooky Delights: Halloween Jack-o’-Lantern Stuffed Peppers

    Spooky Delights: Halloween Jack-o’-Lantern Stuffed Peppers

    Every October, I find myself drawn into the charming chaos of Halloween preparations. But this year, I wanted to do something a bit more unexpected—something that combines the playful spirit of carving pumpkins with a hearty, savory twist. That’s how the idea of Jack-o’-Lantern Stuffed Peppers was born, turning a conventional dish into a festive masterpiece.

    Imagine fiery orange peppers carved with little faces, their insides filled with a fragrant, cheesy mixture that melts in your mouth. This approach lets me embrace the season’s creativity, turning ordinary ingredients into edible art. Plus, these peppers make a great conversation starter at any Halloween gathering, blending fun with flavor seamlessly.

    Jack-o’-Lantern Stuffed Peppers

    This dish features vibrant orange bell peppers carved with miniature faces, filled with a cheesy, fragrant mixture. The peppers are baked until tender and the cheese is bubbly, resulting in an eye-catching and flavorful savory presentation that captures the festive spirit of Halloween.
    Prep Time 20 minutes
    Cook Time 30 minutes
    Total Time 50 minutes
    Servings: 4
    Course: Main Course
    Cuisine: American
    Calories: 250

    Ingredients
      

    • 4 large bell peppers preferably orange for a festive look
    • 1 cup cooked rice can use white or brown rice
    • 1 cup shredded cheese cheddar or mozzarella
    • 1/2 cup diced cooked chicken or beans for added protein
    • 1 small onion finely chopped
    • 2 cloves garlic minced
    • 2 tablespoons olive oil
    • to taste salt and pepper for seasoning

    Equipment

    • Chef’s Knife
    • Spoon
    • Baking Dish
    • Mixing bowl

    Method
     

    1. Preheat the oven to 375°F (190°C). Lightly grease a baking dish.
    2. Slice off the tops of the bell peppers and carefully scoop out the seeds and membranes, creating a hollow shell suitable for stuffing.
    3. Use a small knife or paring knife to carve playful faces into each pepper, turning them into mini jack-o’-lanterns, taking care not to puncture the outer shell.
    4. Heat olive oil in a skillet over medium heat, then sauté the chopped onion and minced garlic until fragrant and translucent, about 3-4 minutes.
    5. Add the cooked rice and diced chicken (or beans) to the skillet, stirring to combine and warm through.
    6. Stir in shredded cheese and season with salt and pepper, mixing until the cheese melts into a creamy filling.
    7. Spoon the cheese mixture into each carved pepper, pressing gently to fill completely and mound slightly at the top.
    8. Place the stuffed peppers upright in the prepared baking dish, ensuring they are stable.
    9. Bake in the preheated oven until the peppers are tender and slightly charred at the edges, about 30 minutes.
    10. Remove from oven and let cool slightly; the peppers will be hot and the cheese gooey.
    11. Serve the Jack-o’-Lantern stuffed peppers warm, allowing the carved faces and cheesy filling to shine as a festive, savory centerpiece.

    Notes

    Feel free to customize the faces with smaller peppers or skin-safe markers for added fun.

    Staging these peppers on your table isn’t just about the visual impact; their smoky aroma will tease your senses even before the first bite. They’re perfect for those crisp fall nights, offering a comforting yet playful experience. As you carve and fill, remember that the joy of Halloween is in the little details—and these peppers capture that spirit beautifully.

    So, whether you’re hosting a spooky dinner or just craving some seasonal cheer, these stuffed peppers bring everything you love about Halloween into one delightful bite. Enjoy the process of creating your spooky, cheesy masterpieces—each one a tiny celebration of the season’s charm.