Blog

  • Chill Out with the Ultimate Vanilla Slushie: An Unexpected Winter Delight

    Chill Out with the Ultimate Vanilla Slushie: An Unexpected Winter Delight

    When the weather turns crisp and chilly, most of us reach for warm drinks or hearty soups. But sometimes, I crave something unexpectedly refreshing, even in the heart of winter. That’s when my vanilla slushie becomes my secret weapon—an icy treat that feels like a cool breeze on a snowy day.

    What makes this vanilla slushie so special isn’t just the smooth, creamy vanilla flavor but how it transforms ordinary ingredients into a frosty escape. I love how simple ingredients like milk, sugar, and vanilla bean come together with a splash of ice to create a luscious, chilled dessert. It’s perfect for those moments when you need a quick, nostalgic burst of freshness that doesn’t require heating up the kitchen.

    WHY I LOVE THIS RECIPE?

    • The aroma of vanilla that instantly transports me to lazy summer afternoons.
    • The icy texture that cools my senses and keeps me coming back for more.
    • It’s a playful twist on traditional frozen drinks, perfect for all seasons.
    • It makes me feel like I’ve brought a mini ice cream shop into my own home.
    • Simple to customize with add-ins like chocolate chips or a drizzle of caramel.

    AVOID MY DISASTER (You’re Welcome)

    • FORGOT to chill the milk overnight? The slushie melts too fast—use frozen milk cubes instead.
    • DUMPED too much vanilla extract? Overpowering flavor, dilute with more milk or ice.
    • OVER‑TORCHED the vanilla bean mixture? It turns bitter. Keep the heat low and stir gently.
    • MISSED the ice step? It’s a liquid mess—add ice gradually and blend thoroughly for perfect slush.

    QUICK FIXES THAT SAVE YOUR DAY

    • When the mixture is too thin, SPLASH in more ice and blend again until frosty.
    • Patch by adding a spoonful of sweetened condensed milk for richer flavor and creaminess.
    • Shield from melting: transfer to a chilled glass and serve immediately for best texture.
    • When flavor lacks punch, STIR in a splash of vanilla extract or a sprinkle of vanilla sugar.
    • Freeze for five minutes if too runny, then re-blend for an ideal slush consistency.
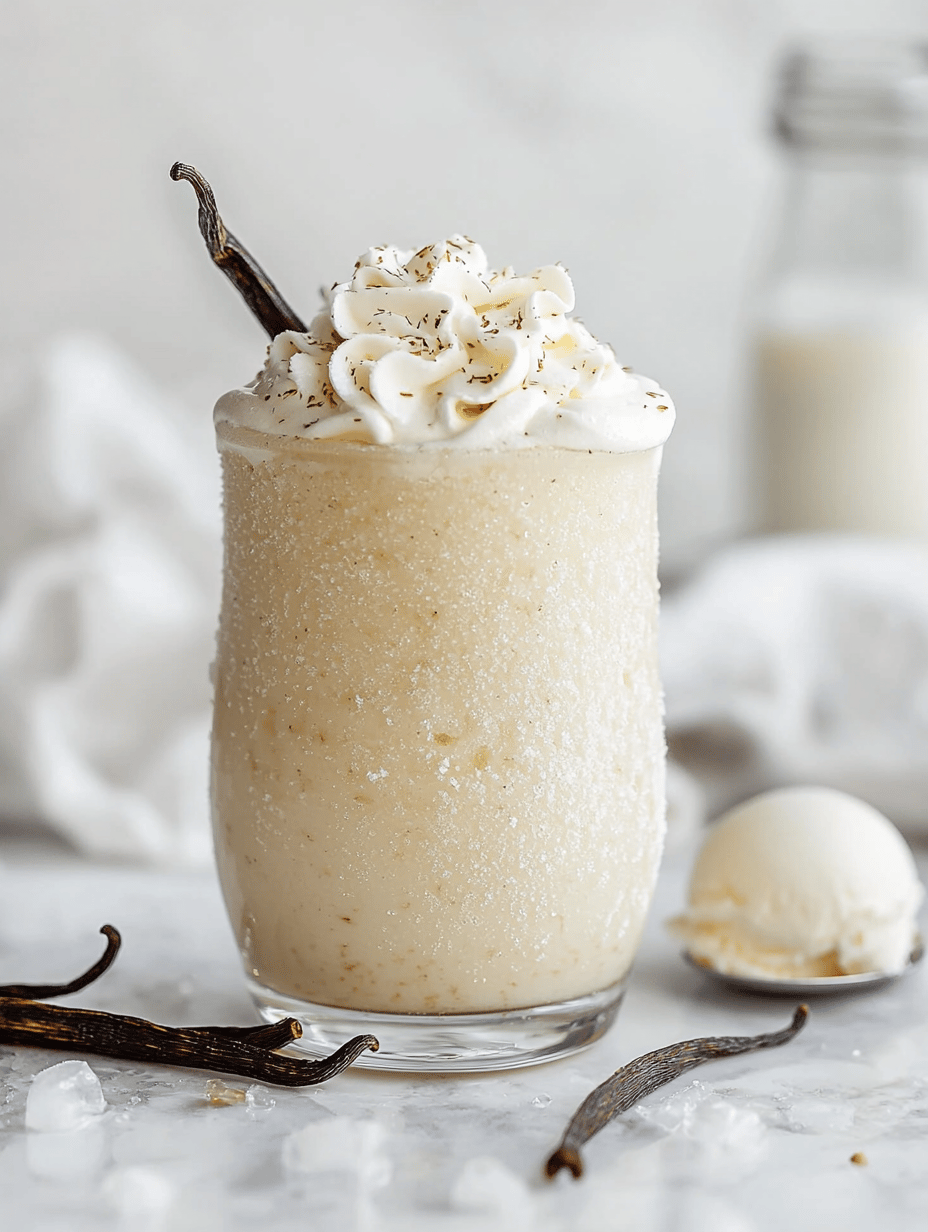
    Vanilla Slushie

    This vanilla slushie is an icy cold beverage made with milk, sugar, vanilla bean, and ice, blended until smooth and frosty. It has a creamy texture with a soft, snow-like appearance, perfect for a quick refreshing treat or dessert. The dish combines simple ingredients transformed through blending into a luscious, frozen drink with a rich vanilla aroma.
    Prep Time 10 minutes
    Total Time 10 minutes
    Servings: 2
    Course: Main Course
    Cuisine: none
    Calories: 130

    Ingredients
      

    • 1 cup milk preferably chilled or overnight frozen into ice cubes
    • 2 tablespoons granulated sugar adjust to taste
    • 1 vanilla bean vanilla bean split and scraped for seeds
    • 1 cup ice or more, as needed

    Equipment

    • Blender
    • Measuring cups and spoons

    Method
     

    1. Pour the milk into the blender and add the sugar. Blend on low until the sugar dissolves completely and the mixture is smooth. This creates a sweet, vanilla-infused base.
    2. Slice open the vanilla bean and scrape out the tiny seeds. Add the seeds and the split bean pod into the blender. Blend briefly to release the vanilla aroma into the milk mixture.
    3. Add the ice to the blender, filling it to the top. Secure the lid tightly to prepare for blending.
    4. Blend on high speed for about 30-45 seconds until the mixture turns icy, creamy, and uniformly frosty. You should see a fluffy, snow-like texture forming.
    5. Stop the blender and check the consistency. If it’s too thin, add a few more ice cubes and blend again until your desired frosty texture is achieved.
    6. Pour the thick, chilly slushie into glasses. The mixture should look creamy with a delicate, snow-like appearance.
    7. Serve immediately for the best frosty texture, or transfer to a chilled container and enjoy later for a softer, more icelike experience.

    Notes

    You can customize this slushie by adding chocolate chips, caramel drizzle, or a splash of your favorite liqueur for an adult twist. For a richer flavor, use full-fat milk or add a dollop of whipped cream on top before serving.

    This vanilla slushie offers a surprising coolness when you want a break from hot-weather treats, perfect for any season. Its silky vanilla flavor combined with icy crunch makes each sip feel like a tiny celebration. Whether for a quiet afternoon or unexpected guests, it’s a go-to refreshment that’s easy to whip up.

    Even on the busiest days, this simple recipe gives me a moment of joy. The best part is how adaptable it is—add a splash of your favorite liqueur or toss in some berries for a burst of color. It’s an uncomplicated reminder that sometimes, the most satisfying treats are the simplest ones.
  • Unexpected Twist on Turkey Chili: The Cinnamon Secret

    Unexpected Twist on Turkey Chili: The Cinnamon Secret

    My obsession with chili started in childhood, but I recently realized I’ve been missing a key flavor element. This recipe adds an unexpected dash of cinnamon, transforming traditional turkey chili into a warm, intriguing dish. It’s perfect for cozy evenings when you want comfort with a twist.

    Using ground turkey makes the dish lighter, yet packed with savory richness. I love how the cinnamon mingles with smoky paprika and cumin, creating a complex aroma that fills the kitchen. It’s a surprising upgrade you might not see coming, but will eagerly crave again and again.

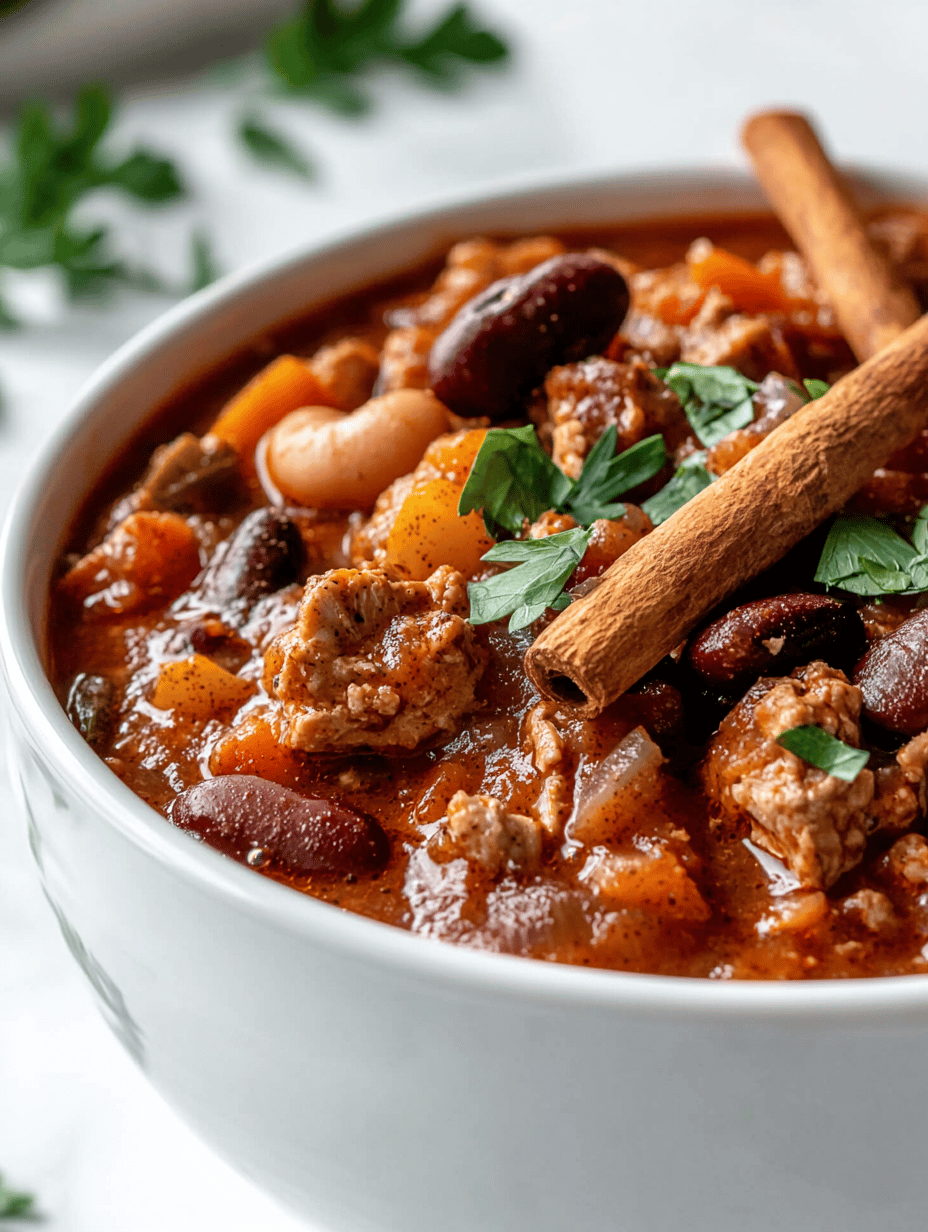
    Turkish-Style Cinnamon Turkey Chili

    This chili combines ground turkey with smoky spices and a dash of cinnamon, cooked through sautéing and simmering methods. The dish develops a hearty, slightly thickened texture with fragrant aroma and vibrant flavors. The final appearance is a chunky, richly colored chili with visible spices and tender meat.
    Prep Time 15 minutes
    Cook Time 30 minutes
    Total Time 45 minutes
    Servings: 4
    Course: Main Course
    Cuisine: Turkish
    Calories: 290

    Ingredients
      

    • 1 tablespoon olive oil for sautéing
    • 1 small onion finely chopped
    • 2 cloves garlic minced
    • 1 pound ground turkey lean
    • 1 teaspoon smoked paprika
    • 1/2 teaspoon cumin
    • 1/4 teaspoon cinnamon adds a warm depth
    • 1 can (14 oz) diced tomatoes undrained
    • 1 cup chicken or vegetable broth
    • 1 can (15 oz) kidney beans drained and rinsed
    • to taste salt and pepper for seasoning

    Equipment

    • Large skillet or Dutch oven
    • Wooden spoon or spatula

    Method
     

    1. Heat a large skillet over medium heat and add the olive oil, allowing it to warm until shimmering.
    2. Add the finely chopped onion to the skillet and sauté until translucent and fragrant, about 3-4 minutes. The onions should soften and become slightly golden around the edges.
    3. Stir in the minced garlic and cook for another minute until fragrant, the garlic becoming fragrant and slightly golden.
    4. Add the ground turkey to the skillet, breaking it apart with a spoon. Cook until it is browned and cooked through, about 5-7 minutes, stirring occasionally.
    5. Sprinkle in the smoked paprika, cumin, and cinnamon, stirring well to coat the meat evenly with the spices. Cook for another minute until the spices release their aroma.
    6. Pour in the diced tomatoes with their juices and the broth, stirring to combine all ingredients. Bring to a gentle simmer.
    7. Reduce the heat slightly and let the chili simmer uncovered for 20 minutes, stirring occasionally, until the mixture thickens and flavors meld.
    8. Add the drained kidney beans to the skillet and stir to incorporate. Cook for another 5 minutes to heat beans through.
    9. Season with salt and pepper to taste, stirring again to distribute the seasoning evenly.
    10. Remove from heat once the chili has thickened to your desired consistency and the flavors are well combined.
    11. Serve hot, garnished with your favorite toppings if desired, and enjoy the warm, aromatic chili with a hint of cinnamon.

    Whether you’re serving it for a weeknight meal or feeding a crowd, this chili offers warmth and depth with a hint of surprise. It’s a reminder that small changes—like a pinch of cinnamon—can make a familiar dish feel new and exciting. Plus, it’s quick enough for busy days and bold enough to impress.

    Now, whenever I make this chili, I deliberately double the batch. Packing leftovers into containers means I get to enjoy that fragrant, spicy aroma all over again. It’s a simple way to bring a little joy and anticipation to the busiest of days.

  • Spooktacular Swirl: The Ultimate Vampire Punch for Halloween

    Spooktacular Swirl: The Ultimate Vampire Punch for Halloween

    As Halloween approaches, I love diving into the ritual of creating eyeball-worthy drinks that stir both nostalgia and chaos. This Vampire Punch with its vibrant red hue is often mistaken for mere juice, but it’s the potion of choice for midnight mischief. The secret ingredient, a splash of black cherry juice, transforms a simple red drink into a bubbling, sinister concoction.

    What makes this recipe stand out isn’t just its striking appearance but how effortless it is to throw together. Perfect for parties, it’s a captivating centerpiece that sparks giggles and gasps. Keep a straw handy, and watch your guests indulge in their sweet, creepy, crimson delight.

    Vampire Punch

    Vampire Punch is a vibrant red beverage with a dark splash of black cherry juice, creating a bubbling, sinister-looking drink. It combines fruit juices and soda to produce a sweet, effervescent beverage with a striking appearance suitable for Halloween parties. The final drink has a thick, ruby-red color with a slightly foamy top, resembling a bubbling potion.
    Prep Time 10 minutes
    Total Time 10 minutes
    Servings: 8
    Course: Main Course
    Cuisine: Halloween
    Calories: 150

    Ingredients
      

    • 2 cups red fruit punch chilled
    • 1/2 cup black cherry juice adds a dark, bubbling effect
    • 1 liter lemon-lime soda for fizz and effervescence
    • to taste ice cubes for chilling and presentation

    Equipment

    • Large pitcher
    • Measuring cups and spoons

    Method
     

    1. Pour the chilled red fruit punch into a large pitcher, filling it about three-quarters full.
    2. Slowly add the black cherry juice into the punch, watching it swirl and create dark, bubbling streaks throughout the red liquid.
    3. Gently pour the lemon-lime soda into the mixture, allowing it to fizz and bubble up, creating a lively, effervescent effect.
    4. Add ice cubes to the pitcher to chill the drink further and enhance the visual appeal with icy bubbles on top.
    5. Stir gently with a spoon to combine all ingredients without flattening the fizz, ensuring the colors and bubbles are evenly distributed.
    6. Serve the Vampire Punch in glasses with additional ice if desired, and watch for the bubbling, sinister red appearance that looks like a bubbling potion.

    Notes

    For extra creepiness, add gummy eyes or floating plastic spiders for decoration.
    This Vampire Punch is more than just a beverage; it’s a conversation starter. It captures the thrill of Halloween with every pour and sip. Plus, it’s versatile enough to add a bit of dry ice for extra fog or to swap out fruit juices to match your spooky theme.

    So gather your ingredients and prepare for a rush of chaos and delight. This punch will turn your gathering into a memorable, blood-red spectacle. Happy haunting, and enjoy every gory, glowing sip.

  • The Secret Ingredient That Changes Pumpkin Bread Forever

    The Secret Ingredient That Changes Pumpkin Bread Forever

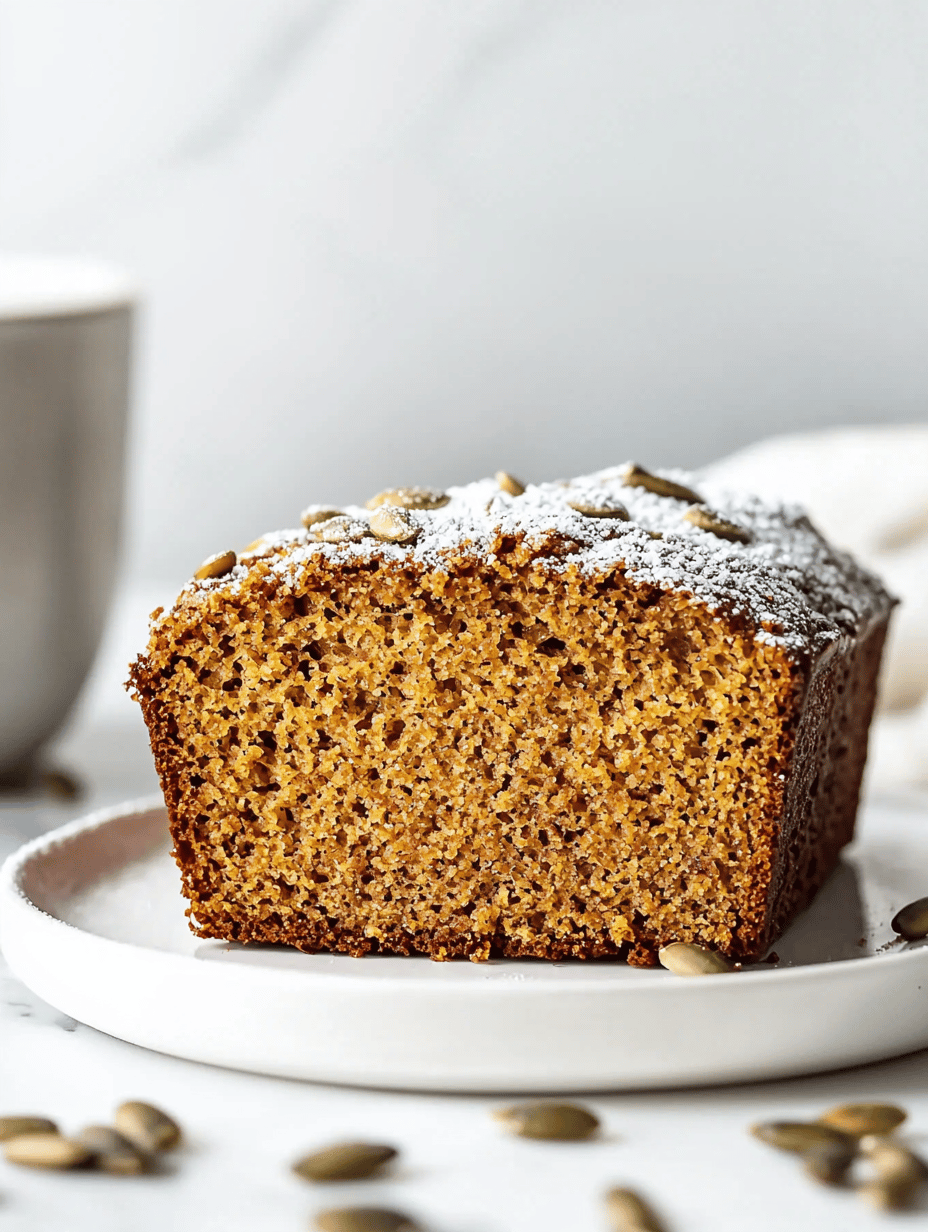
    Baking a pumpkin bread is usually about warm spices and moist bites. But today, I want to share an unusual twist that adds a surprising depth of flavor: roasted pumpkin seeds. These tiny crunchies bring a smoky, nutty undertone that transforms ordinary into extraordinary.

    As the aroma of roasting seeds fills my kitchen, I’m reminded of autumn adventures – cozy mornings and leaf-strewn walks. Incorporating these seeds into the bread creates a layered texture that’s both satisfying and playful. It’s an upgrade that makes each bite more than just sweet pumpkin comfort.

    Roasted Pumpkin Seed Pumpkin Bread

    This pumpkin bread features a moist crumb flavored with warm spices and studded with roasted pumpkin seeds. The seeds impart a smoky nutty flavor and a crunchy texture, creating a layered and visually appealing loaf. Baked until golden brown, the bread offers a tender interior contrasted with a crisp crust.
    Prep Time 15 minutes
    Cook Time 55 minutes
    Total Time 1 hour 10 minutes
    Servings: 8
    Course: Main Course
    Cuisine: American
    Calories: 220

    Ingredients
      

    • 1 1/2 cups all-purpose flour
    • 1 cup granulated sugar
    • 1/2 teaspoon salt
    • 1 1/2 teaspoons baking soda
    • 2 teaspoons ground cinnamon
    • 1/2 teaspoon ground nutmeg
    • 2 large eggs lightly beaten
    • 3/4 cup vegetable oil
    • 1 1/2 cups pureed pumpkin unsweetened
    • 1 cup roasted pumpkin seeds roughly chopped

    Equipment

    • Mixing bowls
    • Loaf pan
    • Rubber spatula
    • Oven
    • Cooling rack

    Method
     

    1. Preheat the oven to 350°F (175°C) and grease a standard loaf pan.
    2. In a large mixing bowl, whisk together the flour, sugar, salt, baking soda, cinnamon, and nutmeg until well combined and the spices are evenly distributed.
    3. In a separate bowl, beat the eggs lightly and then stir in the vegetable oil and pumpkin puree until the mixture is smooth and integrated.
    4. Pour the wet mixture into the dry ingredients and fold gently with a spatula until just combined, being careful not to overmix.
    5. Fold in the chopped roasted pumpkin seeds, ensuring they are evenly distributed throughout the batter.
    6. Pour the batter into the prepared loaf pan, smoothing the top with a spatula for an even surface.
    7. Bake for 55 minutes, or until a toothpick inserted into the center comes out clean and the top is golden brown.
    8. Remove the bread from the oven and let it cool in the pan for about 10 minutes before transferring to a wire rack to cool completely.
    9. Slice the bread once cooled, revealing a moist interior speckled with crunchy pumpkin seeds and a fragrant spiced aroma.
    10. Enjoy slices of this pumpkin bread with your favorite spread or simply on their own to savor the complex flavors and textures.
    This pumpkin bread isn’t just a treat; it’s a story of transforming simple fall ingredients into something memorable. Whether shared with friends or enjoyed alone with a cup of tea, it echoes the essence of cozy season indulgence.

    The slight crunch and rich aroma make it a perfect companion for chilly mornings or afternoon coffee breaks. Baking this loaf feels like a warm hug, a little celebration of fall’s flavors, and a reminder to find joy in simple pleasures.

  • Tropical Twist: The Pineapple Slushie That Transports You

    Tropical Twist: The Pineapple Slushie That Transports You

    Few drinks can conquer a sweltering day quite like a chilled pineapple slushie. Its bright, tangy aroma promises a burst of freshness that immediately awakens the senses. I started making this during restless summer weekends, hoping to recapture childhood beach vacations through its sweet simplicity.

    What makes this recipe unlike the typical fruit smoothie is its icy blend that transforms ripe pineapple into a frosty delight. It’s almost like biting into a frozen piece of summer itself, only smoother and creamier. Perfect for spontaneous gatherings or quiet moments when only a cool escape will do.

    WHY I LOVE THIS RECIPE?

    • It costs less than a fancy coffee but delivers a mini tropical vacation.
    • The aroma alone sparks a rush of nostalgic beach memories.
    • It’s surprisingly easy to customize with coconut or lime for different vibes.
    • My kids scream when I serve this—love that messy, joyful chaos.
    • It’s a flash of sunshine on even the gloomiest days.

    Chilled Pineapple Slushie

    This pineapple slushie is made by blending ripe pineapple with ice to create a frozen, frosty beverage. The mixture results in a smooth, icy texture that resembles a summertime treat, with a bright, tangy flavor and a refreshing appearance.
    Prep Time 10 minutes
    Total Time 10 minutes
    Servings: 2
    Course: Main Course
    Cuisine: Tropical
    Calories: 150

    Ingredients
      

    • 2 cups fresh pineapple chunks ripe and sweet
    • 1 cup ice cubes
    • 1/4 cup sweetened condensed milk optional for creaminess

    Equipment

    • Blender
    • Knife

    Method
     

    1. Prepare the pineapple by cutting it into small, manageable chunks to help the blender process smoothly.
    2. Add the pineapple chunks and ice cubes into the blender, ensuring an even distribution for smooth blending.
    3. Pour in the sweetened condensed milk if you’re using it; this adds richness and a creamy texture.
    4. Blend everything on high speed until the mixture is completely smooth and frosty, with no large ice pieces remaining.
    5. Stop the blender and check the texture—if it’s too thick, add a little water or juice and blend again to loosen it slightly.
    6. Pour the slushie into glasses, and if desired, garnish with a small pineapple wedge or a sprig of mint for an inviting presentation.

    This pineapple slushie is more than just a summer refresher; it’s a doorway to carefree moments. The simple act of blending pineapple, ice, and a touch of sweetness reminds me of lazy weekends that stretch endlessly. It’s a small comfort that continues to brighten days in the busiest seasons.

    Whenever the heat hits hard, I know I can turn to this chilled concoction. Its fresh, zesty flavor clears the mind and revives the spirit. Sometimes, the most joyful recipes are born from the simplest ingredients and spontaneous cravings.

  • The Secret Ingredient in My Watermelon Slushie Groove

    The Secret Ingredient in My Watermelon Slushie Groove

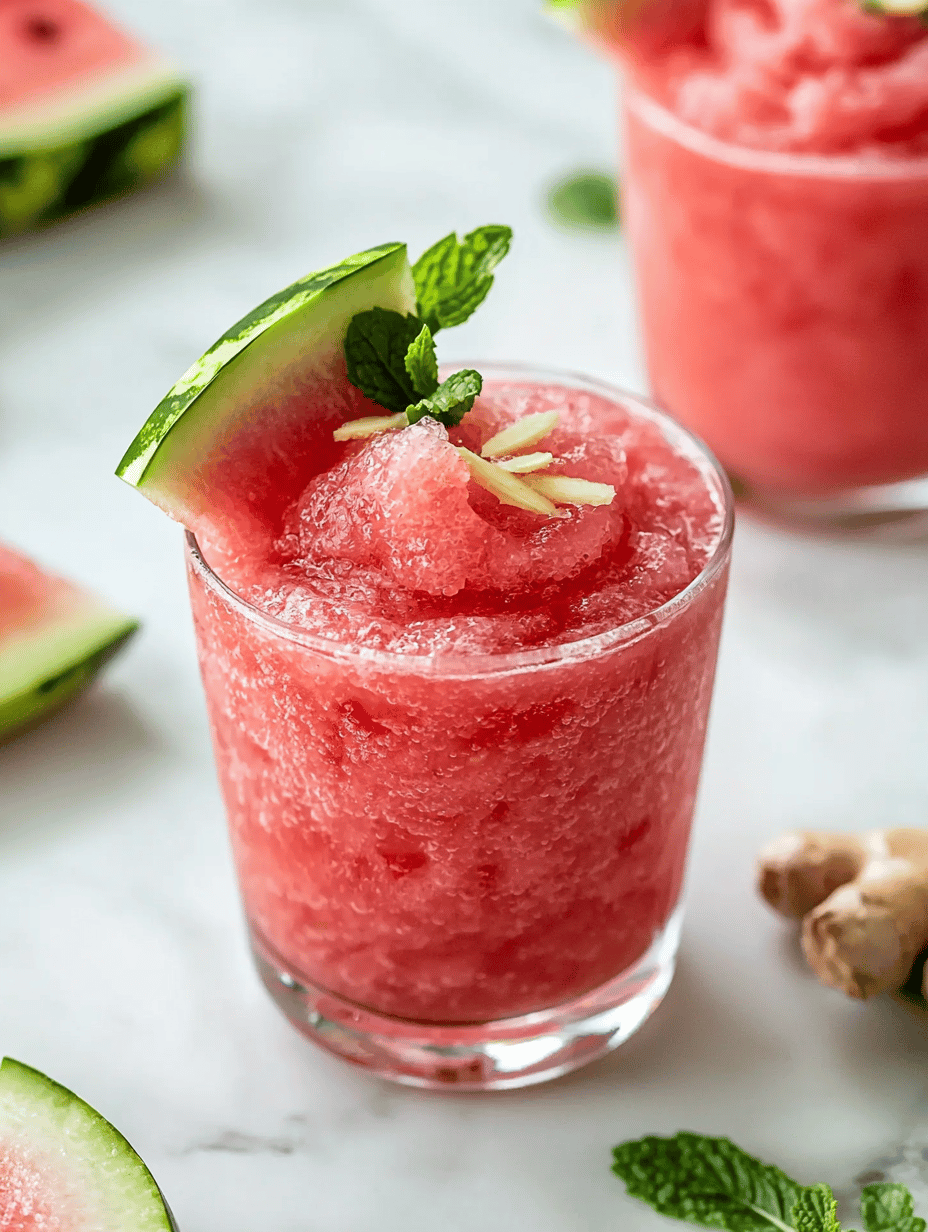
    When the summer heat hits hard, I turn to a unexpectedly tart spin on classic watermelon that I stumbled upon by accident. It’s not just about hydration – it’s about an undeniable burst of nostalgia wrapped in icy delight. I discovered that adding a touch of ginger not only enhances the freshness but also awakens your senses with its spicy kick.

    This recipe is a personal treasure, especially for those sweltering evenings where the usual just won’t cut it. It’s incredibly simple, yet it transforms a humble fruit into a symphony of chilly, sweet, and spicy flavors. Plus, the vibrant pink color makes it almost too pretty to sip.

    Ginger Watermelon Slush

    This refreshing beverage combines ripe watermelon blended into a smooth, icy texture with a hint of fresh ginger for a spicy kick. The mixture results in a vibrant pink, chilled drink that is both hydrating and flavorful, perfect for hot summer days.
    Prep Time 10 minutes
    Total Time 10 minutes
    Servings: 4
    Course: Main Course
    Cuisine: Fusion
    Calories: 150

    Ingredients
      

    • 4 cups fresh watermelon chunks seedless if possible
    • 1 inch fresh ginger root peeled and grated
    • 2 tablespoons honey optional, for extra sweetness

    Equipment

    • Blender
    • Knife
    • Cutting board
    • Measuring Cups

    Method
     

    1. Slice the fresh ginger root into thin pieces and grate it finely to release more flavor.
    2. Add the watermelon chunks to the blender, ensuring they are evenly distributed.
    3. Drop the grated ginger into the blender with the watermelon, allowing the spicy scent to start filling the air.
    4. Optional: pour in the honey to sweeten the mixture, balancing the tartness with a touch of sweetness.
    5. Secure the lid onto the blender and blend on high until the mixture is completely smooth and frosty, about 30-45 seconds.
    6. Pour the chilled watermelon slush into glasses, and see the vibrant pink color glow through the glass.
    7. Serve immediately with a straw, and enjoy the icy, spicy-sweet burst of flavor.

    This watermelon slushie isn’t just a recipe; it’s a little summer escape filled with the scent of ripe melons and zesty ginger. It’s perfect for backyard barbecues, lazy afternoons, or whenever you need a quick cold pick-me-up. Making it reminds me that simple ingredients can create moments of pure refreshment.

    As the days grow longer and hotter, this is the cool treat I keep coming back to. It’s a reminder to slow down and genuinely enjoy the little things – a splash of sweetness, a splash of spice, and a moment of cool bliss.

  • Transform Your Mornings with this Cozy Pumpkin Oatmeal Twist

    Transform Your Mornings with this Cozy Pumpkin Oatmeal Twist

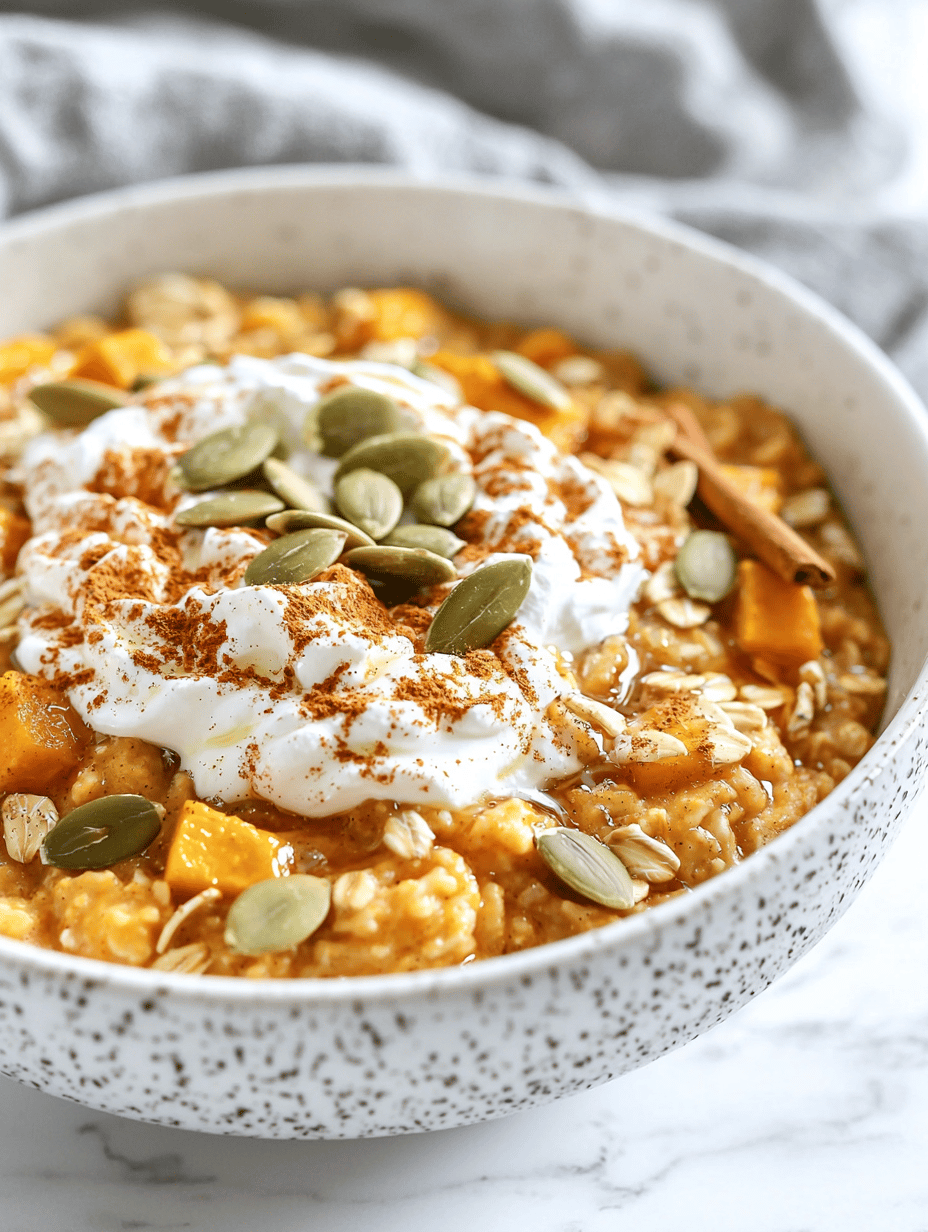
    Imagine waking up to the comforting aroma of spiced pumpkin blending into steaming oats. This recipe transforms simple breakfast into a seasonal adventure, with just a few secret ingredients that elevate the usual morning routine. It’s perfect for those crisp fall days when you crave a bowl that’s both hearty and nostalgic.

    Using pumpkin not only adds a vibrant color but also a subtle sweetness that pairs beautifully with warm cinnamon and nutmeg. The texture is velvety, with bites of softened oats and tender pumpkin chunks, making every spoonful a tiny celebration. It’s a breakfast choice that feels indulgent yet wholesome, ideal for cozy mornings at home.

    Spiced Pumpkin Oatmeal

    This pumpkin oatmeal combines hearty oats with smooth pumpkin purée and warming spices, resulting in a velvety, flavorful porridge. The dish features tender oats infused with cinnamon and nutmeg, topped with soft pumpkin chunks for added texture and sweetness, creating a cozy breakfast with a vibrant appearance.
    Prep Time 5 minutes
    Cook Time 10 minutes
    Total Time 15 minutes
    Servings: 2
    Course: Main Course
    Cuisine: American
    Calories: 250

    Ingredients
      

    • 1 cup old-fashioned rolled oats preferably quick-cooking for faster results
    • 2 cups milk dairy or non-dairy alternative
    • ½ cup canned pumpkin purée unsweetened
    • 1 tablespoon brown sugar or maple syrup for extra flavor
    • 1 teaspoon ground cinnamon warm and aromatic
    • ¼ teaspoon ground nutmeg adds depth of flavor
    • ½ cup pumpkin chunks cooked and tender
    • pinch salt to enhance flavors

    Equipment

    • Saucepan
    • Wooden spoon

    Method
     

    1. Combine the oats, milk, pumpkin purée, brown sugar, cinnamon, nutmeg, and salt in a saucepan.
    2. Bring the mixture to a gentle simmer over medium heat, stirring frequently as it starts to thicken and become fragrant.
    3. Reduce the heat to low and continue cooking, stirring occasionally, until the oats are soft and the mixture is creamy, about 5-7 minutes.
    4. Add the pumpkin chunks to the porridge and fold them gently into the mixture to warm and distribute evenly.
    5. Cook for another 2-3 minutes until the pumpkin is heated through and the oats are tender.
    6. Remove the saucepan from heat and let the oatmeal sit briefly to thicken further before serving.
    7. Spoon the creamy pumpkin oatmeal into bowls and enjoy hot, topped with seeds or a drizzle of honey if desired.
    This pumpkin oatmeal recipe is more than just a seasonal treat; it’s a comforting ritual that keeps me grounded as the seasons change. It’s easy to customize with your favorite toppings, making each bowl uniquely yours.

    As the leaves turn and the air gets crisper, this warm bowl offers a moment of calm and sweetness. Plus, knowing it’s packed with fiber and wholesome ingredients makes mornings feel just a little easier to face.

  • The Joyful Art of Making Peach Crisp in Weird Times

    The Joyful Art of Making Peach Crisp in Weird Times

    As the summer sun dips lower, I find myself craving a dessert that connects me back to childhood picnics and lazy afternoons. But with a twist: I make this peach crisp in an unconventional way that surprises everyone at the table. It’s about turning a simple fruit into a memory, using pantry staples and a little bit of chaos in the kitchen.

    This recipe isn’t just about peaches; it’s about reclaiming those lazy summer days we’re missing right now. Each spoonful crackles with the warm sweetness of caramelized fruit and the comforting crunch of toasted oats. It’s a reminder that sometimes, the best moments come from improvising with what you have at hand.

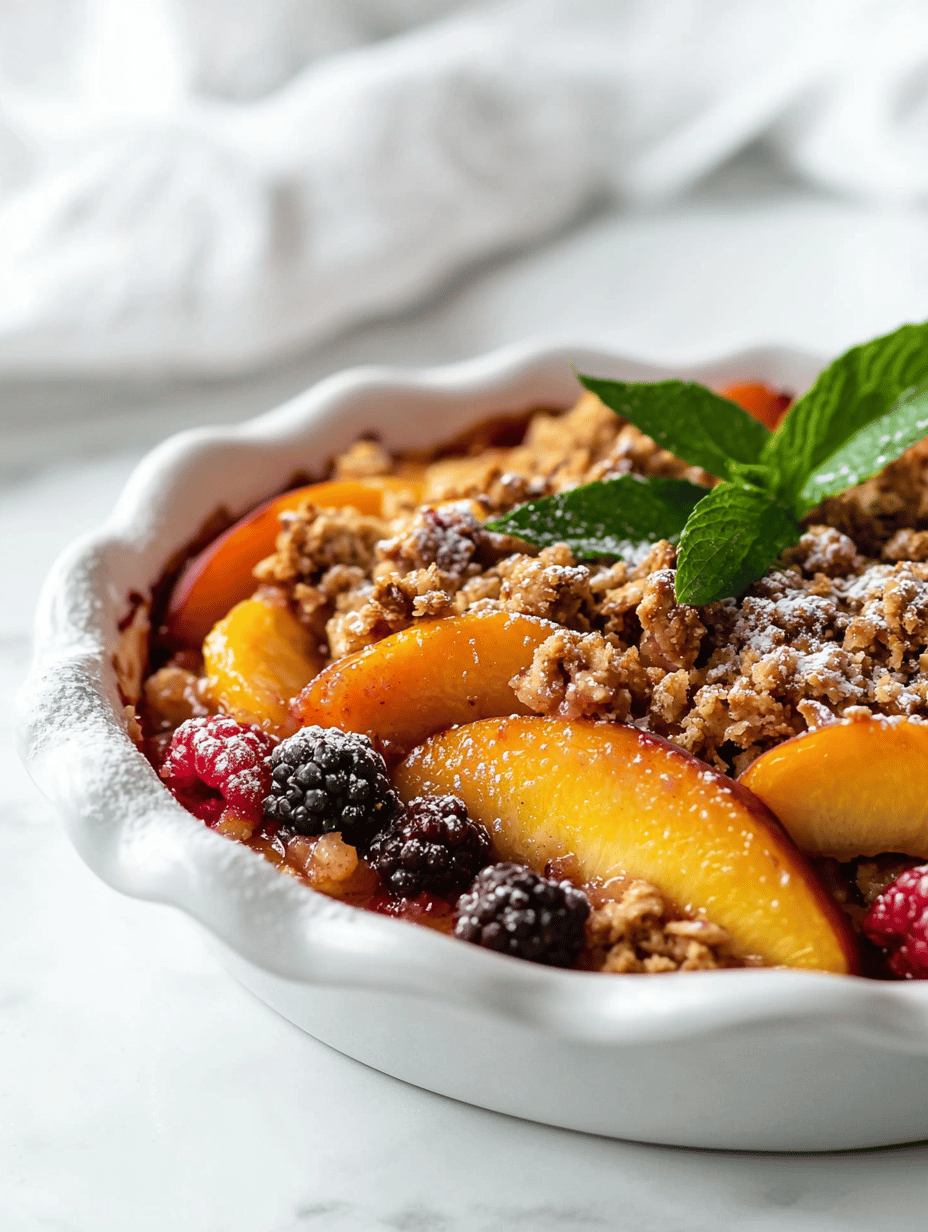
    Unconventional Peach Crisp

    This peach crisp features ripe peaches baked under a crunchy oat topping with caramelized notes. Key cooking methods include slicing, mixing, and baking, resulting in a tender fruit base topped with a golden, crispy crust that crackles with each spoonful.
    Prep Time 15 minutes
    Cook Time 35 minutes
    Total Time 50 minutes
    Servings: 4
    Course: Main Course
    Cuisine: American
    Calories: 250

    Ingredients
      

    • 4 cups fresh peaches peeled, pitted, and sliced
    • 1/2 cup brown sugar
    • 1 tablespoon lemon juice
    • 1/2 cup rolled oats
    • 1/3 cup all-purpose flour
    • 1/4 cup unsalted butter cold and cut into small pieces
    • 1/4 cup granulated sugar
    • 1/2 teaspoon cinnamon

    Equipment

    • Baking Dish
    • Mixing bowls

    Method
     

    1. Preheat your oven to 375°F (190°C) and grease a baking dish with butter or non-stick spray.
    2. In a large mixing bowl, gently toss the sliced peaches with lemon juice and half of the brown sugar until well coated. Spread the fruit evenly into the prepared baking dish.
    3. In a separate bowl, combine rolled oats, flour, remaining brown sugar, and cinnamon, stirring to blend.
    4. Add the cold, cubed butter to the dry mixture. Use a pastry cutter or your fingers to cut the butter into the mixture until it resembles coarse crumbs.
    5. Sprinkle the oat topping evenly over the peaches, ensuring full coverage to create a crunchy crust.
    6. Bake in the preheated oven for about 35 minutes, or until the topping is golden brown and the peaches are bubbling around the edges.
    7. Remove from oven, let cool slightly, and serve warm with ice cream or whipped cream if desired.
    Bake this peach crisp and let the aroma fill your home, a sweet reminder of seasonal bounty. It’s perfect for sharing, whether family or friends drop by unexpectedly or just for your own slow, savoring moments.

    This dish is a celebration of seasonal produce, a way to hold onto summer’s sweetness a little longer. Plus, it’s so easy that it encourages spontaneous baking sessions to lift your spirits in these unpredictable times.

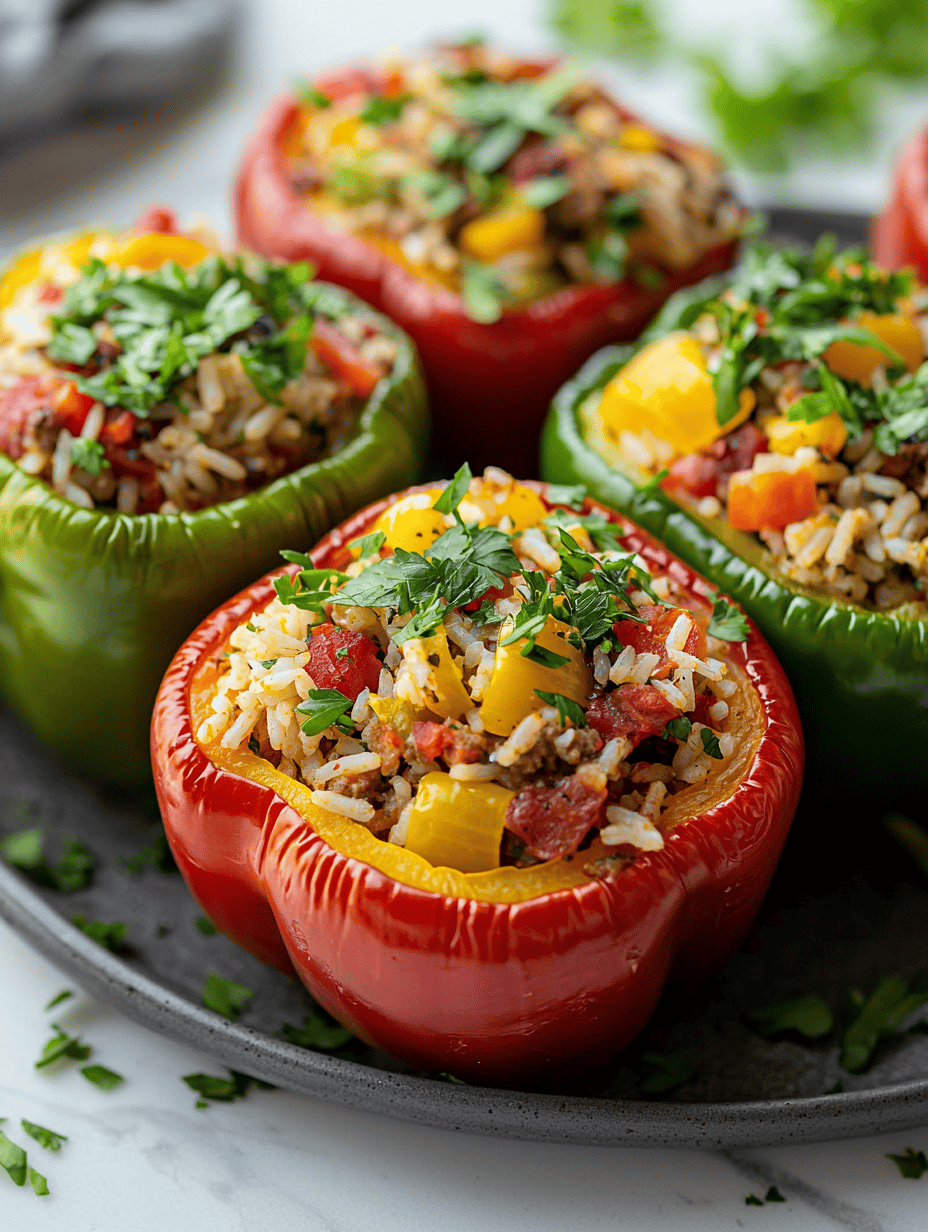
  • Unusual Stuffed Peppers with a Global Twist

    Unusual Stuffed Peppers with a Global Twist

    Stuffed peppers are classic comfort food, but I decided to give them an unexpected twist by incorporating flavors from around the world. Imagine the smoky warmth of paprika from Hungary paired with a tangy twist of preserved lemon, all nestled in tender bell peppers. This recipe started as a simple idea but quickly turned into a journey of discovery in my own kitchen.

    Every time I make these, I think about the stories behind each ingredient—how a pinch of saffron connects to Persian markets or how a dash of oregano recalls Mediterranean sunsets. The aroma alone can transport you. It’s like a mini world tour, right from your stovetop and dinner table.

    Global-Flavor Stuffed Peppers

    These stuffed peppers are baked with a filling that combines smoky paprika, tangy preserved lemon, and aromatic herbs, creating a dish with tender peppers and flavorful, slightly creamy filling. The peppers are halved, stuffed, and baked until bursting with color and softness, resulting in a visually appealing and hearty meal.
    Prep Time 20 minutes
    Cook Time 30 minutes
    Total Time 50 minutes
    Servings: 4
    Course: Main Course
    Cuisine: Global
    Calories: 250

    Ingredients
      

    • 4 large bell peppers halved and seeded
    • 1 cup cooked rice white or brown rice, cooled
    • 1/2 cup preserved lemon finely chopped
    • 2 teaspoons smoked paprika
    • 2 cloves garlic minced
    • 2 tablespoons olive oil
    • 1/4 cup fresh parsley chopped
    • to taste salt and pepper
    • 1 cup shredded cheese optional, such as feta or mozzarella

    Equipment

    • Baking Dish
    • Chef’s Knife
    • Cutting board
    • Mixing bowl
    • Spoon or spatula

    Method
     

    1. Preheat your oven to 375°F (190°C). Rinse the bell peppers, then carefully cut them in half lengthwise and remove the seeds and membranes.
    2. In a mixing bowl, combine the cooked rice, chopped preserved lemon, smoked paprika, minced garlic, chopped parsley, and a pinch of salt and pepper. Drizzle with olive oil and stir everything together until evenly mixed; this creates the flavorful filling.
    3. Spoon the filling generously into each bell pepper half, pressing down slightly to pack it in and ensure the peppers are well filled.
    4. Place the stuffed peppers in a baking dish, arranging them so they sit upright comfortably.
    5. If using cheese, sprinkle it over the top of each stuffed pepper for a cheesy, browned finish.
    6. Bake in the preheated oven for about 25-30 minutes, or until the peppers are tender and the filling is heated through with a slightly golden top if cheese was added.
    7. Remove from the oven and let cool for a few minutes. Serve warm, garnished with extra chopped parsley if desired.

    Notes

    Feel free to customize the filling with additional herbs or spices to suit your taste. Using different cheeses can also add different flavor profiles.

    This dish is a celebration of vibrant flavors and comforting textures, perfect for a cozy dinner or a small gathering. The versatility allows you to adapt with what’s in your pantry, making each batch uniquely yours. It’s a reminder that even familiar favorites can be reimagined with a little creativity and a dash of adventure.

    Sharing this recipe feels like sharing a secret map to new culinary territories. It’s fulfilling to see loved ones react to the unexpected layers of taste—smoky, citrusy, herby. Sometimes, a simple plate can spark the most memorable conversations and moments around the table.

  • Spooky Sweetness: Halloween Ghost Brownies with a Twist

    Spooky Sweetness: Halloween Ghost Brownies with a Twist

    Halloween is the perfect time to embrace a little chaos in the kitchen. Instead of plain brownies, I love transforming them into ghostly figures that look as playful as they taste. This recipe takes a simple chocolate treat and adds a spooky twist that’s sure to delight kids and adults alike.

    What makes these ghost brownies special is how they combine a nostalgic dessert with a touch of artistic flair. The creamy icing and googly eyes give each piece a personality, making dessert time the highlight of any Halloween gathering. Plus, they’re surprisingly quick to whip up, even when Halloween chaos is at its peak.

    Ghost Brownies

    Ghost brownies are soft, fudgy chocolate treats shaped into playful ghost figures for Halloween. They are decorated with creamy icing and googly eyes, giving them an adorable and spooky appearance. The final result is a moist, dense brownie with a smooth surface and cute ghostly faces.
    Prep Time 15 minutes
    Cook Time 25 minutes
    Total Time 40 minutes
    Servings: 12
    Course: Main Course
    Cuisine: Halloween
    Calories: 150

    Ingredients
      

    • 1 box store-bought brownie mix
    • 0.5 cup vegetable oil as directed on the brownie box
    • 3 eggs eggs
    • 1 cup vanilla frosting from a can or homemade
    • to taste black food coloring or melted chocolate for piping features
    • 12 googly eyes decorative googly eyes

    Equipment

    • Mixing bowls
    • 9×13 inch Baking Pan
    • Parchment paper
    • Whisk
    • Spatula
    • Piping bag or plastic sandwich bag

    Method
     

    1. Preheat your oven to 350°F (175°C). Line the baking pan with parchment paper to prevent sticking.
    2. Mix the brownie mix with eggs and vegetable oil in a large bowl until smooth and shiny, about 2-3 minutes. This creates a thick, chocolate batter.
    3. Pour the batter into the prepared pan and spread it evenly with a spatula. Tap the pan gently on the counter to settle the batter and eliminate air bubbles.
    4. Bake in the preheated oven for 22-25 minutes, or until a toothpick inserted in the center comes out with just a few moist crumbs. Let the brownies cool completely in the pan.
    5. Once cooled, lift the brownies out of the pan using the parchment paper and place on a clean surface. Cut into 12 equal square shapes for ghost forms.
    6. Squeeze or spread a generous layer of vanilla frosting on each brownie to create a smooth, white ghost body.
    7. Fill a piping bag or plastic sandwich bag with black food coloring or melted chocolate; snip off a small tip. Pipe small dots and lines onto the frosting to form eyes, mouth, and facial features for each ghost.
    8. Place a googly eye on each ghost’s face, pressing gently to adhere to the frosting immediately.
    9. Arrange the completed ghost brownies on a serving platter. Serve immediately or refrigerate briefly to set the decorations.

    Notes

    For extra spooky effects, pipe additional frosting strands to mimic ghostly wisps.

    These ghost brownies turn an ordinary dessert into a Halloween spectacle that’s as charming as it is delicious. The playful presentation makes them perfect for your spooky season table, whether for a party or a quiet night in.

    As the air cools and the pumpkins glow, baking these treats brings a cozy, festive energy to the season. They’re a reminder that a little creativity can add a lot of fun to any holiday meal. Honestly, they might just become a yearly tradition in your house.