Blog

  • Chill with a Twist: The Ultimate Whiskey Slushie Revival

    Chill with a Twist: The Ultimate Whiskey Slushie Revival

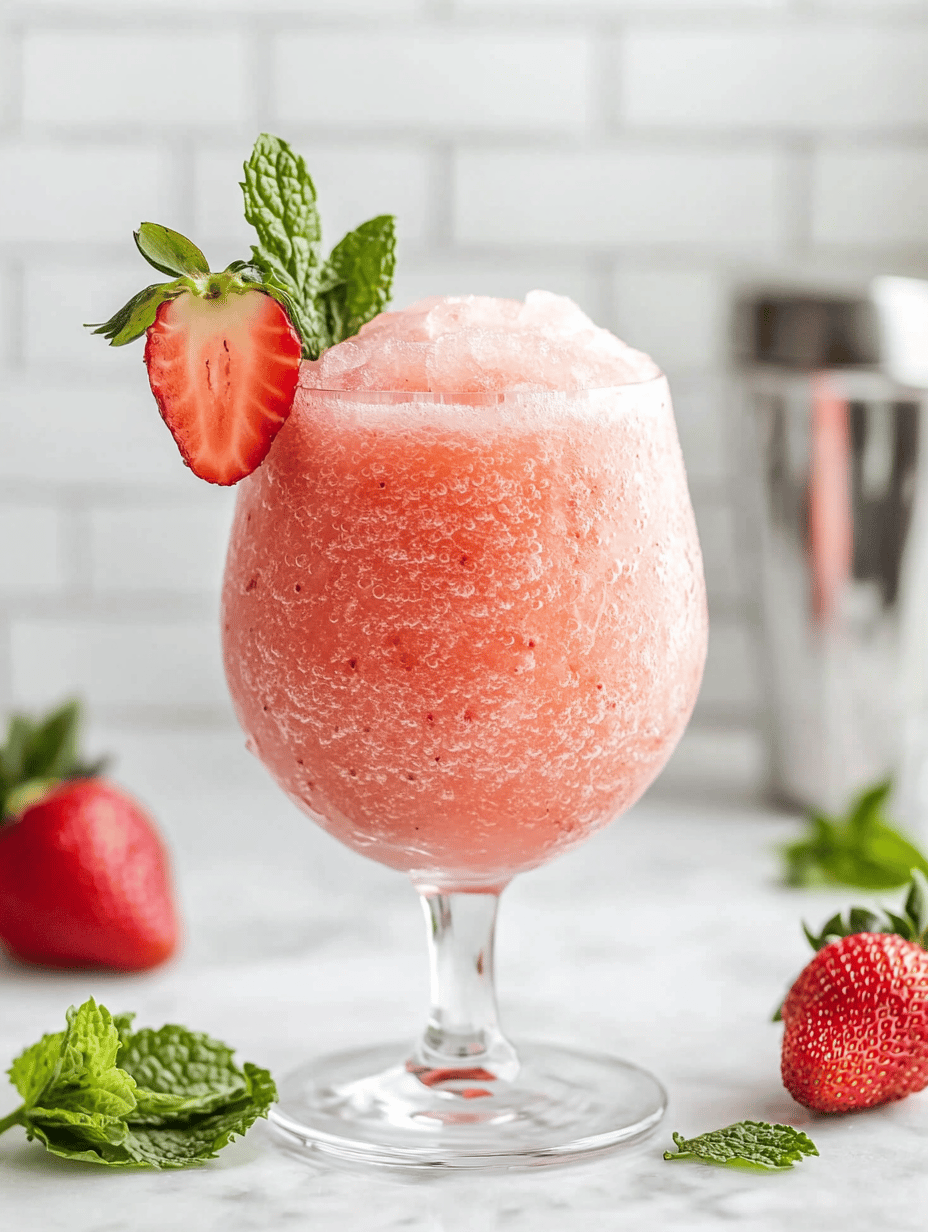
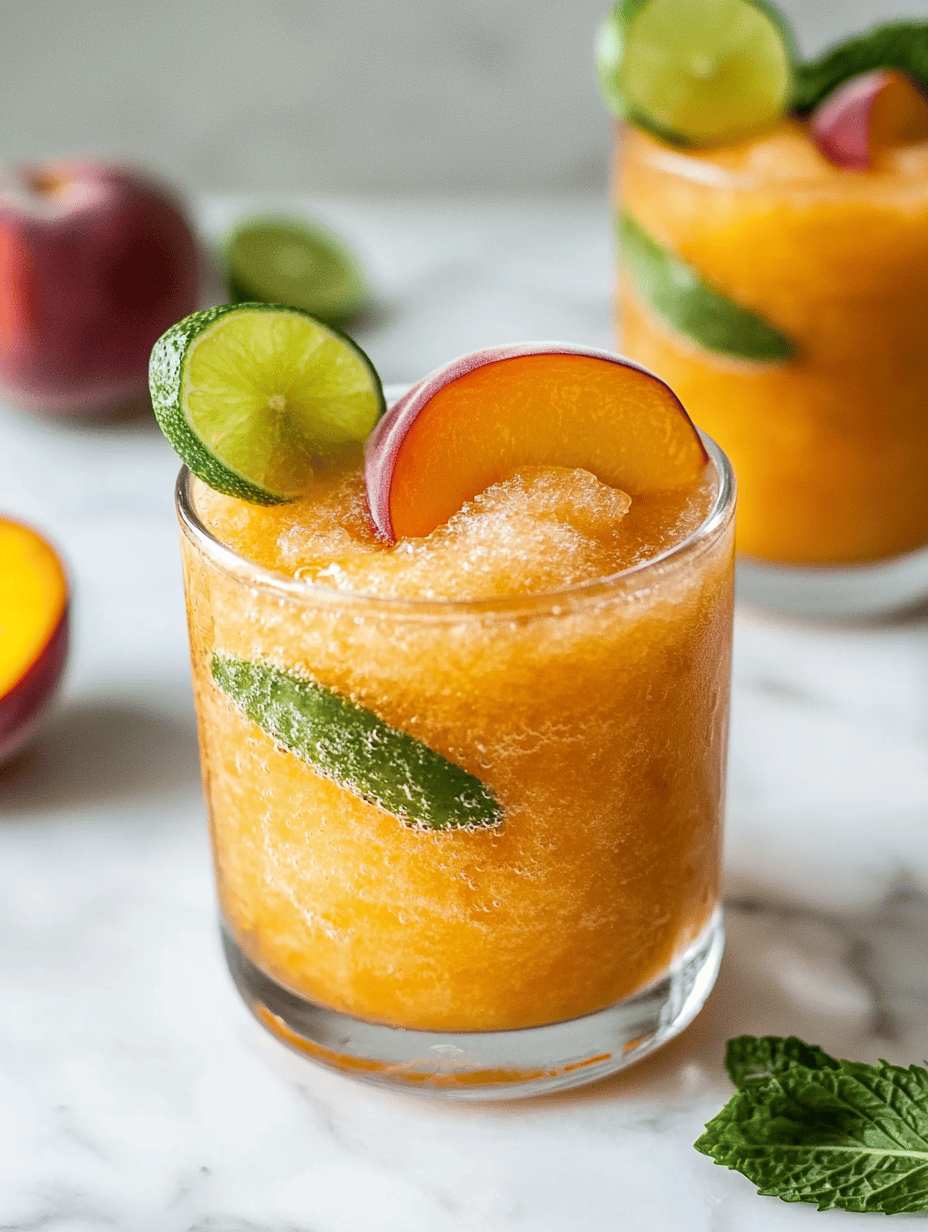
    When summer heat beats down, I find myself craving something cooler, yet with a surprising depth of flavor. Enter the whiskey slushie, a nostalgic nod to childhood frozen treats but with a grown-up twist. The aroma of aged bourbon melting into sweet fruit is a blissful contradiction that awakens my senses in the best way.

    This recipe isn’t just about freezing whiskey and fruit. It’s about balancing the spirit’s warmth with icy refreshment, creating a symphony of textures and flavors. Perfect for backyard gatherings or a quiet evening, this slushie transforms simple ingredients into a spirited escape. Plus, it’s a fun way to impress friends without breaking a sweat.

    Whiskey Slushie

    The whiskey slushie is a frozen beverage made by blending aged bourbon with sweet fruit and ice, resulting in a smooth, icy texture with a balanced flavor of warmth and refreshment. The mixture is churned until it reaches a thick, spoonable consistency, resembling a sorbet with a boozy twist.
    Prep Time 10 minutes
    Total Time 10 minutes
    Servings: 4
    Course: Main Course
    Cuisine: American
    Calories: 210

    Ingredients
      

    • 1 cup fresh or frozen fruit (such as berries or peaches) for sweetness and flavor
    • 1.5 cups aged bourbon the main alcohol component
    • 2 cups ice cubes for chilling and texture
    • 2 tbsp honey or simple syrup optional, for added sweetness

    Equipment

    • Blender
    • Measuring cups and spoons

    Method
     

    1. Place the fruit in your blender, making sure to include any juice or syrup you want to incorporate.
    2. Add the bourbon to the blender over the fruit, ensuring that the alcohol will infuse the mixture with warmth and depth.
    3. Top with ice cubes, filling the blender to about three-quarters full to ensure a thick, slushy consistency.
    4. Drizzle in honey or simple syrup if you prefer a sweeter slushie, then secure the lid on the blender.
    5. Blend on high speed until all ingredients are smoothly combined, and the mixture is thick and slushy, about 30-40 seconds.
    6. Check the texture; it should be thick enough to hold a spoon without immediately melting. If needed, blend for a few more seconds.
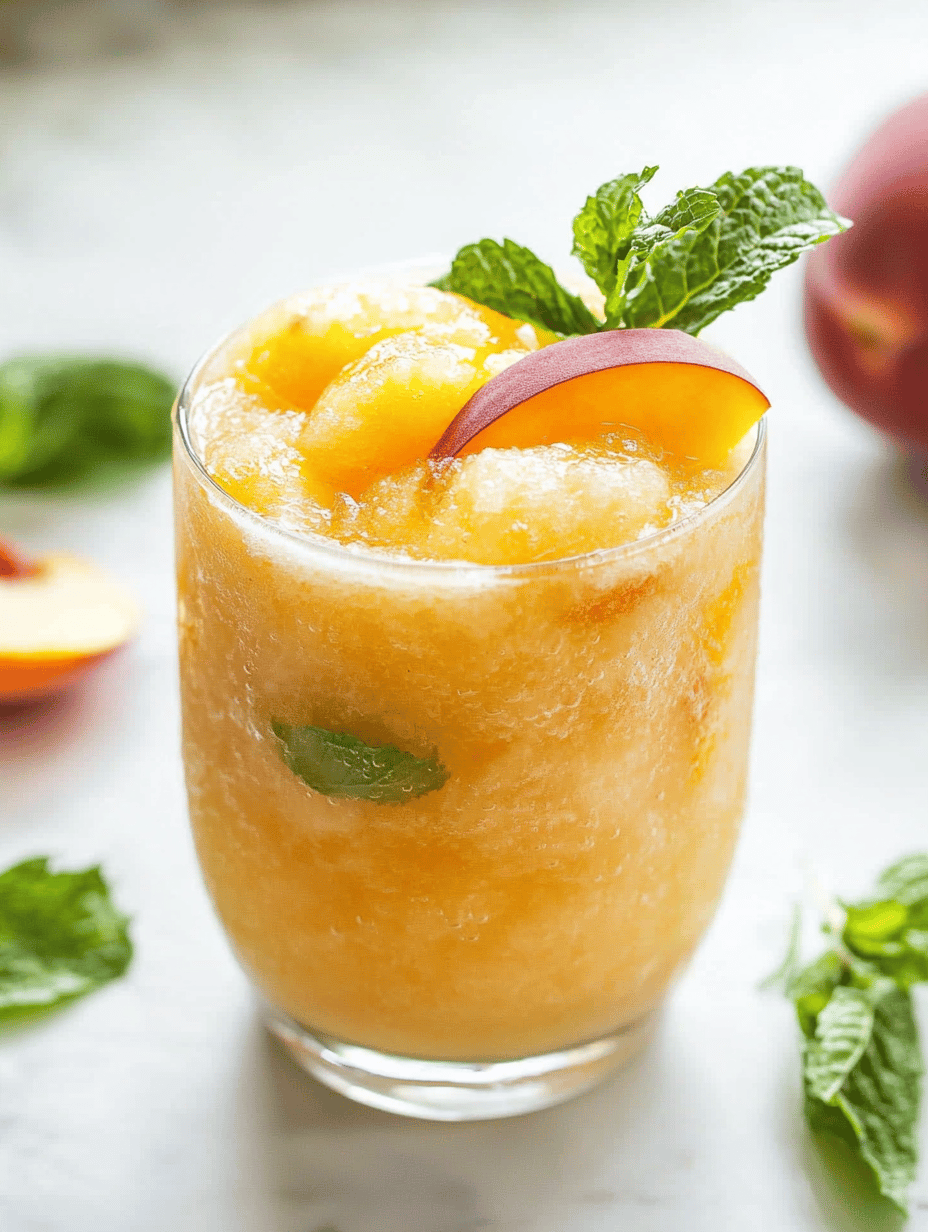
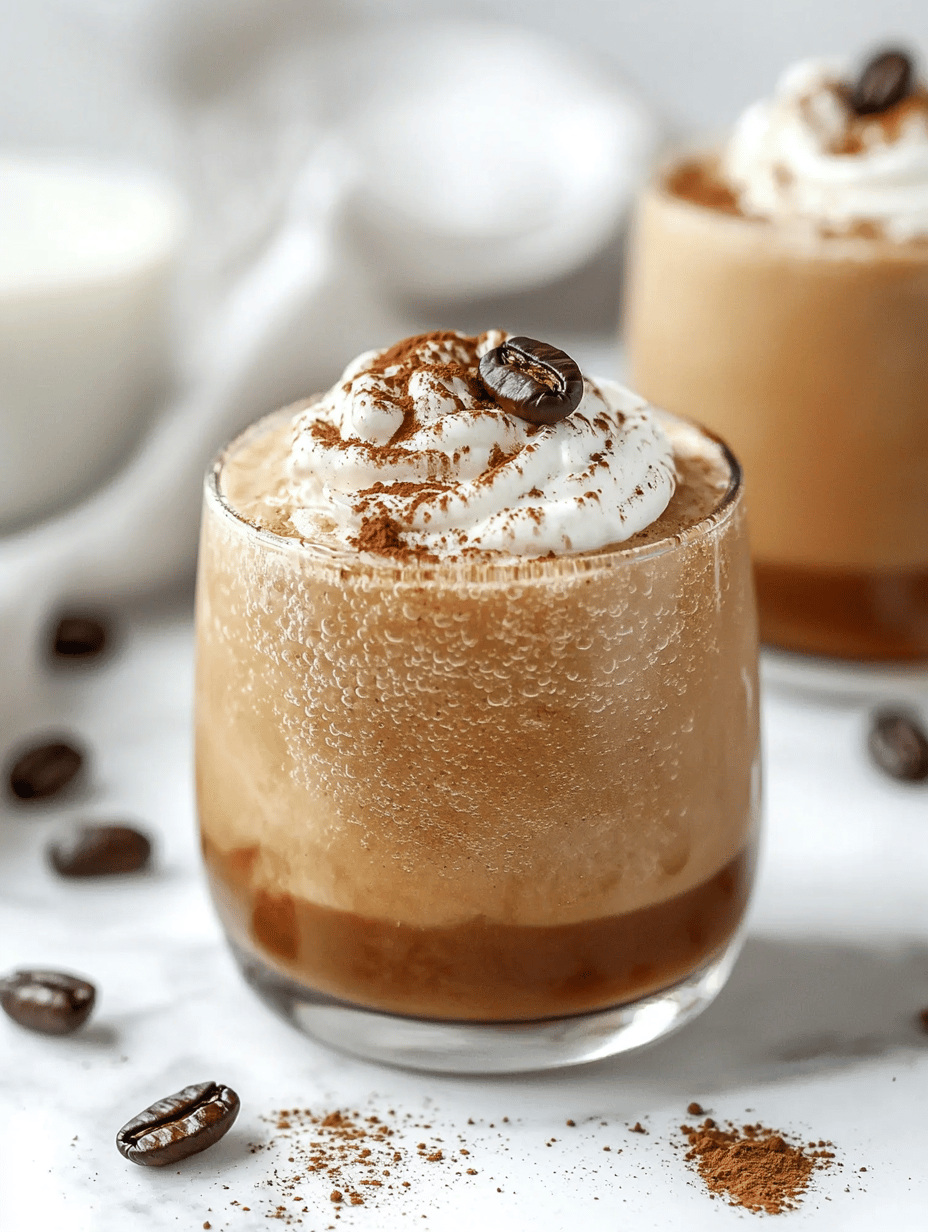
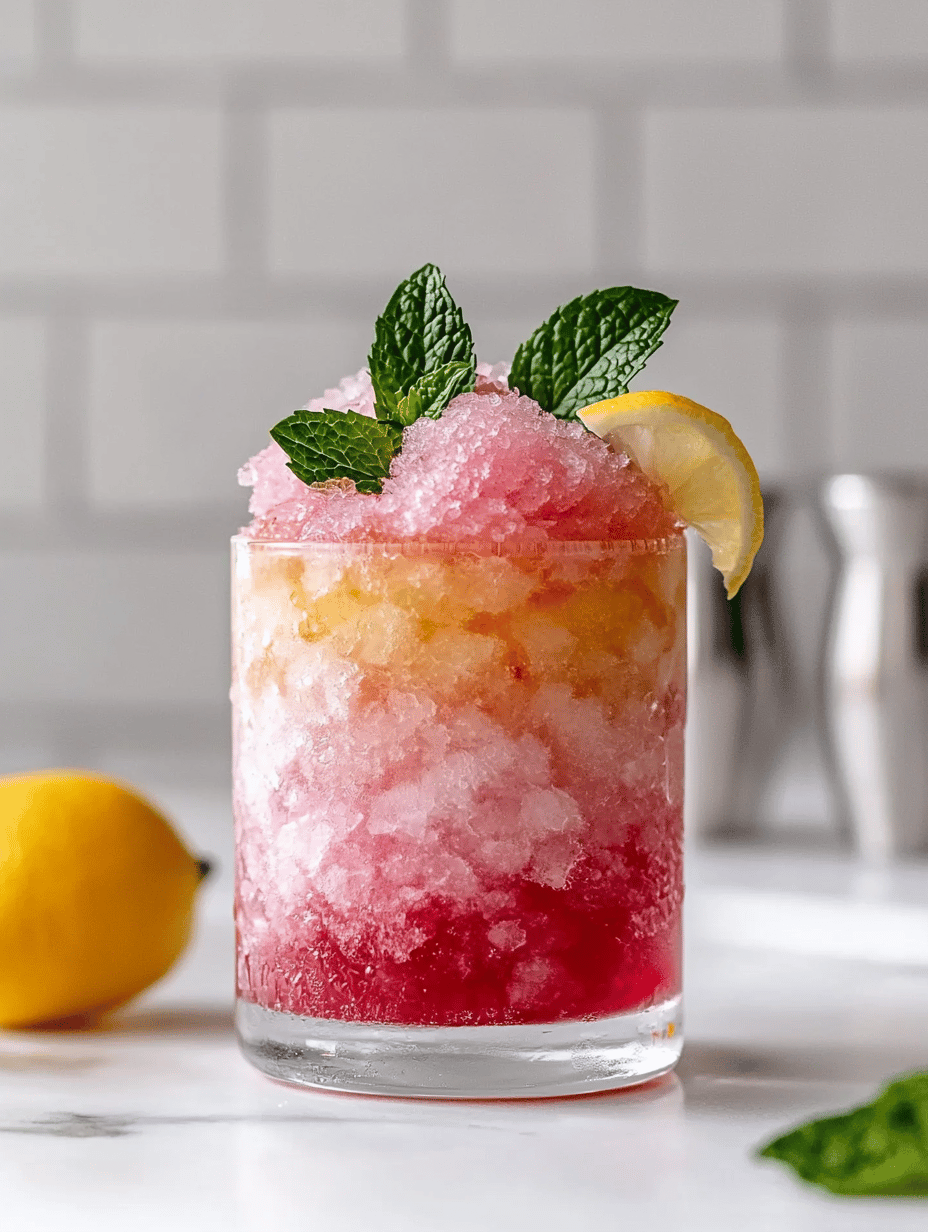
    7. Spoon the whiskey slushie into chilled glasses and garnish with fresh fruit or a sprig of mint if desired.
    8. Serve immediately with a straw or spoon, enjoying the cool, boozy treat that offers a harmonious blend of warmth and icy refreshment.

    This whiskey slushie is more than just a frozen cocktail; it’s a reminder that sometimes, simplicity is best. The combination of icy textures and warming spirits creates a refreshment perfect for summer days or cool evenings.

    As the flavors meld and the ice begins to shimmer in the glass, I feel a quiet satisfaction. It’s a drink that sparks conversation without effort—just pure, icy joy in a glass.

  • Autumnal Bliss: Creamy Fall Pumpkin Soup with a Twist

    Autumnal Bliss: Creamy Fall Pumpkin Soup with a Twist

    Imagine the cozy aroma of roasted pumpkin weaving through your kitchen as you prepare this unexpected twist on a classic fall favorite. What makes this recipe special is its hint of smoked paprika, which transforms the earthy sweetness into something deeply layered. It’s a dish designed to surprise those who think they’ve had all the pumpkin soups they need.

    This soup not only warms the hands but also sparks conversations around the table. Its velvety texture and a dash of cream make each spoonful feel like a small celebration of autumn’s bounty. Plus, it’s surprisingly quick to come together, perfect for those busy fall evenings.

    Smoky Roasted Pumpkin Soup

    This pumpkin soup is made by roasting pumpkin until tender and blending it into a smooth, velvety texture. The soup is seasoned with smoked paprika and finished with cream for richness, resulting in a warming, autumnal dish with a deep, layered flavor. Its bright orange color and creamy consistency make it visually inviting and comforting to enjoy.
    Prep Time 10 minutes
    Cook Time 40 minutes
    Total Time 50 minutes
    Servings: 4
    Course: Main Course
    Cuisine: Fall
    Calories: 180

    Ingredients
      

    • 1 kg Pumpkin peeled, seeded, and cut into chunks
    • 2 tbsp Olive oil for roasting
    • 1 tsp Smoked paprika adds smoky depth
    • 1 cup Vegetable broth
    • 1/2 cup Heavy cream for richness
    • to taste Salt and pepper

    Equipment

    • Baking sheet
    • Large pot or Dutch oven
    • Blender or immersion blender
    • Chef’s Knife
    • Cutting board
    • Cooking spoon

    Method
     

    1. Preheat your oven to 400°F (200°C). Spread the pumpkin chunks on a baking sheet, drizzle with olive oil, and toss to coat evenly. Roast for about 25-30 minutes, until the pumpkin is soft and slightly caramelized around the edges.
    2. While the pumpkin is roasting, heat a large pot over medium heat and add a splash of olive oil. Once shimmering, stir in the smoked paprika and cook for 30 seconds until fragrant. This releases the smoky aroma and enhances the flavor.
    3. Add the roasted pumpkin to the pot, breaking it into smaller pieces if needed. Pour in the vegetable broth, then bring everything to a gentle simmer. Let it cook for about 10 minutes to meld the flavors.
    4. Use an immersion blender directly in the pot, or carefully transfer the mixture to a blender in batches. Puree until the soup is completely smooth and velvety, with a rich orange color.
    5. Return the blended soup to the stove over low heat. Stir in the heavy cream to create a luxurious, creamy texture. Season with salt and pepper to taste as the soup warms through.
    6. Once heated through and seasoned, ladle the soup into bowls. Garnish with a drizzle of cream or a sprinkle of fresh herbs if desired and serve hot.
    As the leaves turn and the air becomes crisp, this creamy pumpkin soup offers a comforting, yet exciting meal option. It’s perfect for sharing over a crackling fire or paired with crusty bread when guests pop by unexpectedly.

    This recipe is a reminder that fall flavors can be both nostalgic and innovative. It’s a dish that invites you to play with spices and textures, making each bowl uniquely yours.

  • Frosé Chronicles: Chill with a Twist of Summer Elegance

    Frosé Chronicles: Chill with a Twist of Summer Elegance

    As the sun dips low and the air kicks up a gentle warmth, I find myself craving more than just a cold drink. I want something unexpected, something that captures the lazy charm of summer while adding a touch of sophistication. That’s when I discovered the magic of a rosé wine slushie—frosé with a flair.

    This isn’t your average frozen beverage. It’s a symphony of refreshing tartness, delicate floral notes, and a whisper of fruity sweetness, all frozen into a smooth, icy medley. Perfect for backyard lounging or as a show-stopping party pitcher, this recipe elevates your bar game without much fuss. Plus, it’s pretty darn Instagram-worthy.

    Whether it’s a spontaneous weekend treat or a planned gathering, a glass of this chilled rosé will turn the mood instantly festive.

    Rosé Wine Slushie (Frosé)

    This rosé wine slushie is a frozen cocktail made by blending chilled rosé wine with sweeteners and optional flavorings to create a smooth, icy beverage. It features a bright, tart flavor with floral and fruity notes, and a velvety texture that’s perfect for summer gatherings and lounging.
    Prep Time 10 minutes
    Total Time 10 minutes
    Servings: 4
    Course: Main Course
    Cuisine: Summer
    Calories: 150

    Ingredients
      

    • 1 bottle dry rosé wine chilled
    • 1/4 cup simple syrup or honey adds sweetness
    • 1 tablespoon fresh lemon juice optional for tartness
    • 1 cup fresh berries or fruit chunks for added flavor and visual appeal

    Equipment

    • Blender
    • Measuring cups and spoons

    Method
     

    1. Pour the chilled rosé wine into a large freezer-safe container or bowl.
    2. Add the simple syrup or honey to the wine and stir until fully combined, ensuring the sweetener dissolves evenly.
    3. Mix in the fresh lemon juice if using, to add a bright, tart flavor that balances the sweetness.
    4. Scatter the fresh berries or fruit chunks into the mixture, which will add color and extra flavor.
    5. Place the container in the freezer and let it chill for about 2-3 hours, stirring every 30 minutes to break up ice crystals and ensure even freezing.
    6. Once the mixture is thick and slushy, transfer it to a blender.
    7. Blend until smooth and scoopable, about 30 seconds, stopping to scrape down the sides if needed.
    8. Pour the blended slushie into glasses, garnishing with additional berries or a lemon twist if desired.
    9. Enjoy immediately with a straw or spoon, savoring the icy, floral notes of this cool summer treat.

    Notes

    For best results, use a good quality dry rosé and serve immediately for the optimal slushie texture.
    As the seasons hint at summer’s final wave, this frosé remains a versatile crowd-pleaser. Its icy texture and vibrant hue can make even the quietest afternoon feel special. Pair it with light bites or a sunset view, and suddenly, time slows down.

    This recipe is proof that simple ingredients, when combined with a little creativity, can bring about joyful moments and cool memories. It’s both a celebration of warm days and a gentle reminder to indulge in small, delightful pleasures whenever they come your way.

  • Spooky Bite-Sized Horror: Halloween Deviled Egg Eyeballs

    Spooky Bite-Sized Horror: Halloween Deviled Egg Eyeballs

    As the haunted season rolls in, I love transforming simple ingredients into ghoulish delights that spark both joy and a bit of chaos at the table. These Halloween Deviled Egg Eyeballs are perfect for those who crave a little creepy fun with every bite. The moment you cut into one, the eerie red and veiny detail revealing a gooey yolk center never fails to get a squeal or giggle from guests.

    I’ve recently started viewing food presentations as mini theatrical productions—this recipe is my favorite new act. The way the bright whites mimic eyeballs, complete with a touch of red paprika and olive for the bloodshot look, makes it seem like a tiny horror scene. Plus, it’s a playful way to get kids involved in the kitchen, even if it’s just to squish an olive or sprinkle paprika with their little hands.

    Halloween Deviled Egg Eyeballs

    These deviled eggs are decorated to resemble eerie eyeballs, with bright white egg whites filled with creamy yolk mixture topped with bloodshot details of paprika, a sliced olive for the iris, and veiny red accents. The dish involves boiling, halving, mixing, and decorating to create a spooky, fun appetizer with a smooth, creamy texture and visually striking appearance.
    Prep Time 20 minutes
    Cook Time 10 minutes
    Total Time 30 minutes
    Servings: 12
    Course: Main Course
    Cuisine: Halloween/Party Food
    Calories: 70

    Ingredients
      

    • 6 large eggs for boiling
    • 2 tablespoons mayonnaise for filling
    • 1 teaspoon yellow mustard adds tang to yolk filling
    • to taste salt and pepper for seasoning
    • 1/2 teaspoon paprika for bloodshot look and coloring
    • 12 small green olives pitted, sliced for irises
    • 1 small red candy or jalapeño slices for veiny bloodshot effect

    Equipment

    • Saucepan
    • Mixing bowl
    • Whisk
    • Small knife
    • Spoon
    • Plate

    Method
     

    1. Place the eggs in a saucepan and cover with cold water. Bring to a boil over medium-high heat, then lower the heat and simmer for 10 minutes. Remove eggs and transfer them to a bowl of ice water to cool completely.
    2. Once cooled, peel the eggs carefully and slice them in half lengthwise. Gently remove the yolks and place them in a mixing bowl.
    3. Add mayonnaise, mustard, salt, and pepper to the yolks. Whisk until the mixture is smooth and creamy, adjusting seasoning to taste. This creates the filling that will resemble gooey eyeball centers.
    4. Spoon or pipe the yolk mixture back into the hollowed egg whites, filling them generously so they look like eyeballs. Place the filled eggs on a serving plate.
    5. Slice the green olives crosswise to create irises for each eyeball. Gently press an olive slice into the center of each filled egg to resemble the pupil.
    6. Using a small knife, make small veins by attaching thin red candy or jalapeño slices across the egg whites, radiating outward for a veiny bloodshot look. Sprinkle a pinch of paprika around the edges for an eerie bloodshot effect.
    7. Arrange all the decorated deviled eggs on a platter, ensuring each looks like a creepy eyeball. Chill for 15 minutes before serving to let the presentation set.

    Notes

    For extra creepy effect, add some red food coloring to the yolk mixture before filling.

    These eyeball deviled eggs are more than just creepy snacks—they’re a conversation starter that adds personality to any Halloween spread. The crispy, creamy textures paired with the vivid colors make it a fun, memorable centerpiece. Plus, they’re quick to prepare, which means you can focus on other spooky details of your celebration.

    As autumn’s chill seeps in and the nights grow longer, there’s something joyful about whipping up these eerie treats. They serve as a reminder that Halloween is all about unleashing your creativity—messy, silly, and spectacular. So go ahead, craft these eyeballs and let your spooky spirit shine through your culinary mischief.

  • The Unexpected Charm of Peach Slushie: A Nostalgic Summer Escape

    The Unexpected Charm of Peach Slushie: A Nostalgic Summer Escape

    Imagine biting into a perfectly ripe peach, the scent of sweet nectar filling the air. Now, blend that peach with ice and a hint of citrus to create a chilled escape from the summer heat. This peach slushie is more than just a drink; it’s a wistful nod to childhood summers and lazy afternoons.

    But here’s the twist: it’s not your average frozen beverage. I’ve discovered that adding a splash of ginger elevates the flavor, turning a simple fruit treat into a complex, refreshing experience. And in the current season, nothing beats the vibrant, sunny vibes this drink delivers.

    Peach Ginger Slushie

    This peach ginger slushie is a chilled beverage made by blending ripe peaches with ice, citrus juice, and fresh ginger. The mixture results in a vibrant, smooth, and icy drink with a fragrant, slightly spicy flavor and a bright, refreshing appearance.
    Prep Time 10 minutes
    Total Time 10 minutes
    Servings: 2
    Course: Main Course
    Cuisine: Summer
    Calories: 120

    Ingredients
      

    • 2 cups ripe peaches, pitted and sliced preferably fresh or frozen
    • 1 cup ice cubes
    • 1 tablespoon fresh ginger, grated adjust to taste
    • 1 tablespoon honey or agave syrup optional, for sweetness
    • 1 tablespoon fresh lemon juice
    • 1 cup water or cold orange juice for blending

    Equipment

    • Blender
    • Measuring cups and spoons

    Method
     

    1. Add the sliced peaches, ice cubes, grated ginger, honey, lemon juice, and water (or orange juice) into a blender.
    2. Blend on high until the mixture is smooth, icy, and well combined, about 30-45 seconds. You should see a vibrant, frosty texture.
    3. Stop and taste the slushie; adjust sweetness if desired by adding more honey or ginger.
    4. If the mixture is too thick, add a splash more water or orange juice and blend briefly.
    5. Pour the slushie into glasses, giving it a gentle swirl to distribute any settled pulp or frost.
    6. Serve immediately with a garnish of a peach slice or a sprig of mint for a colorful finish.
    As you sip this peach slushie, you’re not just cooling down—you’re reliving a slower, simpler time with every icy gulp. It’s the kind of drink that’s perfect for summer gatherings or a quiet moment of self-care.

    Keep this recipe in your back pocket for days when life feels hectic. Its bright, fruity notes can lift your mood and remind you that sometimes, the simplest pleasures are the sweetest.

  • Spooky Secrets: The Haunted Charm of Poison Toffee Apples

    Spooky Secrets: The Haunted Charm of Poison Toffee Apples

    Every October, as the air turns crisp and the leaves crunch underfoot, I find myself craving a treat that’s both playful and a little mischievous. These Halloween Poison Toffee Apples aren’t just your average caramel-dipped fruits; they carry a whisper of chaos and a dash of dark whimsy. The blackened toffee glaze glimmers like potion spilled in the moonlight, inviting curious hands to indulge.

    The secret lies in the duality of sweetness and a hint of danger, perfect for haunting parties or a creepy family snack. As the scent of melting sugar wafts through the kitchen, it pulls everyone into a ghostly anticipation. These apples turn a simple fruit into an eerie centerpiece that sparks conversations and nostalgic memories.

    Poison Toffee Apples

    These Poison Toffee Apples are coated with a glossy, blackened toffee glaze, creating an eerie and shiny exterior that contrasts with the crispness of fresh apples. The toffee is heated until bubbling and thickened before dipping, resulting in a firm, sticky coating that hardens as it cools, giving a glossy, dark appearance perfect for Halloween festivities.
    Prep Time 15 minutes
    Cook Time 15 minutes
    Total Time 30 minutes
    Servings: 4
    Course: Main Course
    Cuisine: Halloween
    Calories: 250

    Ingredients
      

    • 4 medium apples preferably Granny Smith or Fuji for tartness and firmness
    • 2 cups granulated sugar for toffee
    • 0.5 cup water to help dissolve sugar
    • 0.5 cup light corn syrup prevents sugar from crystallizing
    • 1 teaspoon black gel food coloring for dark, spooky appearance
    • 1 tablespoon unsalted butter adds richness to toffee

    Equipment

    • Kitchen thermometer
    • Heavy-bottomed saucepan
    • Lollipop sticks or skewers
    • Baking sheet lined with parchment paper

    Method
     

    1. Wash and dry the apples thoroughly. Insert a lollipop stick or skewer into the stem end of each apple for easier dipping.
    2. Combine the sugar, water, and corn syrup in a heavy-bottomed saucepan over medium heat. Stir gently until the sugar dissolves completely, then stop stirring and let the mixture come to a boil.
    3. Attach a kitchen thermometer to the side of the pan and cook the toffee without stirring until it reaches 300°F (hard crack stage), about 10-15 minutes. Watch for a deep amber color and bubbling.
    4. Remove the saucepan from heat and immediately stir in the butter and black gel food coloring. Be careful, as the mixture will bubble vigorously. Stir until the color is evenly distributed and the toffee is smooth.
    5. Quickly dip each apple into the hot toffee, tilting the pan if needed to cover the apple completely. Allow excess toffee to drip off before placing the apple on a parchment-lined baking sheet to set.
    6. Repeat the dipping process with all apples, then let the coated apples cool at room temperature until the toffee hardens and becomes shiny, about 20-30 minutes.
    7. Once the toffee is firm and glossy, serve the Poison Toffee Apples on a platter for a spooky Halloween treat.

    Notes

    Work quickly when pouring the hot toffee to prevent it from cooling and becoming difficult to dip. Be cautious as the syrup is extremely hot and sticky.

    As darkness falls and spirits rise, these Poison Toffee Apples become the perfect macabre treat to share. Their mischievous appearance and rich, caramel aroma create a festive atmosphere that’s impossible to resist. Watching friends and family bite into their glossy, dark shells sparks a sense of celebration that’s both spooky and sweet.

    In this season of ghosts and ghouls, a little chaos in the kitchen adds to the fun. These apples aren’t just a dessert—they’re a reminder that a dash of darkness can make the sweetest moments even more memorable. Happy haunting—and snacking!

  • Chill Out with a Lime-Peach Iced Tea Slushie

    Chill Out with a Lime-Peach Iced Tea Slushie

    Imagine a summer afternoon, the air thick with heat, and all you want is a cool, refreshing treat. This iced tea slushie brings a new twist to your usual beverage by blending the tartness of fresh lime with the sweetness of ripe peaches. It’s like capturing a sun-drenched orchard in a glass, then transforming it into a chilly delight.

    This recipe isn’t just about cool drinks; it’s about the experience. The icy texture melts slowly on your tongue, releasing layers of fruity flavor and herbaceous tea undertones. It’s perfect for lazy weekends or spontaneous gatherings, offering a refreshing escape from the heat.

    Peach Lime Iced Tea Slushie

    This iced tea slushie combines brewed black tea with fresh peach and lime juice, blended into a frozen, icy beverage. It has a smooth, granular texture with bright fruity flavors and a hint of herbal tea in the background, perfect for hot weather.
    Prep Time 10 minutes
    Cook Time 10 minutes
    Total Time 20 minutes
    Servings: 4
    Course: Main Course
    Cuisine: Various
    Calories: 120

    Ingredients
      

    • 4 cups water for brewing tea
    • 4 bags black tea or 4 teaspoons of loose leaf tea
    • 2 ripe peaches pitted and sliced
    • 1 large lime juice only
    • 1/4 cup honey or agave syrup, adjust to taste
    • Ice cubes ice as needed to fill the blender

    Equipment

    • Kettle or pot for boiling water
    • Blender
    • Measuring cups and spoons
    • Fine mesh sieve
    • Freezer-safe container

    Method
     

    1. Bring water to a boil in a kettle or pot, then pour it over the tea bags in a heatproof container. Cover and steep for 5 minutes, filling your kitchen with a fragrant aroma. Remove the tea bags and let the tea cool to room temperature.
    2. While the tea cools, slice the peaches into thin wedges, watching their bright orange flesh and golden skin. Squeeze fresh lime juice into a small bowl, extracting about 2 tablespoons of tangy liquid. Mix the peaches and lime juice for a fresh, fruity aroma.
    3. Add the cooled tea to a blender, followed by the sliced peaches. Pour in honey and blend on high until the peaches are fully pureed and the mixture is smooth.
    4. Fill the blender with several handfuls of ice cubes, then blend again until the mixture is thick, icy, and slushy in texture. Adjust the amount of ice for your desired consistency.
    5. Taste the slushie and add more honey or lime juice if you’d like a sweeter or tangier flavor. Give it a final quick blend to incorporate any adjustments.
    6. Pour the peach lime iced tea slushie into glasses, garnishing with a slice of peach or lime wedge if desired. Serve immediately for a refreshingly cold treat.

    As the season peaks, this iced tea slushie stands out as a simple, bold choice. It’s versatile enough to customize with other fruits or tea varieties, making it your personal summer signature. Plus, it’s quick to whip up, leaving you more time to bask in the sunshine or lounge with a good book.

    Enjoy the soothing cold and refreshing taste that this slushie delivers. It’s a small, delightful reminder that some of the best summer moments come in chilled, fruity sips.

  • Unusual Vodka Slushie Flavors You Need to Try Now

    Unusual Vodka Slushie Flavors You Need to Try Now

    Many think of vodka slushies as simple frozen drinks, but I love to push their boundaries with unexpected flavors. Incorporating herbs, spices, or even floral elements transforms them into complex, refreshingly unique treats. It’s like capturing a summer breeze in a glass, with a twist of something surprising.

    Recently, I experimented with a basil and honey combo that turned out to be a revelation. This approach makes the classic icy cocktail a conversation starter for gatherings or a personal indulgence on lazy afternoons. If you’re craving something different, these recipes might just change your frozen drink game.

    Herb-Infused Vodka Slushies

    Herb-infused vodka slushies are frozen beverages that combine alcoholic spirits with fresh herbs, sweeteners, and ice to create a icy, refreshing drink. The mixture is blended until smooth, resulting in a semi-frozen, textured treat that captures the flavors of herbs like basil, with a hint of honey sweetness.
    Prep Time 10 minutes
    Total Time 10 minutes
    Servings: 4
    Course: Main Course
    Cuisine: Fusion
    Calories: 150

    Ingredients
      

    • 1 cup vodka choose a smooth variety
    • 1/2 cup honey for natural sweetness
    • 1 cup fresh basil leaves lightly packed, roughly chopped
    • 2 cups water
    • 4 cups ice cubes

    Equipment

    • Blender
    • Measuring cups and spoons

    Method
     

    1. Combine the water and honey in a small saucepan over medium heat, stirring until the honey dissolves completely. Remove from heat and let cool completely to make a honey syrup.
    2. Place the fresh basil leaves into a blender and pulse briefly to release their aroma, then add the cooled honey syrup and vodka.
    3. Blend the mixture on high until the basil is finely chopped and the mixture is vibrant green, about 30 seconds.
    4. Add the ice cubes to the blender, then blend on high until the mixture becomes thick, slushy, and evenly combined, about 1 minute.
    5. Taste the slushie and adjust sweetness if desired—add a drizzle of honey and blend briefly if needed.
    6. Pour the herb-infused vodka slushie into chilled glasses and garnish with a fresh basil leaf or a sprig of herbs for presentation.

    Notes

    For a stronger basil flavor, let the basil and syrup sit together for 15 minutes before blending. Adjust the ice quantity depending on desired thickness.

    Frozen vodka slushies aren’t just for hot days—they’re an adventure in a glass for all seasons. The little tweaks and unexpected flavors keep me coming back for more, especially when I want a cool, spirited treat with a twist.

    Next time you need a party showstopper or a fun solo escape, whip up one of these inventive recipes. They’re simple, surprising, and perfect for surprising friends or just indulging yourself. Cheers to the unexpected in every frosty sip!

  • Spooky Delights: Halloween Jack-o’-Lantern Stuffed Peppers

    Spooky Delights: Halloween Jack-o’-Lantern Stuffed Peppers

    Every October, I find myself drawn into the charming chaos of Halloween preparations. But this year, I wanted to do something a bit more unexpected—something that combines the playful spirit of carving pumpkins with a hearty, savory twist. That’s how the idea of Jack-o’-Lantern Stuffed Peppers was born, turning a conventional dish into a festive masterpiece.

    Imagine fiery orange peppers carved with little faces, their insides filled with a fragrant, cheesy mixture that melts in your mouth. This approach lets me embrace the season’s creativity, turning ordinary ingredients into edible art. Plus, these peppers make a great conversation starter at any Halloween gathering, blending fun with flavor seamlessly.

    Jack-o’-Lantern Stuffed Peppers

    This dish features vibrant orange bell peppers carved with miniature faces, filled with a cheesy, fragrant mixture. The peppers are baked until tender and the cheese is bubbly, resulting in an eye-catching and flavorful savory presentation that captures the festive spirit of Halloween.
    Prep Time 20 minutes
    Cook Time 30 minutes
    Total Time 50 minutes
    Servings: 4
    Course: Main Course
    Cuisine: American
    Calories: 250

    Ingredients
      

    • 4 large bell peppers preferably orange for a festive look
    • 1 cup cooked rice can use white or brown rice
    • 1 cup shredded cheese cheddar or mozzarella
    • 1/2 cup diced cooked chicken or beans for added protein
    • 1 small onion finely chopped
    • 2 cloves garlic minced
    • 2 tablespoons olive oil
    • to taste salt and pepper for seasoning

    Equipment

    • Chef’s Knife
    • Spoon
    • Baking Dish
    • Mixing bowl

    Method
     

    1. Preheat the oven to 375°F (190°C). Lightly grease a baking dish.
    2. Slice off the tops of the bell peppers and carefully scoop out the seeds and membranes, creating a hollow shell suitable for stuffing.
    3. Use a small knife or paring knife to carve playful faces into each pepper, turning them into mini jack-o’-lanterns, taking care not to puncture the outer shell.
    4. Heat olive oil in a skillet over medium heat, then sauté the chopped onion and minced garlic until fragrant and translucent, about 3-4 minutes.
    5. Add the cooked rice and diced chicken (or beans) to the skillet, stirring to combine and warm through.
    6. Stir in shredded cheese and season with salt and pepper, mixing until the cheese melts into a creamy filling.
    7. Spoon the cheese mixture into each carved pepper, pressing gently to fill completely and mound slightly at the top.
    8. Place the stuffed peppers upright in the prepared baking dish, ensuring they are stable.
    9. Bake in the preheated oven until the peppers are tender and slightly charred at the edges, about 30 minutes.
    10. Remove from oven and let cool slightly; the peppers will be hot and the cheese gooey.
    11. Serve the Jack-o’-Lantern stuffed peppers warm, allowing the carved faces and cheesy filling to shine as a festive, savory centerpiece.

    Notes

    Feel free to customize the faces with smaller peppers or skin-safe markers for added fun.

    Staging these peppers on your table isn’t just about the visual impact; their smoky aroma will tease your senses even before the first bite. They’re perfect for those crisp fall nights, offering a comforting yet playful experience. As you carve and fill, remember that the joy of Halloween is in the little details—and these peppers capture that spirit beautifully.

    So, whether you’re hosting a spooky dinner or just craving some seasonal cheer, these stuffed peppers bring everything you love about Halloween into one delightful bite. Enjoy the process of creating your spooky, cheesy masterpieces—each one a tiny celebration of the season’s charm.

  • Chill Out with This Unique Coffee Slushie Twist!

    Chill Out with This Unique Coffee Slushie Twist!

    Have you ever wondered what happens when you take your morning coffee and turn it into a frozen treat? This coffee slushie is not just a cold drink; its a sensory adventure in each sip, combining the bitter-chocolate aroma of freshly brewed coffee with the icy, smooth texture of a summer refresher. Its perfect for those hot days when you still need a caffeine kick but want something fun and unexpected.

    This recipe is inspired by childhood ice treats but packed with adult flavor. Imagine biting into a chilly, coffee-laced delight that cools your senses and sparks a sense of nostalgia, all while delivering a little caffeine boost. Its a playful way to energize without reaching for a latte or an energy drink.

    Coffee Frozen Slushie

    A refreshing frozen treat made by blending brewed coffee with ice and a sweetener, resulting in a smooth, icy beverage. The final texture is like a sorbet or slush, with a bold coffee flavor and chilly consistency perfect for hot days.
    Prep Time 10 minutes
    Total Time 10 minutes
    Servings: 2
    Course: Main Course
    Cuisine: American
    Calories: 65

    Ingredients
      

    • 1 cup hot brewed coffee cooled to room temperature
    • 1 cup ice cubes plus extra for serving if desired
    • 2 tablespoons simple syrup or sugar adjust sweetness to taste

    Equipment

    • Coffee maker or kettle
    • Blender

    Method
     

    1. Brew a cup of coffee and allow it to cool to room temperature, or chill it in the refrigerator for a quicker approach.
    2. Add the cooled coffee into a blender along with the ice cubes and sweetener. This combination will form the icy base of your slushie.
    3. Blend on high speed until the mixture is smooth and ice is finely crushed, resembling a thick slush or sorbet texture. You should hear a consistent blending sound with no large chunks.
    4. Stop the blender and check the texture; if it’s too thick, you can add a splash more coffee or a little water, then blend briefly to incorporate.
    5. Pour the blended coffee slushie into glasses, creating a mound of icy goodness that holds its shape and looks invitingly frosty.
    6. If desired, garnish with a coffee bean or a sprig of mint for visual appeal before serving immediately with a straw or spoon.

    This coffee slushie is a testament to how simple ingredients can come together to create a delightful experience. Its a conversation starter at summer parties and an instant mood lifter on a sluggish afternoon. Plus, its a cool DIY project to beat the heat and elevate your coffee routine.

    Next time you crave a frozen pick-me-up, remember this recipe. Its zesty, rich flavors combined with icy crunch make it a refreshing change from your usual coffee. Sip slowly and enjoy the moment—summer in a glass has never been so exhilarating.