Blog

  • Autumn’s Secret: Roasted Butternut Squash Soup with a Twist

    Autumn’s Secret: Roasted Butternut Squash Soup with a Twist

    This season, I escaped the usual and decided to focus on a harvest-ready squash with unexpected charm—purple-skinned butternut. The wild hue makes even the most mundane kitchen feel a bit alive, crackling with anticipation as it roasts. The smell of caramelizing squash, sweet and earthy, fills the air, turning the process into a small celebration.

    What makes this soup different isn’t just the look but how roasting deepens every flavor footprint, transforming soft sweetness into a smoky, complex delight. It’s perfect for a cozy weekend or a quick weeknight dinner that asks for little fuss but delivers big on warmth and texture. This recipe is a gentle reminder that simplicity often breeds the most satisfying dishes.
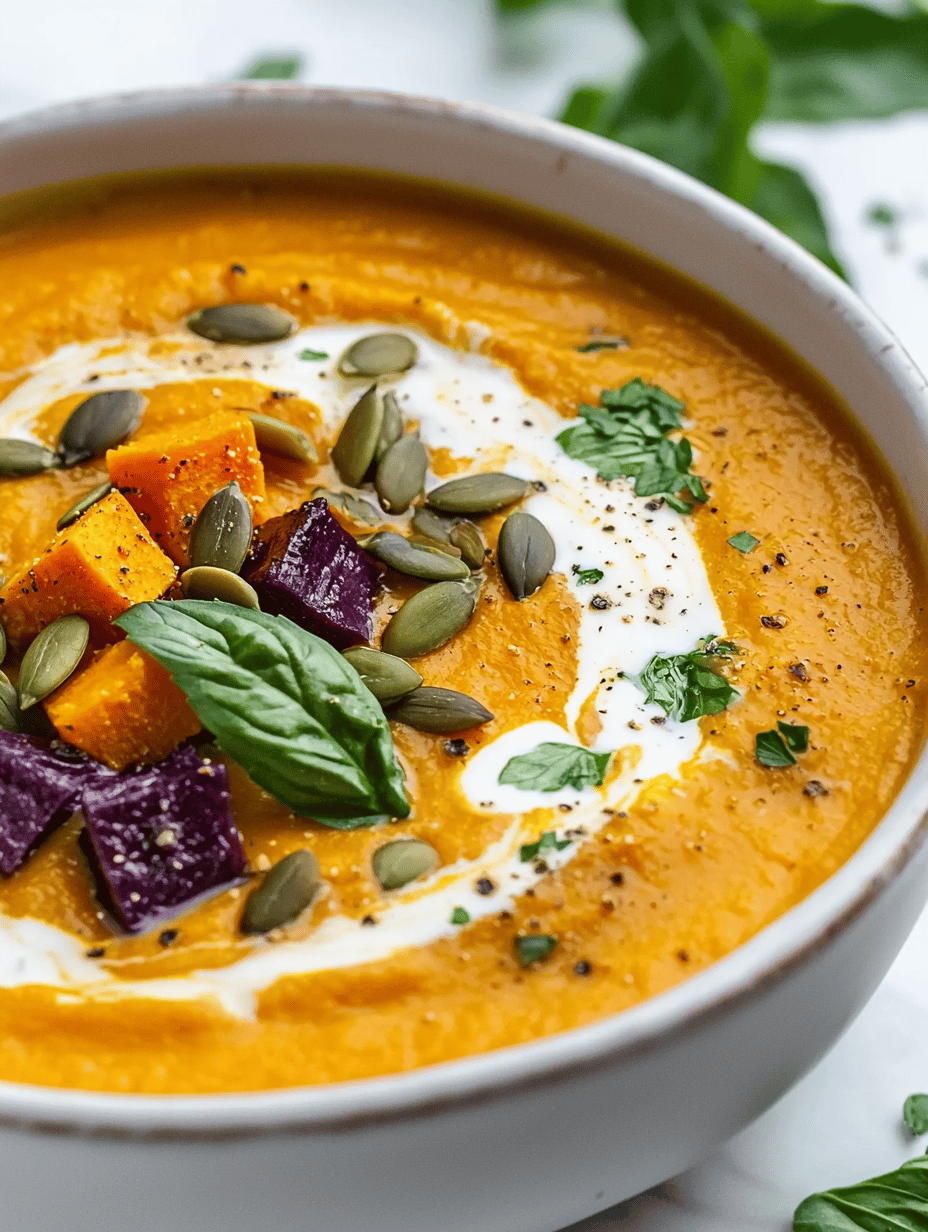
    Roasted Purple-Skinned Butternut Squash Soup

    This soup features purple-skinned butternut squash roasted until caramelized, then blended into a smooth, velvety purée. The roasting process deepens the squash’s natural sweetness and introduces smoky, earthy flavors, resulting in a vibrant-colored, hearty soup with a rich texture.
    Prep Time 15 minutes
    Cook Time 45 minutes
    Total Time 1 hour
    Servings: 4
    Course: Main Course
    Cuisine: Fusion
    Calories: 180

    Ingredients
      

    • 1 large purple-skinned butternut squash halved lengthwise, seeds removed
    • 2 tablespoons olive oil for roasting
    • 1 large onion roughly chopped
    • 2 cloves garlic minced
    • 4 cups vegetable broth
    • to taste salt and pepper for seasoning

    Equipment

    • Oven or Roasting Pan
    • Blender or Food Processor
    • Soup pot or large saucepan
    • Chef’s Knife
    • Cutting board

    Method
     

    1. Preheat your oven to 400°F (200°C). Place the halved squash cut-side up on a baking sheet, brush with olive oil, and season with a pinch of salt. Roast until the flesh is tender and caramelized around the edges, about 40-45 minutes.
    2. While the squash roasts, heat a splash of olive oil in a large pot over medium heat. Add the chopped onion and sauté until soft and translucent, about 5-7 minutes. The onions should turn a light golden color and release a sweet aroma.
    3. Add the minced garlic to the onions and cook for another minute until fragrant. Be careful not to burn the garlic, as it should turn golden quickly.
    4. Once the squash is roasted and cool enough to handle, scoop out the flesh into the pot with the sautéed onions and garlic. The flesh should be vibrant orange and soft enough to blend easily.
    5. Pour in the vegetable broth and bring the mixture to a gentle simmer. Let it cook uncovered for about 10 minutes, allowing the flavors to meld together.
    6. Using an immersion blender or a regular blender, blend the soup until smooth and creamy. If using a regular blender, blend in batches and be cautious with hot liquids. Return the blended soup to the pot if needed.
    7. Season the soup with salt and pepper to taste, then stir well. Adjust the seasoning as desired for balance and flavor depth.
    8. Heat the soup through until steaming hot, about 2-3 minutes. The final texture should be smooth, velvety, and slightly thickened.
    9. Serve the soup in bowls, optionally garnished with a drizzle of olive oil or fresh herbs for an inviting presentation.

    Notes

    Roasting brings out a smoky sweetness in the squash, enhancing the depth of flavor in the soup. You can top with croutons or a dollop of cream for added richness.

    Each spoonful offers a velvety consistency with a whisper of toasted edges around every bite. This soup is truly a reminder that autumn’s bounty is best enjoyed with patience and a touch of char. It pairs beautifully with crusty bread or a light salad, making it an ideal seasonal centerpiece.

    In the end, this roasted butternut squash soup is more than a comforting dish—it’s an experience. A warm bowl filled with nuanced flavors, smoky undertones, and cozy memories. Perfect for embracing the cooler days ahead and celebrating the fleeting beauty of fall harvests.

  • Chill Out with a Unique Chocolate Slushie Twist

    Chill Out with a Unique Chocolate Slushie Twist

    Nothing screams summer refreshment like a cool, frosty treat that sparks joy with every sip. But today, I want to take you beyond the typical chocolate milkshake and introduce a twist that celebrates childhood chaos and adult nostalgia alike. This chocolate slushie isn’t just a drink; it’s a tiny rebellion against the ordinary, blending intense cocoa with a surprising crunch.

    Imagine biting into a slushy explosion that instantly transports you into a carefree backyard summer, while also satisfying that deep chocolate craving. It’s perfect for spontaneous gatherings or those quiet evenings when only something icy and richly chocolatey will do. The best part? It’s an easy, no-fuss recipe that turns simple ingredients into an unexpected delight.

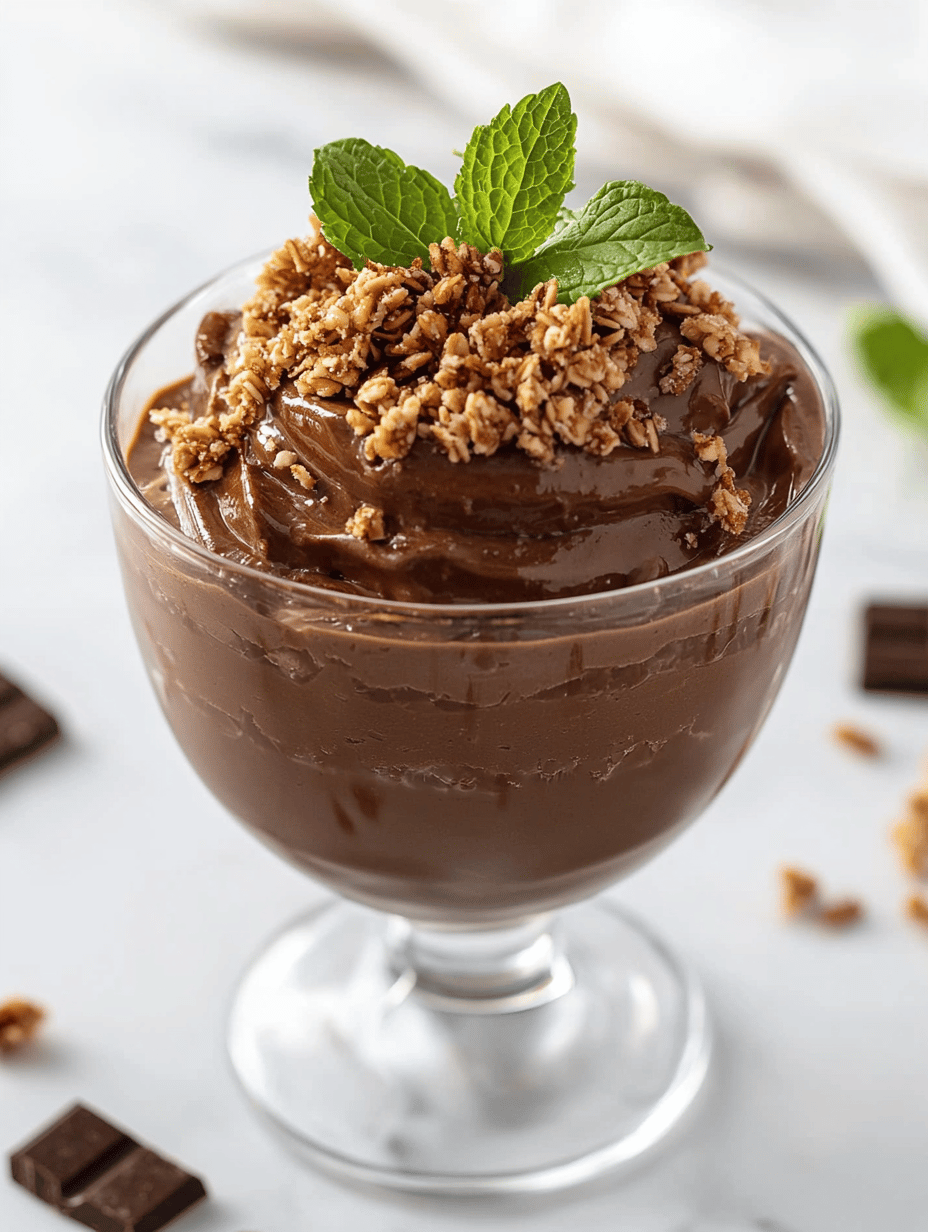
    Chocolate Slushie with Crunchy Topping

    This chocolate slushie combines rich cocoa and sweetened milk blended into a thick, icy beverage with a smooth texture. The drink is finished with a crunchy topping that adds a surprising textural contrast, creating an indulgent, visually appealing treat. It’s perfect for hot days or nostalgic moments, blending frozen ingredients into a frosty, chocolatey delight.
    Prep Time 10 minutes
    Total Time 10 minutes
    Servings: 2
    Course: Main Course
    Cuisine: Dessert
    Calories: 250

    Ingredients
      

    • 2 cups frozen chocolate ice cubes prepared by freezing blended chocolate milk
    • 1/2 cup milk any type, preferably chilled
    • 2 tbsp cocoa powder unsweetened
    • 2 tbsp sugar adjust to taste
    • 1/2 cup crushed graham crackers for the crunchy topping
    • optional chocolate chips or chopped chocolate for extra richness

    Equipment

    • Blender
    • Measuring cups and spoons

    Method
     

    1. Combine the cocoa powder, sugar, and milk in a blender, blending until smooth and slightly frothy, about 30 seconds.
    2. Add some chopped chocolate or chocolate chips if using, then blend briefly just to incorporate.
    3. Pour the mixture into a shallow freezer-safe dish and freeze until firm, about 2-3 hours, stirring halfway through to prevent large ice crystals.
    4. Once frozen, break the chocolate ice into chunks and transfer them to a blender with the milk and remaining ingredients.
    5. Blend the frozen chunks with the milk mixture until smooth, thick, and scoopable, about 30-45 seconds.
    6. Spoon the creamy, chocolate slushie into glasses and top with crushed graham crackers for added crunch.
    7. Garnish with extra chocolate chips if desired, and serve immediately with a straw or spoon for the ultimate cool treat.

    Notes

    For an extra decadent touch, top with whipped cream or a drizzle of chocolate syrup.

    The beauty of this chocolate slushie lies in its simplicity and adaptability. It’s perfect for hot days when everyone craves something cold but refuses to sacrifice flavor. Plus, it’s a versatile canvas—try adding a pinch of chili powder or a swirl of caramel to customize each batch.

    Whether you’re sharing it at a summer party or enjoying a solo moment of bliss, this drink offers a moment of cool serenity amid chaos. It’s a reminder that sometimes, the best recipes are the ones that bring a little joy and a lot of flavor—all in a single, icy sip.

  • The Hidden Power of Homemade Chicken Noodle Soup

    The Hidden Power of Homemade Chicken Noodle Soup

    Few comfort foods carry the same quiet significance as a bowl of chicken noodle soup made from scratch. This recipe transforms simple ingredients into a warm embrace against chilly days or tired evenings. What makes this version stand out is the secret ingredient that amplifies the broth’s flavor—think roasted garlic or a splash of apple cider vinegar.

    Every spoonful offers more than just nourishment; it sparks memories of kitchen chaos and family warmth, all wrapped up in a fragrant, steamy bowl. The process is surprisingly forgiving, making it perfect for nights when perfection isn’t your priority—just a bowl of tender chicken, noodles, and flavorful broth.

    WHY I LOVE THIS RECIPE?

    • baking a homemade broth fills the house with an irresistible aroma of roasted herbs and chicken.
    • It’s a chaos-free way to enjoy comfort food without hours of prep.
    • The noodles absorb the broth’s rich flavors, making every bite a tiny celebration.
    • leftovers taste even better the next day, with flavors deepening overnight.
    • It connects me to childhood memories of chilly evenings and mom’s cooking.

    Homemade Chicken Noodle Soup

    This chicken noodle soup features tender shredded chicken, soft noodles, and a flavorful broth infused with roasted garlic and herbs. The soup is simmered until the ingredients meld into a comforting and hearty dish with a clear, steaming appearance and a savory aroma.
    Prep Time 15 minutes
    Cook Time 45 minutes
    Total Time 1 hour
    Servings: 4
    Course: Main Course
    Cuisine: Comfort Food
    Calories: 350

    Ingredients
      

    • 2 pounds bone-in chicken thighs or breasts, skin removed
    • 1 head garlic whole head for roasting
    • 2 carrots large carrots peeled and sliced
    • 2 stalks celery sliced
    • 8 cups chicken broth preferably homemade
    • 8 ounces egg noodles wide or medium
    • 1 teaspoon dried thyme
    • 2 tablespoons olive oil
    • to taste Salt and pepper for seasoning

    Equipment

    • Large Soup Pot
    • Sharp knife

    Method
     

    1. Preheat your oven to 400°F (200°C). Place the whole head of garlic on a baking sheet, drizzle with a teaspoon of olive oil, wrap in foil, and roast for about 40 minutes until fragrant and golden. Once cooled, squeeze out the roasted garlic cloves and set aside.
    2. While the garlic roasts, heat a large soup pot over medium heat and add a tablespoon of olive oil. Season the chicken thighs with salt and pepper, then brown them in the hot oil for about 5-7 minutes per side until golden and cooked through. Remove the chicken and set aside to cool slightly.
    3. Shred the cooked chicken into bite-sized pieces using two forks or your hands. Pour out any excess fat from the pot, leaving behind the flavorful browned bits.
    4. Add sliced carrots and celery to the same pot and cook for about 5 minutes, stirring occasionally, until the vegetables begin to soften and become fragrant.
    5. Pour in the chicken broth and add the dried thyme. Bring the mixture to a gentle boil, then lower the heat and simmer for 15 minutes, allowing the flavors to meld.
    6. Add the shredded chicken back into the soup along with the roasted garlic cloves, stirring to distribute the flavors evenly.
    7. In a separate pot, cook the egg noodles according to package instructions until al dente, then drain and rinse with cold water to stop the cooking process.
    8. Add the cooked noodles to the soup pot and stir well. Let everything simmer together for another 5 minutes, allowing the noodles to soak up some of the broth’s savory flavor.
    9. Taste the soup and adjust seasoning with salt, pepper, and additional thyme if desired. Once seasoned to your liking, remove from heat and serve hot, garnished with fresh herbs if preferred.

    Notes

    For a richer flavor, let the soup sit for a few hours or overnight; the flavors develop even more with time. You can also add vegetables like spinach or peas near the end of cooking for extra freshness.

    This Chicken Noodle Soup isn’t just a meal; it’s a small ritual that turns a simple ingredients list into something special. It reminds us that comfort food doesn’t have to be complicated or time-consuming. Sometimes, a bowl of warm soup can be the perfect pause in a hectic day.

    As the seasons change and chilly days settle in, this soup offers both warmth and a touch of nostalgia. It’s a humble reminder that the best meals often come from the simplest ideas and a little love in the kitchen.

  • Spooky Yet Sophisticated: Halloween Eyeball Caprese Bites

    Spooky Yet Sophisticated: Halloween Eyeball Caprese Bites

    Whether you’re planning a Halloween dinner, a spooky cocktail party, or just want a fun way to celebrate the season, these eyeball bites are a perfect fit. They’re quick to assemble, strangely satisfying to look at, and so delicious. Plus, they make you look like the most inventive host without much effort. It’s a find I’ll keep coming back to each spooky season.

    Eyeball Bites

    Eyeball bites are fun, spooky snacks made by forming creamy cheese mixtures into round shapes and decorating them with edible embellishments like olives or cherry tomatoes to resemble eyeballs. They typically involve shaping, chilling, and decorating to achieve a realistic and eerie appearance, with a smooth and firm texture once completed. These bites are perfect for Halloween parties and add a playful touch to seasonal gatherings.
    Prep Time 15 minutes
    Total Time 15 minutes
    Servings: 8
    Course: Main Course
    Cuisine: American
    Calories: 120

    Ingredients
      

    • 8 oz cream cheese, softened
    • 1 cup shredded mozzarella cheese
    • 1 tsp garlic powder
    • 1 cup black olives or cherry tomatoes for decorating eyeballs
    • 2 tbsp sliced almonds or red pepper flakes optional for details

    Equipment

    • Mixing bowl
    • Spoon
    • Baking sheet or plate
    • Small knife or toothpick

    Method
     

    1. Combine the softened cream cheese and shredded mozzarella in a mixing bowl, stirring until smooth and creamy.
    2. Add the garlic powder to the cheese mixture, folding it in evenly for flavor.
    3. Using your hands or a spoon, scoop out small portions of the mixture and roll them into smooth, oval or round shapes that resemble eyeballs.
    4. Place the shaped eyeballs onto a platter or baking sheet lined with parchment paper.
    5. Slice the black olives or cherry tomatoes in half; these will be used for the eyeballs’ irises and pupils.
    6. Insert an olive half into the center of each cheese ball to create the iris, and use a small knife or toothpick to add smaller details, like tiny veins or pupils.
    7. If desired, sprinkle sliced almonds or red pepper flakes around the base for added detail and texture.
    8. Chill the eyeball bites in the refrigerator for about 10-15 minutes to firm up and set their shape.
    9. Once chilled, serve the spooky eyeball bites on a platter, enjoying their creepy and fun appearance and smooth, cheesy texture.

    Notes

    For extra realism, add tiny bloodshot veins using a toothpick dipped in red food coloring. You can also experiment with different toppings for varied eye effects.
    These Halloween Eyeball Caprese Bites are a fun, spooky way to jazz up your appetizer spread. The combination of fresh flavors and creepy presentation makes them a crowd favorite every year.
    They’re quick to assemble, and the kids and adults alike will get a kick out of the eerie eyes. Plus, they’re a nice balance of playful and sophisticated, perfect for embracing the spirit of the season.

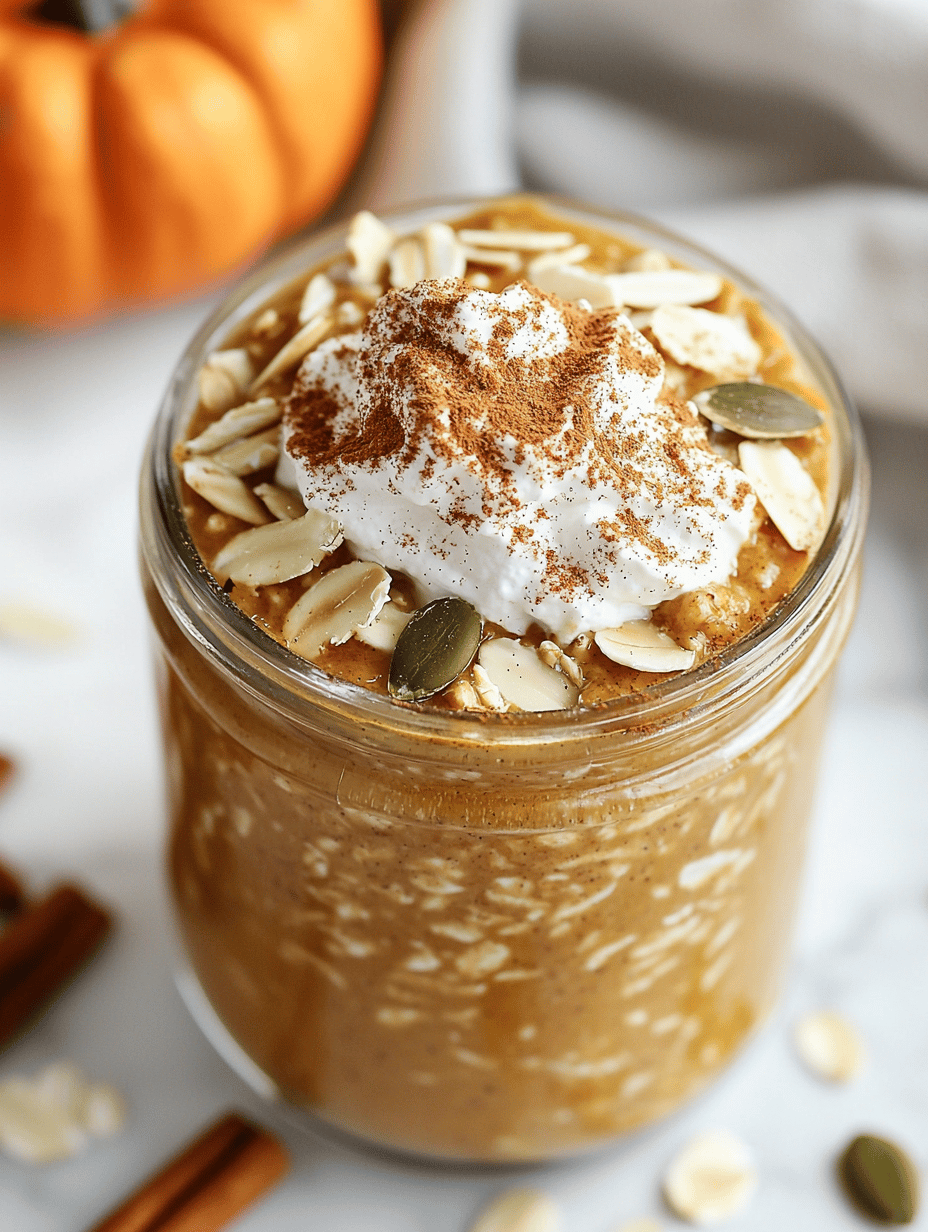
  • Morning Comfort in a Jar: Pumpkin Spice Overnight Oats

    Morning Comfort in a Jar: Pumpkin Spice Overnight Oats

    Starting your day with a spoonful of pumpkin spice overnight oats is like waking up to a cozy fall morning. The aroma of cinnamon, nutmeg, and warm pumpkin greets you even before your first sip of coffee, filling the kitchen with anticipation. This recipe turns busy mornings into a moment of delight, combining simplicity with seasonal charm.

    What makes this twist on traditional oats special? It’s the slow infusion of spice and pumpkin that create a silky, flavorful bowl. Plus, the texture is outstanding—creamy and chunky with the right bite, perfect for those chilly mornings when comfort food feels most needed.

    ## WHY I LOVE THIS RECIPE?
    – I love the nostalgic scent of autumn spices wrapping around my mornings.
    – The preparation is so effortless, it’s practically a stress-free ritual.
    – This recipe reminds me of childhood pumpkin patches and cozy sweaters.
    – I take pride in how customizable it is to suit any dietary need.
    – The blend of textures and flavors makes every spoonful a little celebration.

    ## AVOID MY DISASTER (You’re Welcome)
    – FORGOT TO STIR: Clumpy spice settling at the bottom. Mix well and re-cover.
    – DUMPED TOO MUCH LIQUID: Oversoaked oats turning mushy. Add a pinch more oats and refrigerate.
    – OVER‑TORCHED THE TOP: A burnt smell and bitter bite. Cover and scoop off the burn layer.
    – SKIPPED THE CHILL: Warm oats tasted flat. Let it sit overnight for flavor to deepen.

    ## QUICK FIXES THAT SAVE YOUR DAY
    – When oats are too thick, splash in a splash of almond milk.
    – When spice is muted, sprinkle extra cinnamon before serving.
    – Forgot to sweeten? Patch with a drizzle of maple syrup.
    – When oats turn runny, stir in a handful of coconut flakes for texture.
    – If the pumpkin smell is faint, stir in a splash of vanilla extract.

    This pumpkin spice overnight oats recipe offers a delightful way to start any day. The mix of warm spices, creamy oats, and the subtle sweetness of pumpkin makes each bite satisfying. With its make-ahead convenience, it’s perfect for preparing the night before, leaving mornings free for enjoying that first sip of coffee.

    As seasonal flavors continue to dominate our kitchens, this dish feels particularly relevant. It’s a cozy nod to fall that still feels fresh and easy, fitting into any busy lifestyle. A simple jar of oats becomes a small, comforting ritual that’s worth looking forward to every morning.

    Pumpkin Spice Overnight Oats

    This dish consists of rolled oats soaked in a mixture of milk, pumpkin puree, and warm spices, then chilled overnight to develop a creamy, flavorful consistency. The final result is a silky bowl with a slightly chunky texture, infused with autumnal flavors and topped with optional garnishes for added texture and visual appeal.
    Prep Time 10 minutes
    Total Time 10 minutes
    Servings: 2
    Course: Main Course
    Cuisine: American
    Calories: 250

    Ingredients
      

    • 1 cup rolled oats old-fashioned
    • 1/2 cup pumpkin puree unsweetened
    • 1 cup milk dairy or non-dairy
    • 1 teaspoon cinnamon
    • 1/2 teaspoon nutmeg
    • 1 tablespoon maple syrup optional sweetener
    • 1/4 teaspoon allspice optional
    • 1 pinch salt

    Equipment

    • Mixing bowl
    • Spoon
    • Jar or container with lid

    Method
     

    1. Combine the rolled oats, pumpkin puree, milk, cinnamon, nutmeg, allspice, salt, and maple syrup in a mixing bowl. Stir thoroughly until the mixture is smooth and the oats are evenly coated with the spices and pumpkin.
    2. Pour the mixture into a jar or container with a lid, making sure everything is evenly distributed. Seal tightly to prevent spills and ensure even soaking.
    3. Place the jar in the refrigerator and let it soak overnight or for at least 6 hours. This allows the oats to absorb the flavors and become tender, with a creamy yet chunky texture.
    4. Remove the jar from the fridge the next morning. Give the oats a gentle stir to incorporate any separated liquids and check the consistency.
    5. Scoop the pumpkin spice overnight oats into bowls. The mixture should be creamy with visible oats and a smooth, thick texture. Garnish with your favorite toppings like chopped nuts, seeds, or a drizzle of additional maple syrup if desired.
    6. Enjoy your cozy, flavorful breakfast—a perfect balance of spice, pumpkin, and creamy oats ready to start your day with fall-inspired warmth.
    Incorporating this pumpkin spice overnight oats into your routine can be a small act of self-care during the hectic pace of fall. It offers a cozy pause, a moment of warmth that’s just waiting to be enjoyed. Plus, it’s a gentle way to savor every spoonful of the season.

    Sometimes, the best mornings start with a picture-perfect bowl of something familiar but elevated. This recipe makes that easy and delicious. It’s a reminder that comfort can be both simple and nourishing, especially when it’s as adaptable and tasty as this.

  • Spooky Good: Halloween Mummy Hot Dogs That Charm and Charm

    Spooky Good: Halloween Mummy Hot Dogs That Charm and Charm

    This Halloween treat isn’t just about looks. It’s about what it brings to the table — nostalgia, chaos, and a whole lot of smiles. It’s the kind of dish that invites everyone to get messy in the kitchen and share a laugh over a plate of spooky, delicious fun.

    Spooky Halloween Cheese Ball

    This Halloween cheese ball is made with cream cheese mixed with savory herbs and spices, formed into a round shape, and coated with crushed savory snacks or nuts. Decorated with googly eyes or spooky accents, it presents a creamy, crumb-coated exterior with a smooth interior, resembling a creepy, fun costume-ready centerpiece.
    Prep Time 15 minutes
    Total Time 15 minutes
    Servings: 8
    Course: Main Course
    Cuisine: Holiday
    Calories: 250

    Ingredients
      

    • 16 oz cream cheese, softened
    • 1 tsp garlic powder
    • 1 tsp dried herbs (e.g., parsley or chives)
    • 0.5 tsp black pepper
    • 1 cup crushed savory snacks, nuts or crackers for coating
    • 10 small googly eyes or edible decorations

    Equipment

    • Mixing bowl
    • Spoon or spatula
    • Plastic wrap
    • Serving platter

    Method
     

    1. Combine the softened cream cheese with garlic powder, dried herbs, and black pepper in a mixing bowl. Mix thoroughly with a spoon or spatula until the herbs are evenly distributed and the mixture is smooth and creamy.
    2. Use your hands or a spatula to shape the herb-infused cream cheese into a round ball, about the size of a large melon. Press gently to create a firm, smooth exterior.
    3. Place the assembled cheese ball on a serving platter and evenly roll or press the crushed snacks or nuts over the entire surface, creating a crumb-coated exterior that resembles a spooky camouflage.
    4. Decorate the top of the cheese ball with small googly eyes or other edible decorations to give it a spooky, characterful look. Press them gently into the coating to secure.
    5. Once decorated, chill the cheese ball for at least 30 minutes to firm up, making it easier to serve and keeping the decorations in place.
    6. Transfer the cheese ball to a serving platter, and arrange additional decorations or spooky edible accents around it for presentation. Serve alongside crackers or bread for spreading and eating.

    Notes

    For extra spooky effects, use black olives or sliced peppers for ‘fingers’ or other decorations.
    In the end, Halloween is about creating moments of joy and laughter. Whether you’re dressing up or just decorating your table, these little mummies add a sprinkle of delight and a dash of chaos to your night. Enjoy the magic, one bite at a time.

  • The Magic of Blue Raspberry: Chilling Secrets for a Perfect Slushie

    The Magic of Blue Raspberry: Chilling Secrets for a Perfect Slushie

    Imagine a summer afternoon where the air is thick with heat, and the only relief is a cold, vibrant drink that turns even the gloomiest day into a celebration. Blue raspberry slushie isn’t just a refreshment; it’s a nostalgic escape wrapped in electric blue hues. I discovered this gem when I needed something that sparkled in both flavor and color, a playful twist on a classic.

    This recipe isn’t your average frozen treat. It’s a vibrant splash of childhood memories mixed with a modern obsession for bold, eye-catching food. I’m excited to share the secrets behind its bright color and intensely fruity flavor, which make it stand out at any get-together or lazy afternoon. Let’s dive into the frozen magic.

    Blue Raspberry Slushie

    A blue raspberry slushie is a frozen beverage made by blending ice with blue raspberry syrup and juice, resulting in a vibrant, icy drink with a smooth, slushy texture. The mixture is processed until it reaches a thick, spoonable consistency and served cold, showcasing an electric blue hue and intensely fruity flavor.
    Prep Time 5 minutes
    Total Time 5 minutes
    Servings: 2
    Course: Main Course
    Cuisine: American
    Calories: 150

    Ingredients
      

    • 2 cups ice cubes preferably crushed or chipped for blending
    • 1/2 cup blue raspberry syrup
    • 1/2 cup blue raspberry juice or flavored water for extra flavor and color

    Equipment

    • Blender
    • Measuring cups and spoons

    Method
     

    1. Place the ice cubes, blue raspberry syrup, and blue raspberry juice into the blender.
    2. Start blending on low speed, gradually increasing to high, until the mixture is shaved and becomes thick, smooth, and slushy, about 30-40 seconds.
    3. Pause briefly to check the texture, and blend again if necessary until the mixture is evenly blended and has a vibrant blue color.
    4. Pour into glasses, using a spoon if needed to serve the thickest parts.
    5. Optionally, garnish with a few extra ice chips or berries for presentation.
    6. Enjoy immediately with a straw or spoon for a cooling, fruity treat.
    Whether you’re cooling down after a long day or just craving something fun and fruity, this blue raspberry slushie hits the spot. It’s easy to customize with different fruit juices or add a splash of lemon for extra tang. The next time you want a drink that’s as lively as your summer spirit, this slushie is your go-to.

    Remember, the best part about making this at home is tweaking it to match your perfect icy texture or flavor intensity. Grab your blender, some vibrant blue syrup, and let the icy adventure begin. Your taste buds will thank you for the burst of cool, fruity joy.

  • The Secret Charm of Rum Slushies on Hot Summer Days

    The Secret Charm of Rum Slushies on Hot Summer Days

    When the heat hits its peak, I turn to an old favorite: rum slushies that pack a punch of flavor and nostalgia. Unlike typical cocktails, these icy drinks hold a childhood joy but with a spirited twist. Making them reminds me of summer vacations and late-night gatherings under string lights.

    This recipe offers a surprising way to elevate a simple frozen drink with a hint of spice and citrus, delivering a cool escape from the scorching sun. It’s perfect for sundown parties or relaxed weekends where the only thing you need is cold sweetness and a splash of rum. The best part? You can customize the sweetness and strength to perfectly match your mood.

    Rum Slushies with a Spicy Citrus Twist

    This recipe produces icy frozen drinks made by blending rum, citrus juice, and sweeteners until smooth and slushy. The mixture has a bright, refreshing appearance with a slightly granular texture that melts smoothly in the mouth. A hint of spice and citrus elevates the classic frozen cocktail for a summer-friendly treat.
    Prep Time 10 minutes
    Total Time 10 minutes
    Servings: 4
    Course: Main Course
    Cuisine: Various
    Calories: 200

    Ingredients
      

    • 1 cup rum white or amber rum, depending on preference
    • 1 cup fresh citrus juice orange and lime juice combined
    • 0.5 cup simple syrup adjust sweetness as desired
    • 0.25 teaspoon ground cinnamon adds warmth and spice
    • 3 cups ice cubes preferably crushed for easier blending

    Equipment

    • Blender
    • Measuring cups and spoons
    • Knife
    • Citrus Juicer

    Method
     

    1. Juice fresh oranges and limes using a citrus juicer, then combine the juices in a measuring cup.
    2. Pour the citrus juice into the blender, followed by the rum and simple syrup. Add the ground cinnamon for a hint of spice.
    3. Add the ice cubes to the blender to create a chilled, slushy mixture.
    4. Blend on high speed for 30-45 seconds until the mixture is smooth and icy, with a texture similar to granular snow.
    5. Stop the blender and check the texture; it should be thick and slushy but pourable. If needed, blend a few seconds longer.
    6. Pour the frosty mixture into glasses, garnishing with a citrus slice or a sprinkle of cinnamon if desired.
    7. Enjoy immediately with a straw or spoon for a cool, refreshing treat that captures summery zest with a spirited kick.

    In the end, rum slushies aren’t just a beverage; they’re a mini mental vacation in a glass. As the summer days stretch on, this recipe will be your go-to for quick refreshment and fun. Sharing it with friends makes the moment even sweeter, adding a little splash of joy to the season.

    So, next time the heat feels relentless, remember there’s a simple icy solution waiting in your freezer. It’s an easy crowd-pleaser and a personal treat rolled into one. Cheers to cooling down with a bit of rum and a whole lot of cheer!

  • Chili Conquered: My Chaos-Driven Secret to Heartwarming Comfort

    Chili Conquered: My Chaos-Driven Secret to Heartwarming Comfort

    Cooking chili isn’t just about combining beans and spices; it’s a ritual that unexpectedly echoes childhood memories of tapping into my grandma’s spicy magic. Today’s recipe is born from my chaotic kitchen moments—when I accidentally discovered a secret ingredient that makes this chili irresistibly smoky and rich. The aroma alone, a blend of roasted peppers and simmered beef, can turn even the gloomiest day around.

    What makes this particular chili stand out is its embrace of imperfect ingredients—sometimes a splash of coffee or a sprinkle of cocoa turns ordinary into extraordinary. It’s a dish that appreciates the unexpected, much like my own kitchen where mistakes often lead to the best flavors. So, I invite you to join me in this messy, flavorful adventure that only gets better with love and a little chaos.

    Hearty Smoked Chili

    This chili is made by simmering ground beef with beans, peppers, and spices to develop deep, robust flavors. The dish features a thick, chunky consistency with a smoky aroma, finished with a rich, meaty taste and a slightly spicy kick.
    Prep Time 15 minutes
    Cook Time 45 minutes
    Total Time 1 hour
    Servings: 6
    Course: Main Course
    Cuisine: American
    Calories: 350

    Ingredients
      

    • 1 lb ground beef preferably lean
    • 1 can (15 oz) kidney beans drained and rinsed
    • 1 can (15 oz) black beans drained and rinsed
    • 1 large red bell pepper seeded and chopped
    • 1 medium onion diced
    • 3 cloves garlic minced
    • 2 tbsp olive oil
    • 1 tbsp chili powder adjust to taste
    • 1 tsp ground cumin
    • 1/2 tsp smoked paprika adds smoky flavor
    • 1/4 tsp cocoa powder optional, enhances richness
    • 1 cup beef broth
    • 1 tbsp coffee richens the flavor, optional
    • Salt and pepper to taste

    Equipment

    • Large pot or Dutch oven
    • Knife
    • Cutting board
    • Wooden spoon or spatula
    • Can Opener

    Method
     

    1. Heat the olive oil in a large pot over medium-high heat. Add the diced onion and chopped bell pepper, sautéing until softened and fragrant, about 5 minutes, with the mixture bubbling and the vegetables turning translucent.
    2. Add the minced garlic to the pot and cook for another minute, until fragrant and slightly golden.
    3. Stir in the ground beef, breaking it apart with your spoon, and cook until browned all over, about 8 minutes, until the mixture is bubbling and the beef develops a deep color.
    4. Mix in the chili powder, cumin, smoked paprika, cocoa powder, and a pinch of salt and pepper; cook for 1-2 minutes to toast the spices and deepen their aroma.
    5. Pour in the beef broth and coffee, stirring well to deglaze the bottom of the pot and incorporate all flavors, letting it bubble up.
    6. Add the drained kidney and black beans, and stir the mixture to evenly distribute the ingredients.
    7. Reduce the heat to low and let the chili simmer uncovered for about 30 minutes, stirring occasionally, until the mixture thickens slightly and the flavors meld, with a rich smoky aroma filling the kitchen.
    8. Taste the chili and adjust the seasoning with salt and pepper as needed, ensuring a balanced and bold flavor.
    9. Serve the chili hot, garnished with your favorite toppings, and enjoy the deep, smoky, and hearty flavors.

    This chili isn’t just a meal; it’s a story told through spices and slow simmering. It reminds me that sometimes, the best comfort food comes from embracing the imperfections and surprises along the way. When served with a side of crusty bread or a sprinkle of sharp cheddar, it feels like a warm, familiar hug.

    In a season where hearty, soul-warming dishes are most needed, this chili offers both nostalgia and a creative twist. It’s a dish that can be assembled with pantry staples in under an hour, yet tastes like it’s been simmering all day. The true magic is in how it brings people together, no matter the chaos behind the scenes.

  • Spook-tacular Mummy Pizza: Halloween’s Chewiest Delight

    Spook-tacular Mummy Pizza: Halloween’s Chewiest Delight

    Every October, I find myself craving the playful chaos that Halloween brings. This year, I decided to blend my love for funny-faced foods with a nostalgic twist—Mummy Pizza! The smell of toasted crust mingling with bubbling cheese and spicy pepperoni instantly takes me back to childhood trick-or-treat adventures.

    What makes this recipe truly special is its quirky presentation. Wrapping cheese and toppings in pizza dough feels like preparing tiny, edible scarecrows. It’s a perfect way to make mealtime fun for kids and adults alike, all while showcasing your baking skills with a spooky flair.

    Mummy Pizza

    Mummy Pizza features a classic pizza crust topped with bubbling cheese and spicy pepperoni, shaped to resemble bandaged mummies for a playful Halloween presentation. The dish involves assembling and baking the decorated pizzas until the crust is golden and the cheese is melted and bubbly, resulting in a fun and flavorful kid-friendly meal with a crispy exterior and gooey topping.
    Prep Time 20 minutes
    Cook Time 15 minutes
    Total Time 35 minutes
    Servings: 4
    Course: Main Course
    Cuisine: American
    Calories: 250

    Ingredients
      

    • 1 package pizza dough store-bought or homemade
    • 1 cup shredded mozzarella cheese for topping
    • 50 grams pepperoni slices for eyes and decoration
    • 1 tablespoon olive oil optional, for brushing crust
    • 1 teaspoon dried oregano optional, for extra flavor

    Equipment

    • Baking sheet
    • Rolling pin
    • Oven
    • Cooking knife
    • Parchment paper

    Method
     

    1. Preheat the oven to 400°F (200°C) and line a baking sheet with parchment paper.
    2. Lightly flour a clean surface and roll out the pizza dough into a rectangle about ¼ inch thick. Use a rolling pin to get an even layer.
    3. Transfer the rolled dough onto the prepared baking sheet. Brush the edges with a bit of olive oil to give the crust a shiny finish.
    4. Spread the shredded mozzarella evenly over the dough, leaving about an inch around the edges for the crust.
    5. Arrange slices of pepperoni across the cheese in a playful pattern, leaving space for ‘bandages’ and eyes.
    6. Use extra strips of dough or cheese to create bandage-like strips across the pizza, wrapping over the toppings to resemble mummy wrappings.
    7. Place small pepperoni slices on the ends or in the gaps to resemble eyes. You can also add a tiny piece of cheese or olive for added detail.
    8. Bake the pizza in the preheated oven for about 12-15 minutes, or until the crust is golden and the cheese is bubbling and slightly browned.
    9. Remove the pizza from the oven and allow it to cool for a couple of minutes; the cheese will set slightly and make slicing easier.
    10. Slice the mummy pizza into portions and serve hot, showcasing the playful bandaged look with gooey cheese and pepperoni eyes.

    Halloween is all about embracing the macabre and the merry. These mummies aren’t just a snack—they’re a conversation starter at any spooky gathering. Plus, they come together quickly, making them an ideal project for last-minute party prep.

    So next time you want to impress with some edible Halloween decor, pull out this easy, cheesy recipe. Their mischievous faces will turn any table into a festive spectacle, and your kitchen will smell like a bakery haunted by delicious spirits.