Blog

  • The Unexpected Charm of Roasted Tomato Sauce

    The Unexpected Charm of Roasted Tomato Sauce

    Homemade tomato sauce can sometimes feel like just another kitchen task. But what if you turned it into a sensory ritual, roasting the tomatoes until they are bursting with smoky depth? The slow transformation brings out caramelized sweetness, making it a soulful addition to any dish.

    This recipe invites you to embrace the imperfect charm of charred edges and bubbling juices. It’s a comforting process that reconnects you with the essence of summer produce, even in the dead of winter. The aroma alone transforms your space into a rustic kitchen escape.
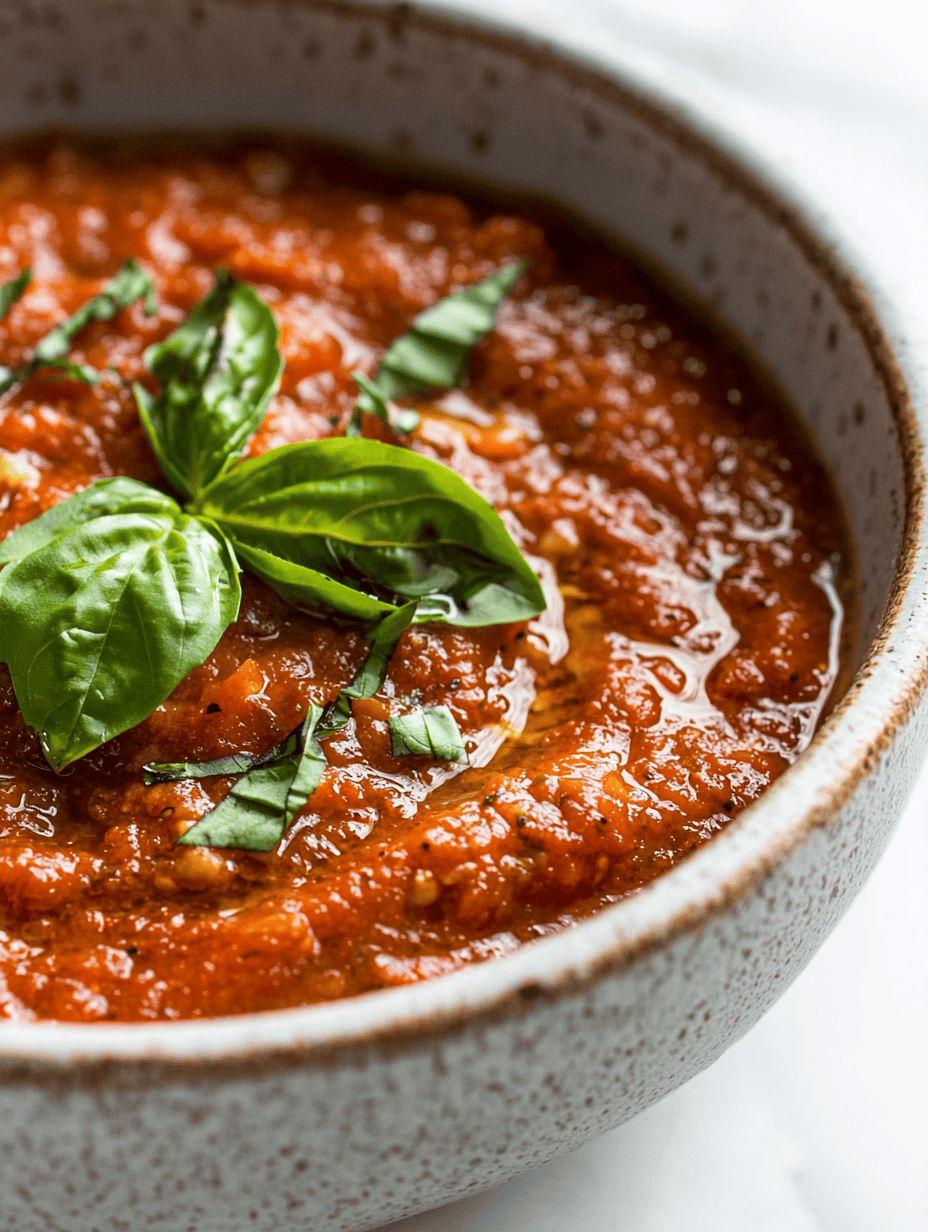
    Roasted Homemade Tomato Sauce

    This tomato sauce is crafted by roasting fresh tomatoes to develop deep, smoky flavors and caramelized sweetness. The roasting process creates a thick, slightly charred consistency with rich, bubbling juices, resulting in an intensely flavorful sauce that embodies rustic charm.
    Prep Time 10 minutes
    Cook Time 45 minutes
    Total Time 55 minutes
    Servings: 4
    Course: Main Course
    Cuisine: Italian
    Calories: 120

    Ingredients
      

    • 2 pounds ripe tomatoes halved
    • 3 cloves garlic minced
    • 2 tablespoons olive oil
    • 1 teaspoon sea salt
    • 1/2 teaspoon black pepper
    • 1 pinch crushed red pepper flakes optional

    Equipment

    • Baking sheet
    • Blender or immersion blender
    • Cooking pot

    Method
     

    1. Preheat your oven to 425°F (220°C). Spread the halved tomatoes on a baking sheet, cut side up, and brush them lightly with olive oil. Roast for about 35-40 minutes until they are blistered and slightly charred around the edges.
    2. Remove the tomatoes from the oven and let them cool just enough to handle. The skins should be blistered and slightly blackened, filling your kitchen with a smoky aroma.
    3. Transfer the roasted tomatoes, along with any juices in the pan, into a blender or use an immersion blender directly in the baking sheet to blend until smooth or slightly chunky, depending on your preference.
    4. Pour the blended tomato mixture into a cooking pot and bring it to a gentle simmer over medium heat. Add the minced garlic, salt, black pepper, and red pepper flakes, stirring to combine.
    5. Simmer the sauce uncovered for 15-20 minutes, stirring occasionally, until it thickens slightly and the flavors meld. You should notice a richer color and a fragrant aroma emerging.
    6. Taste the sauce and adjust seasoning if necessary, adding more salt or pepper as desired. For a smoother consistency, blend again with an immersion blender if preferred.

    Notes

    This roasted tomato sauce pairs beautifully with pasta, grilled vegetables, or as a base for other dishes.
    This roasted tomato sauce reminds us that simplicity often yields the most profound flavors. It’s perfect for cozy nights when you crave a sauce with a deep, layered taste, yet it’s quick enough for a weeknight meal.

    As the season demands hearty, warming meals, this sauce becomes a pantry staple that’s both versatile and memorable. Its smoky richness pairs beautifully with pasta, roasted vegetables, or even as a dip. Embrace the cooking process, and let the aroma of roasted tomatoes bring a little extra warmth to your kitchen.
  • Chilling Charm: The Unexpected Allure of Caramel Slushies

    Chilling Charm: The Unexpected Allure of Caramel Slushies

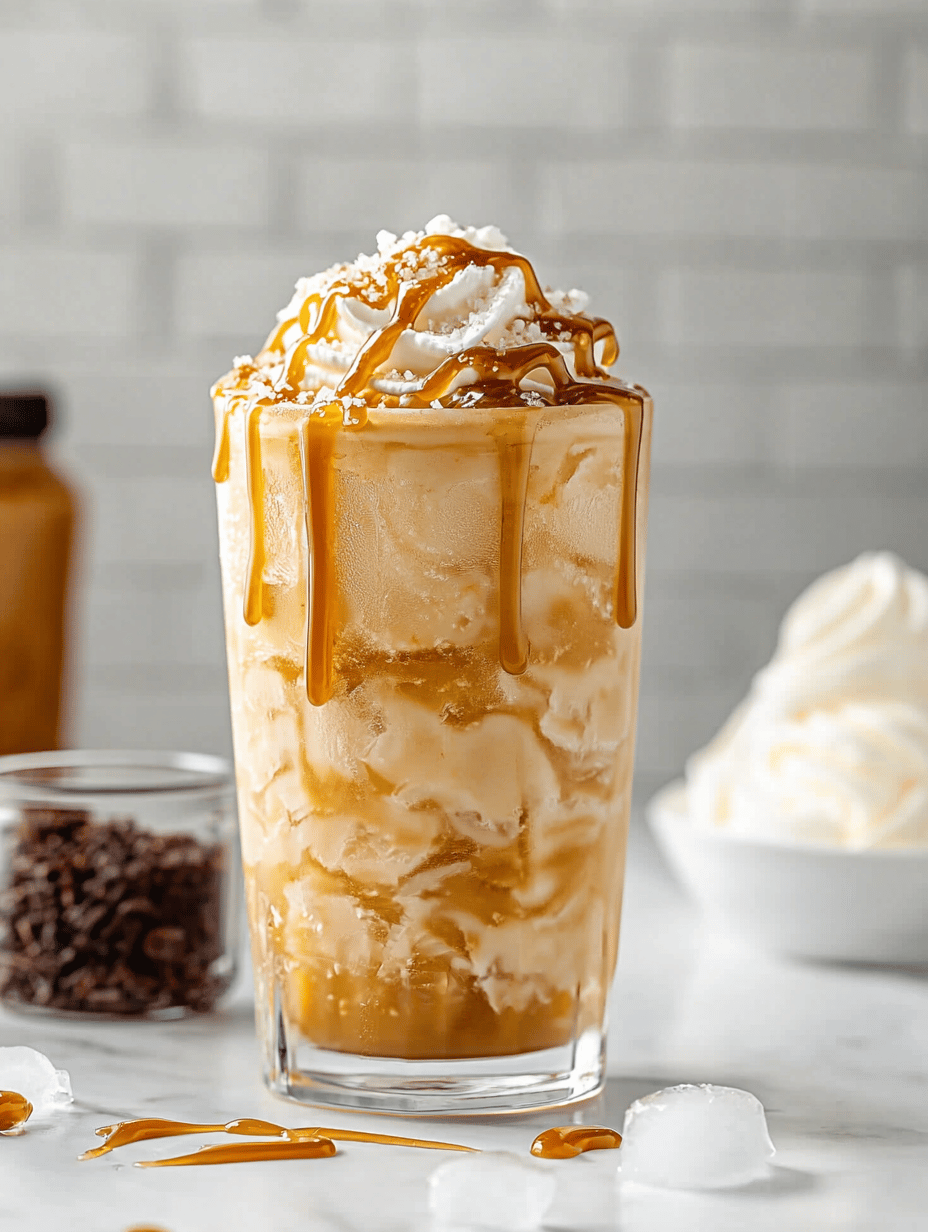
    Imagine the cool embrace of a slushie, but amp it up with a sweet, buttery caramel twist. This recipe transforms a simple frozen treat into a nostalgic escape, perfect for spontaneous summer cravings or lazy afternoons. The aroma alone, warm caramel mingled with icy freshness, whips up a sensory party that’s hard to resist.

    Crafting this caramel slushie isn’t just about blending flavors; it’s about celebrating the chaos of childhood joy mixed with grown-up indulgence. The silky caramel syrup drizzled over crushed ice makes every sip a reminder of simpler days, now with a luxurious edge. It’s a quick refresher with a whisper of decadence, a perfect little cheat on a warm day.

    Caramel Slushie

    A caramel slushie is a frozen beverage that combines crushed ice with sweet, buttery caramel syrup, resulting in a refreshing treat with a smooth, icy texture and a rich, caramel flavor. The mixture is blended until slushy and served immediately, showcasing a glossy appearance with a textured, icy finish.
    Prep Time 10 minutes
    Total Time 10 minutes
    Servings: 2
    Course: Main Course
    Cuisine: Dessert
    Calories: 180

    Ingredients
      

    • 2 cups crushed ice preferably made by crushing ice in a blender or a bag
    • 1/2 cup caramel syrup store-bought or homemade caramel syrup

    Equipment

    • Blender
    • Measuring cups and spoons

    Method
     

    1. Measure out the crushed ice and caramel syrup, placing them nearby for quick access.
    2. Add the crushed ice to the blender, filling it about three-quarters full to allow room for blending.
    3. Secure the lid on the blender and blend on high speed for about 30-45 seconds, until the mixture becomes thick, slushy, and well combined.
    4. Stop the blender, and check the texture; it should look icy and smooth, with a glossy, caramelized appearance.
    5. Pour the sticky, caramel-slushie mixture into glasses, using a spoon if needed to scoop out the last bits.
    6. Serve immediately to enjoy the icy, creamy texture with a rich caramel flavor and a glossy finish.

    This recipe reminds us that comfort can be beautifully simple and oddly sophisticated. It’s a refreshing escape that doesn’t demand much fuss but offers plenty of smiles, especially when served in a favorite glass. Whether you’re cooling down after a long day or just craving something sweet and cold, this caramel slushie fits right in.

    Made with pantry staples and a few minutes of blending, it proves that delight can often be found in the simplest forms. Plus, the lingering caramel scent, a hint of toasted sugar in the air, makes the moment even more special. Sometimes, the best summer memories are just a sip away.

  • Chill & Thrill: The Art of the Milkshake Slushie

    Chill & Thrill: The Art of the Milkshake Slushie

    Imagine a warm summer day, you crave something cold but can’t decide between a milkshake or a slushie. Now, what if I told you there’s a way to combine the creamy decadence of a milkshake with the icy crunch of a slushie? Welcome to the world of milkshake slushies — a surprisingly simple recipe with a delightful twist.

    This recipe is a secret weapon for spontaneous gatherings or a quick pick-me-up after a long day. You don’t need fancy equipment, just a few ingredients and a love for cold, sweet treats. It’s about transforming everyday ingredients into a frozen spectacle that excites every sense.

    From the first frosty sip, you’ll notice how the smooth, rich flavor of milk and ice blends seamlessly with your favorite toppings. This isn’t just a dessert; it’s an experience. Ready to elevate your frozen snack game? Let’s dive in.

    Milkshake Slushies

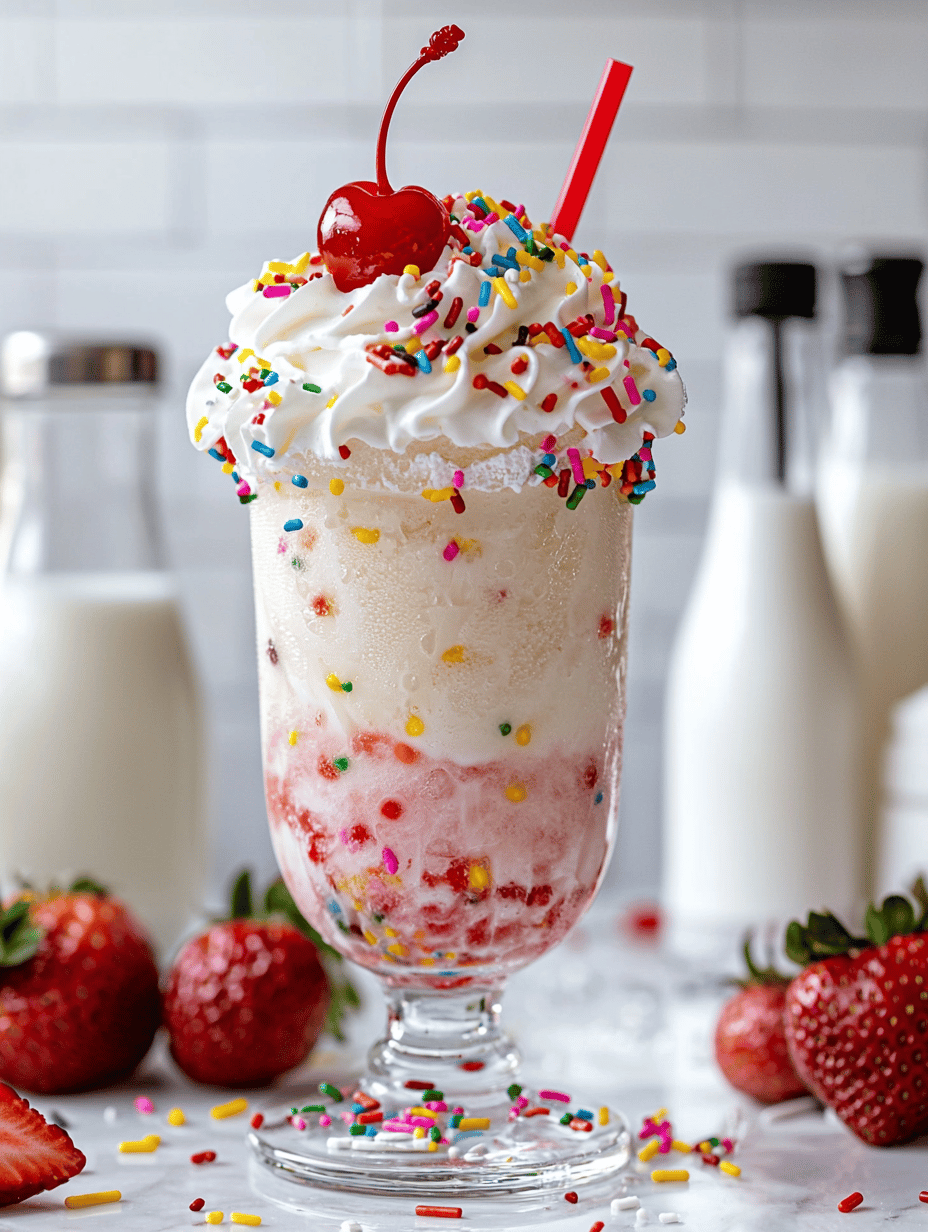
    Milkshake slushies blend the creamy richness of milkshakes with the icy texture of a slushie through blending and freezing techniques. Main ingredients include milk, ice, and sweeteners, resulting in a cold, semi-frozen treat with a smooth yet crunchy appearance. The final dish is a visually appealing, frosty beverage with a thick, slushy consistency suitable for scooping or sipping.
    Prep Time 10 minutes
    Total Time 10 minutes
    Servings: 2
    Course: Main Course
    Cuisine: Fusion
    Calories: 150

    Ingredients
      

    • 1 cup milk
    • 2 cups ice cubes
    • 2 tablespoons sugar or sweetened condensed milk
    • 1 teaspoon vanilla extract

    Equipment

    • Blender
    • Measuring cups and spoons

    Method
     

    1. Add the milk, ice cubes, sugar or sweetened condensed milk, and vanilla extract into the blender.
    2. Secure the lid on the blender and blend on high speed for about 30-45 seconds until the mixture is thick, frosty, and the ice is finely crushed.
    3. Check the consistency; it should be creamy with a slightly crunchy texture from the ice. If it’s too soft, add a few more ice cubes and blend briefly again.
    4. Stop the blender and give the mixture a quick stir with a spoon if needed, to ensure even distribution of ice and sweetness.
    5. Scoop the milkshake slushie into glasses or serve directly from the blender for a more rustic look.
    6. Enjoy the chilled, icy-smooth texture of your milkshake slushies immediately, with optional toppings like whipped cream or sprinkles if desired.

    Notes

    For a richer flavor, substitute some milk with flavored syrups or add fruit puree before blending.

    In a world full of complex desserts, this milkshake slushie keeps things refreshingly simple and endlessly customizable. It’s perfect for lazy weekends or last-minute cravings, offering a cool, satisfying escape without fuss. As the summer heat continues to press on, this treat will always be your go-to.

    So, next time you’re hunting for something chilly yet comforting, remember this easy recipe. It’s a playful mix of nostalgia and innovation that never fails to bring a smile. Enjoy crafting your own icy masterpiece, one sip at a time.

  • Spooky Sweetness: Halloween Graveyard Pudding Cups

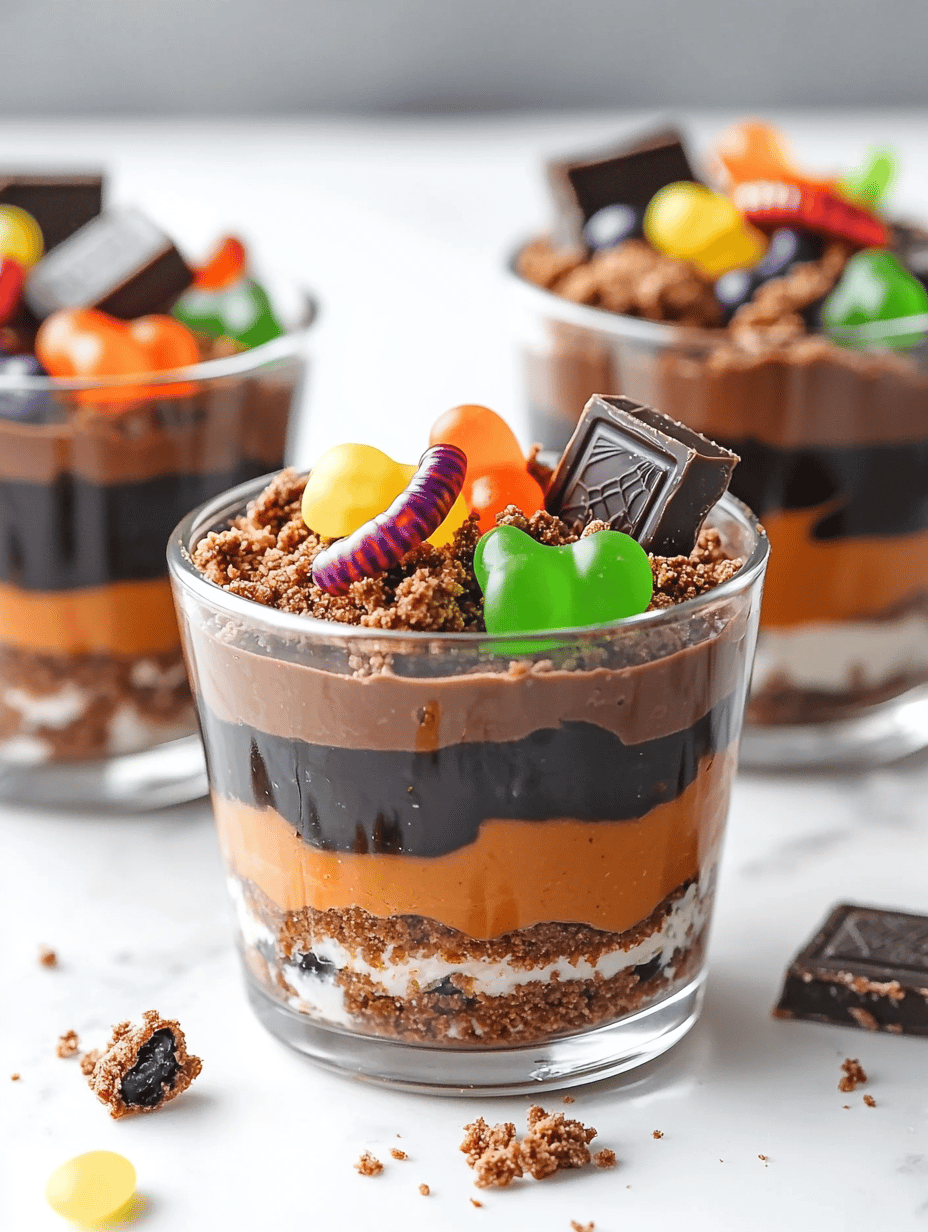
    Spooky Sweetness: Halloween Graveyard Pudding Cups

    Every October, I find myself craving something that combines the thrill of Halloween with a little indulgent chaos. These Graveyard Pudding Cups do just that—they turn simple desserts into a spooky scene straight out of a haunted yard. The best part? They’re quick to assemble, making them perfect for last-minute party surprises.

    Imagine biting into a chocolate pudding graveyard, with crushed cookies for dirt and candy all around—each spoonful a little adventure. The mix of textures and flavors sparks nostalgic childhood memories of Halloween trick-or-treating. Plus, they add a playful, eerie vibe to any spooky celebration.

    Graveyard Pudding Cups

    Graveyard Pudding Cups are layered desserts featuring chocolate pudding, crushed cookies for dirt, and candy decorations to create a spooky, haunted scene. The dessert is assembled in individual cups, offering a combination of creamy, crunchy, and chewy textures with a visually eerie appearance. Perfect for Halloween parties, they are quick to prepare and visually striking.
    Prep Time 10 minutes
    Total Time 10 minutes
    Servings: 4
    Course: Main Course
    Cuisine: Halloween
    Calories: 250

    Ingredients
      

    • 1 box chocolate pudding mix prepare according to package instructions
    • 1 1/2 cups milk for pudding mix
    • 1 cup crushed chocolate cookies for dirt layer
    • 1/2 cup candy eyes or smarties for decorations
    • Optional candy bones or mini candy figures for extra decoration

    Equipment

    • Mixing bowl
    • Serving cups or small jars
    • Spoon or spatula
    • Food processor or plastic bag and rolling pin

    Method
     

    1. Start by preparing the chocolate pudding mix according to the package instructions, whisking until smooth and thickened. Pour the pudding into a large bowl and refrigerate for a few minutes if needed to firm up slightly.
    2. While the pudding chills, crush the chocolate cookies into coarse crumbs using a food processor or by placing them in a plastic bag and smashing with a rolling pin. This will resemble loose dirt.
    3. Spoon or pipe the firm chocolate pudding evenly into individual cups or small jars, filling them about two-thirds full. This creates the base of your graveyard scene.
    4. Sprinkle a generous layer of crushed cookies over the pudding to resemble dirt covering a graveyard. Use the back of a spoon to spread evenly and press lightly to settle the crumbs.
    5. Decorate the top with candy eyes to mimic tombstones or spooky accents, placing them randomly for an eerie effect. Add any candy bones or figures for a more haunted appearance if desired.
    6. Repeat the layering process for additional cups if making more, finishing with a cookie dirt layer and creepy decorations on top.
    7. Once decorated, chill the pudding cups in the refrigerator for at least 10 minutes to allow flavors to meld and decorations to set lightly.
    8. Serve the Graveyard Pudding Cups chilled, revealing the layered dirt and spooky decorations just before enjoying this creepy treat.

    Notes

    For extra spookiness, add candy bones, gummy worms, or fake spiders atop the crushed cookies before serving.

    These pudding cups are more than just treats; they’re little story starters at your party table. Watching guests’ faces as they uncover the mini gravestones and bones is half the fun. Plus, they remind us how some of the simplest ingredients can craft the most memorable moments.

    As the season shifts and Halloween décor floods the stores, it’s nice to have a dessert that’s both fun and spoiler-proof. No matter how much chaos surrounds your prep, these cups bring joy and a dash of spooky charm to the night. They’re proof that sometimes, eerie and adorable go hand in hand.

  • Cherry Slushie: A Cool, Nostalgic Burst in Your Glass

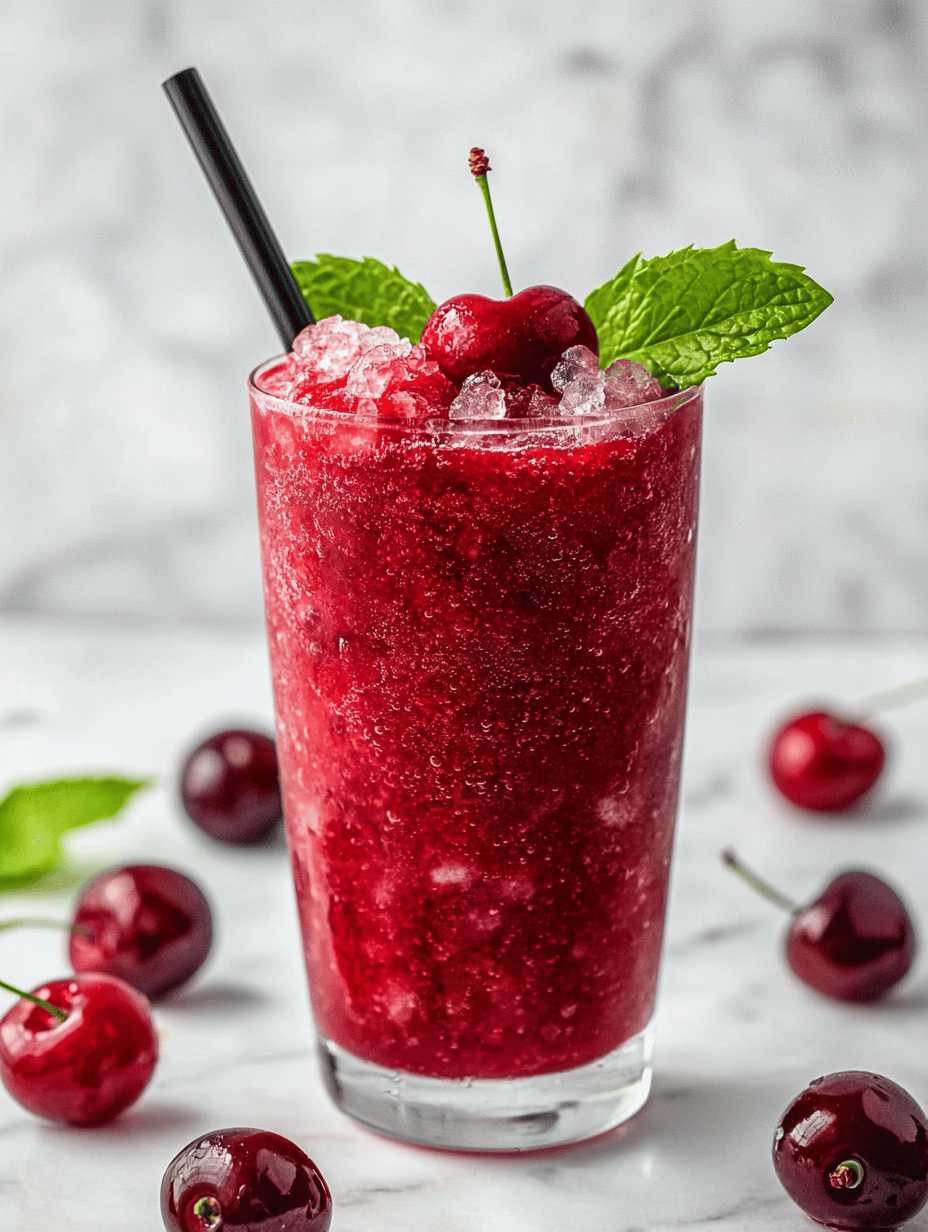
    Cherry Slushie: A Cool, Nostalgic Burst in Your Glass

    Sweet, tangy cherries frozen into a frosty delight—this cherry slushie takes me back to childhood summer days. What makes this recipe stand out is its simplicity paired with that vibrant, summery flavor. It’s perfect for breaking through the heat with a splash of tartness and icy refreshment.

    This isn’t just any frozen drink; it’s a playful blend of ripe cherries and a hint of citrus, served in a glass that beckons you to sip and smile. The eye-catching crimson hue instantly lifts spirits, especially when you’re craving something deliciously nostalgic yet effortlessly cool.

    WHY I LOVE THIS RECIPE?

    • I adore the pop of fresh cherry flavor that hits just right.
    • The vibrant red color makes it feel like a celebration in a glass.
    • It’s a rush of cold joy, perfect for quick cool-downs or weekend treats.
    • The simplicity of ingredients makes me feel clever with minimal effort.
    • It reminds me of childhood summers, carefree and full of sunshine.

    AVOID MY DISASTER (You’re Welcome)

    • FORGOT to blend cherries well? Ended up with chunks. Just pulse again for puree smoothness.
    • DUMPED sugar accidentally? Rinse, taste, then add gradually to suit your tartness preference.
    • OVER‑TORCHED the syrup? Cool it quickly under cold water before mixing again.
    • MISSED the lemon juice? Adds brightness and balances sweetness—don’t skip it.

    QUICK FIXES THAT SAVE YOUR DAY

    • When too thick, add a splash of cold water or juice and blend well.
    • SHAKE in a spoon of vanilla for extra depth of flavor.
    • When cherries release too much juice, freeze some for a thicker texture.
    • SPARKLE it up with a sprinkle of edible glitter or a dash of lemon zest.
    • When missing fresh cherries, use a good quality cherry preserves for quick flavor boost.

    Cherry Frozen Slushie

    This cherry frozen slushie combines ripe cherries blended with citrus juice and sweetener to create a vibrant, icy beverage. The mixture is processed until smooth and icy, resulting in a bright red, slushy texture perfect for hot days.
    Prep Time 10 minutes
    Total Time 10 minutes
    Servings: 2
    Course: Main Course
    Cuisine: modern
    Calories: 120

    Ingredients
      

    • 2 cups frozen cherries pitted and stemmed
    • 1 cup citrus juice (lemon or lime) freshly squeezed preferred
    • 2 tablespoons honey or simple syrup adjust to taste

    Equipment

    • Blender
    • Measuring cups and spoons

    Method
     

    1. Measure out the frozen cherries and place them into the blender.
    2. Add freshly squeezed citrus juice to the cherries in the blender.
    3. Pour in the honey or simple syrup to sweeten the mixture naturally.
    4. Secure the lid and blend on high speed until the mixture is smooth and icy, about 30-45 seconds. You should hear a consistent whir and see the mixture turn a vibrant red.
    5. Stop the blender and check the texture; if it’s too thick, add a splash of additional citrus juice or water and blend briefly until you reach your desired consistency.
    6. Pour the icy cherry slushie into glasses, allowing the vibrant color and frosty texture to show off the final look.
    7. Serve immediately with a straw or garnish with a fresh cherry or citrus wedge for a fun touch.

    Notes

    Feel free to experiment with different citrus or sweeteners to suit your taste. Using frozen cherries ensures a thick, icy texture without needing extra ice. For an extra flavor boost, add a splash of vanilla or a sprig of fresh mint.
    This cherry slushie is an ode to those simple summer joys we sometimes forget. Bright, refreshing, and bursting with flavor, it’s ideal for hot days when you need a quick pick-me-up. I find that sharing these chilled bursts of happiness makes any day feel a bit brighter.

    Plus, it’s a flexible recipe—adapt it with other berries or citrus flavors depending on what you have. No matter how you customize it, that icy crunch and fruit-forward kick will always feel just right. It’s the kind of treat that pairs perfectly with lazy weekends or spontaneous gatherings when everyone needs a cool respite.

  • Cozy Up with Autumn: An Unconventional Fall Casserole Adventure

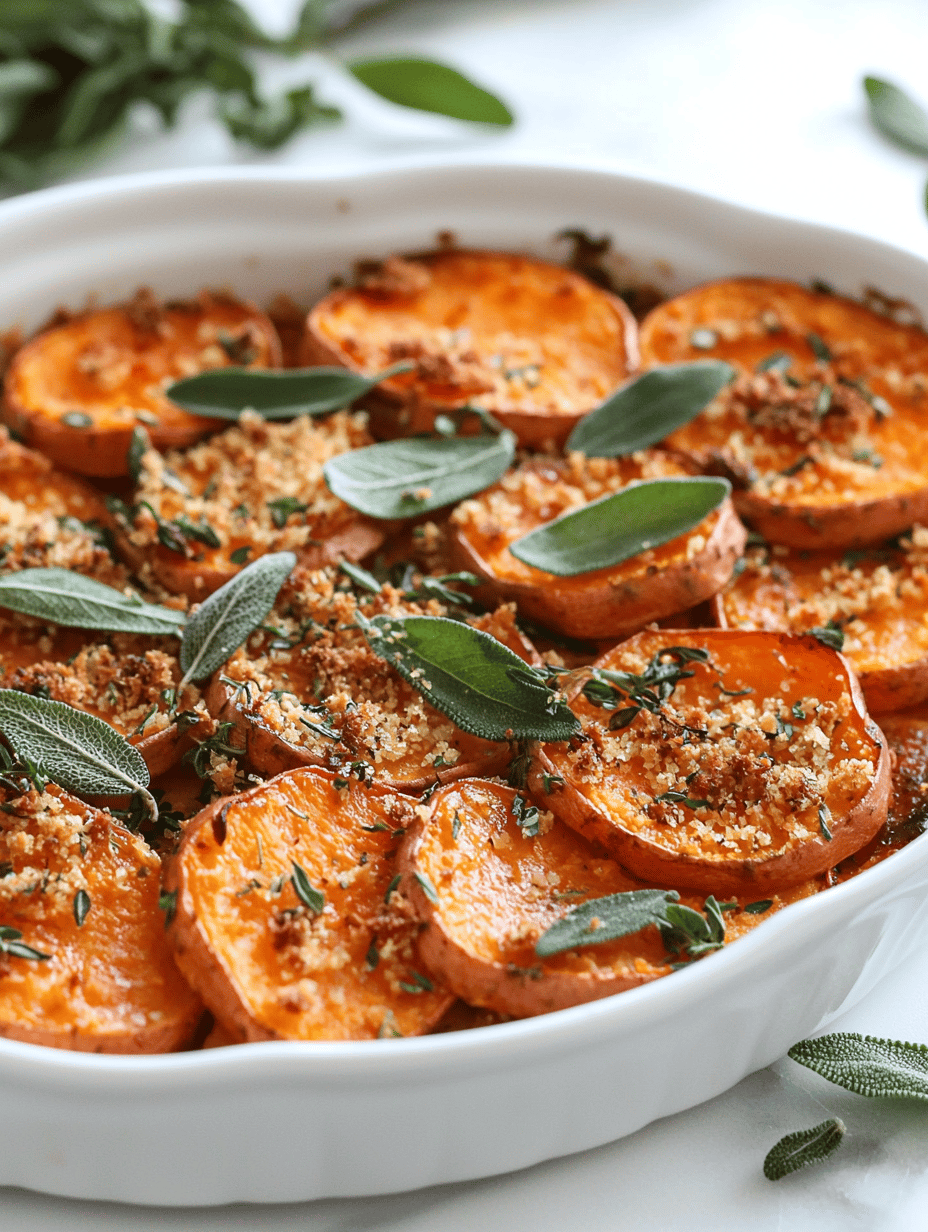
    Cozy Up with Autumn: An Unconventional Fall Casserole Adventure

    As the leaves turn vibrant shades of amber and crimson, I find myself craving more than just pie and pumpkin lattes. I want something savory, warm, and unexpectedly delightful—a casserole that whispers autumn in every bite. This recipe is a twist on the classic, combining flavors that might seem unusual but come together in perfect harmony.

    What sets this casserole apart is its bold use of seasonal ingredients like sweet potatoes and sage, paired with a splash of apple cider for a hint of sweetness. It’s perfect for those chilly evenings when you want a dish that not only fills your belly but also sparks joy with its comforting aroma. It’s proof that fall’s best flavors can be reinvented into a hearty one-dish wonder.

    Autumn Sweet Potato and Sage Casserole

    This casserole combines tender roasted sweet potatoes with aromatic sage and a splash of apple cider, layered with a savory cheesy topping. The dish results in a warm, hearty, and visually appealing bake with a golden crust and soft, flavorful interior. It encapsulates fall’s comforting flavors in a single, satisfying casserole.
    Prep Time 15 minutes
    Cook Time 40 minutes
    Total Time 55 minutes
    Servings: 6
    Course: Main Course
    Cuisine: American
    Calories: 320

    Ingredients
      

    • 2 large sweet potatoes peeled and cubed
    • 1 cup apple cider
    • 2 tablespoons olive oil divided
    • 1 teaspoon fresh sage chopped
    • 1 teaspoon salt
    • 1/2 teaspoon black pepper
    • 1 cup shredded Gruyère cheese
    • 1/2 cup bread crumbs preferably rustic or panko
    • 1 tablespoon butter melted

    Equipment

    • Chef’s Knife
    • Cutting board
    • Mixing bowls
    • Baking Dish
    • Spoon or spatula
    • Oven

    Method
     

    1. Preheat your oven to 400°F (200°C) and line a baking dish with parchment paper or lightly grease it.
    2. Peel and cut the sweet potatoes into 1-inch cubes. Toss them in a bowl with 1 tablespoon of olive oil, chopped sage, salt, and pepper until evenly coated.
    3. Spread the sweet potato cubes in a single layer on a baking sheet. Roast in the oven for about 25-30 minutes until they are golden around the edges and tender when poked with a fork.
    4. In the meantime, warm the apple cider in a small saucepan over medium heat until it just begins to bubble, allowing it to reduce slightly and intensify the flavor.
    5. Once the sweet potatoes are roasted, transfer them to a large mixing bowl and gently mash them with a fork or potato masher. Drizzle the warm apple cider over the mash and fold gently to combine and keep the mixture moist.
    6. Pour the sweet potato mixture into your prepared baking dish, spreading it out evenly with a spatula.
    7. In a small bowl, mix grated Gruyère cheese, bread crumbs, and melted butter. Sprinkle this topping evenly over the sweet potato layer.
    8. Bake the casserole uncovered for about 15-20 minutes, or until the topping is golden brown and crispy, and the casserole is bubbly around the edges.
    9. Remove the casserole from the oven and let it rest for 5 minutes before serving. You will see a beautiful golden crust with tender, flavorful sweet potato underneath.
    10. Scoop out portions and enjoy this hearty, autumn-inspired dish that combines sweet, savory, and herbaceous flavors.

    Notes

    For an extra touch of flavor, sprinkle some additional fresh sage on top before serving.

    In the end, this casserole isn’t just a meal; it’s a celebration of fall’s bounty and a reminder to embrace the unexpected. As the oven fills your kitchen with fragrant spices, you’ll feel a cozy sense of contentment. These recipes are about creating warmth and memories, turning simple ingredients into something memorable.

    So, gather your ingredients and prepare to impress. This dish is perfect for those days when you want something familiar yet exciting—something that says, “Yes, fall is here.” Enjoy every fragrant, flavorful bite as you settle into the season’s gentle lull.

  • Spine-Chilling Sparkle: Halloween Poison Apple Martini Magic

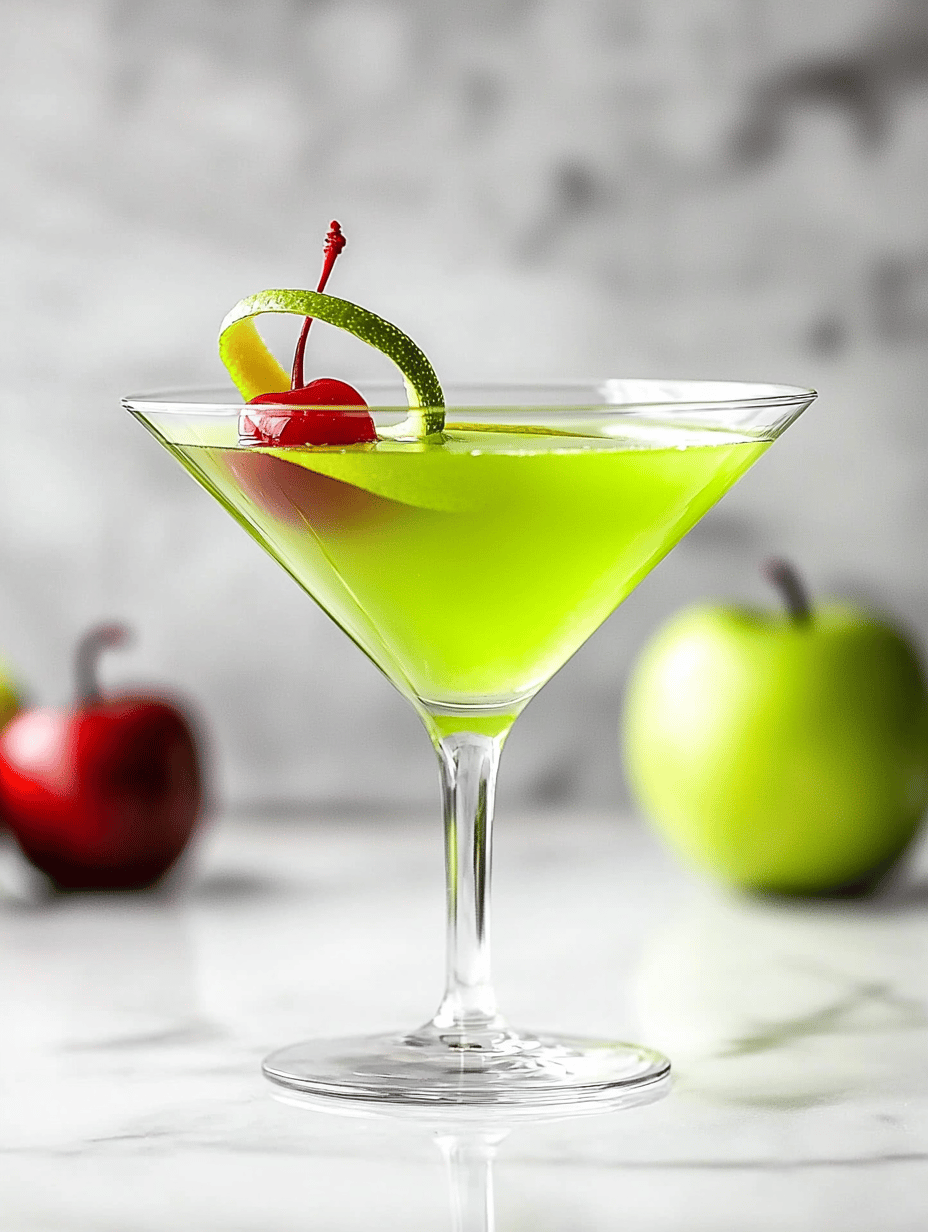
    Spine-Chilling Sparkle: Halloween Poison Apple Martini Magic

    Every October, as leaves crunch underfoot and pumpkin-shaped candies fill store aisles, I find myself yearning for something both eerie and elegant. The Halloween Poison Apple Martini captures that perfect spell of mystique and festivity. Its shimmering green hue and hauntingly crisp apple aroma turn any gathering into a spectral celebration.

    This recipe flips the typical cocktail on its head, blending spectral aesthetics with a bite that’s as sharp as a witch’s grin. The moment the tart apple hits your lips, an intoxicating swirl of flavors awakens memories of haunted harvest nights and bonfires flickering in the dark. It’s a potion that invites both chaos and charm.

    WHY I LOVE THIS RECIPE?

    • It’s a nostalgic nod to childhood treats disguised as adult elixirs with a twist of chaos.
    • The bubbling green shimmer feels like potion magic, perfect for Halloween decor.
    • The crisp apple taste balances sweetness and tartness flawlessly.
    • The vibrant color sparks conversations and curiosity at every sip.
    • Creating it is a quick mix, but it impresses with seasonal flair.

    AVOID MY DISASTER (You’re Welcome)

    • FORGOT to strain the icy shards? Ended up with a slushy mess—remember the fine mesh!
    • DUMPED too much absinthe? The drink turned bitter—add more apple juice to fix.
    • OVER-TORCHED the sugar rim? It turned black and bitter—use a lighter touch next time.
    • FORGOT the garnish? The presentation looked dull, but a simple candy apple saved it.

    QUICK FIXES THAT SAVE YOUR DAY

    • When the green glow dulls, add a splash of tonic water for shimmer.
    • Splash a little more lemon juice if the flavor feels flat.
    • Patch bitterness by stirring in a dash of simple syrup.
    • Shield the rim with colored sugar for an eye-catching effect.
    • When in doubt, toss in a few edible glitter flakes—instant wow factor.

    As Halloween night approaches, this Poison Apple Martini feels like the perfect alliance of nostalgia and modern flair. Its mesmerizing look and balanced flavors make it a standout at any costume party or spooky get-together. Whether you’re serving it to witches or mortals, it’s sure to enchant.

    The beauty of this cocktail is how effortlessly it captures the spooky season’s essence while offering a taste that’s both fresh and familiar. It’s a reminder that a little chaos and creativity can turn an ordinary night into something memorable. The glow of your drinks will surely set the mood for an unforgettable haunted evening.

    Halloween Poison Apple Martini

    This cocktail features a vibrant green hue and crisp apple aroma, achieved by blending tart apple juice, absinthe, and sour mix. The drink is shaken with ice until well-chilled and served with a shimmering glow, creating a striking, spectral appearance with a smooth, refreshing texture.
    Prep Time 5 minutes
    Total Time 5 minutes
    Servings: 2
    Course: Main Course
    Cuisine: Beverages
    Calories: 120

    Ingredients
      

    • 3 oz green apple juice preferably fresh or high-quality
    • 1 oz absinthe for a haunting green shimmer
    • 1 oz sour mix adds tartness and balances flavors
    • 0.5 oz lemon juice freshly squeezed preferred
    • Ice cubes Ice enough to fill the shaker

    Equipment

    • Cocktail shaker
    • Fine mesh strainer

    Method
     

    1. Measure the green apple juice, absinthe, sour mix, and lemon juice into a cocktail shaker.
    2. Add plenty of ice cubes to the shaker, filling it about halfway to ensure proper chilling.
    3. Secure the lid and shake vigorously for about 15-20 seconds until the mixture is cold and the outside of the shaker feels frosty.
    4. Strain the chilled cocktail into a glass, using a fine mesh strainer to catch any ice shards or pulp, ensuring a smooth, clear drink.
    5. Watch as the vibrant green liquid glows softly, reminiscent of a magical potion, ready to serve at your Halloween gathering.

    Notes

    For extra spooky effect, rim the glass with colored sugar or edible glitter. Garnish with a candy apple or mini witch hat for presentation.

    Making the Halloween Poison Apple Martini is a ritual that sparks joy, chaos, and a bit of mischief. The crisp apple aroma and shimmering green glow create a sensory escape into the spirit of the season. It’s a cocktail that delights and surprises with each sip, perfect for celebrating October’s mysterious charm.

    As the night winds down, these drinks leave a lingering sparkle—just like those magical moonlit nights of childhood. Sharing this recipe adds a little extra fun and flair to your spooky festivities, making every toast a moment to remember. Cheers to embracing the eerie, the elegant, and the utterly enchanting.

  • Hidden Spice Secrets of Pumpkin Cookies

    Hidden Spice Secrets of Pumpkin Cookies

    Even as the leaves turn and the air grows crisp, there’s something magical about baking cookies that carry a hint of autumn. These pumpkin cookies go beyond basic spice, infusing a subtle warmth that feels like wrapping yourself in a favorite sweater. The secret? A dash of ground ginger and a pinch of cinnamon that awakens the senses with every bite.

    As I mix the dough, the smell of roasted pumpkin fills the kitchen, reminding me of cozy afternoons and pumpkin patches. These cookies are not just treats—they’re a journey into the comfort of fall flavors, perfect for sharing or keeping all to yourself on a lazy weekend. The texture? Crispy edges with a soft, pumpkin-rich center that melts in your mouth.

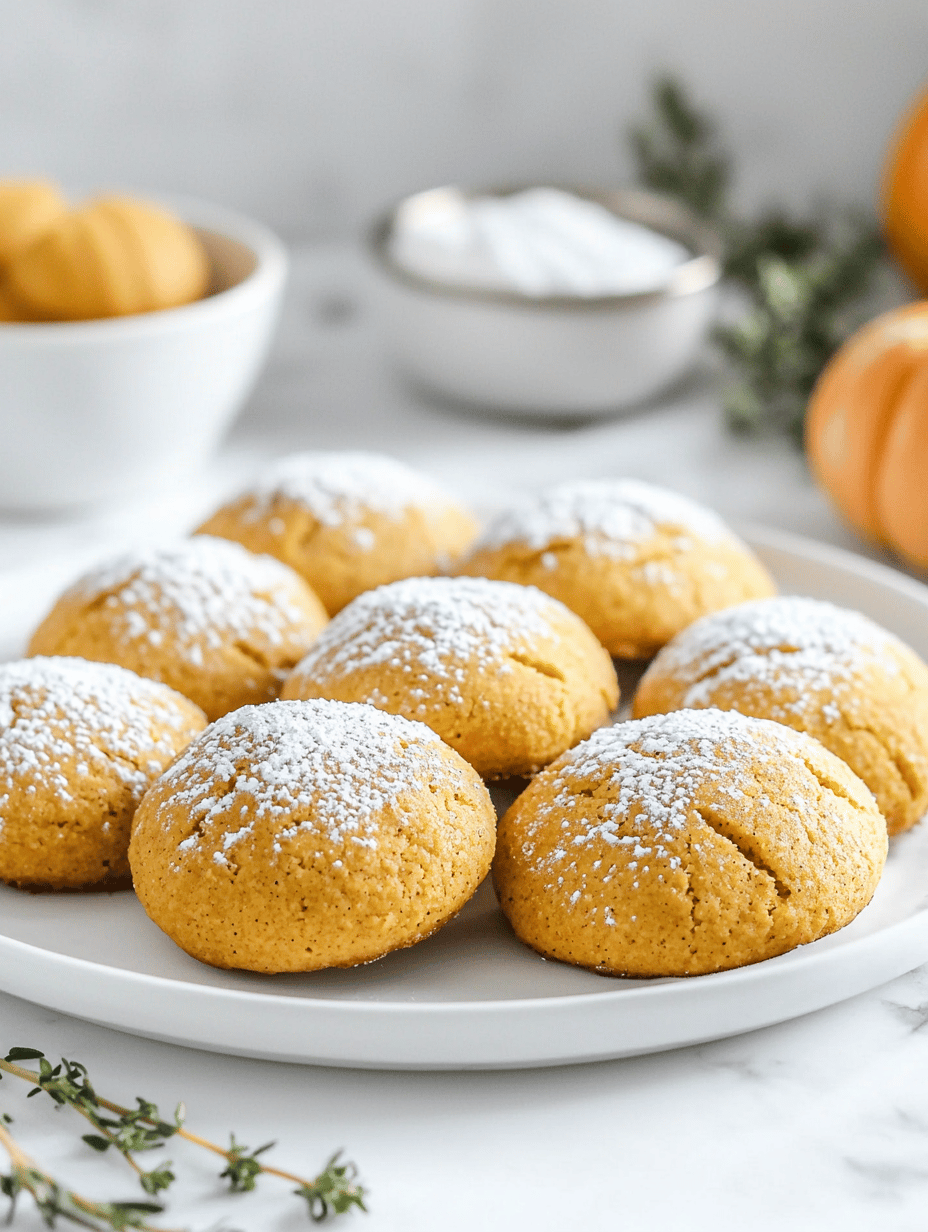
    Pumpkin Cookies

    These pumpkin cookies are baked treats that feature a soft, moist center encased in crispy edges. Made with pureed pumpkin, spices like ginger and cinnamon, and a simple dough, they develop a golden-brown exterior with a tender interior that melts in the mouth. The cookies showcase warm fall flavors and a appealing visual contrast between their crisp top and soft core.
    Prep Time 20 minutes
    Cook Time 15 minutes
    Total Time 35 minutes
    Servings: 12
    Course: Main Course
    Cuisine: American
    Calories: 150

    Ingredients
      

    • 1 ½ cups all-purpose flour
    • ½ cup granulated sugar
    • ½ cup brown sugar
    • ½ cup unsalted butter softened
    • ½ cup unsweetened pumpkin puree
    • 1 large egg
    • 1 ½ teaspoons ground ginger
    • ½ teaspoon ground cinnamon
    • ½ teaspoon baking powder
    • ¼ teaspoon salt

    Equipment

    • Mixing bowls
    • Whisk
    • Measuring cups and spoons
    • Baking sheet
    • Parchment paper
    • Cooling rack

    Method
     

    1. Preheat your oven to 350°F (175°C) and line a baking sheet with parchment paper.
    2. In a large mixing bowl, whisk together the flour, ground ginger, cinnamon, baking powder, and salt until well combined.
    3. In a separate bowl, cream the softened butter with both sugars until the mixture becomes light and fluffy, and the sugars are dissolved.
    4. Add the egg and pumpkin puree to the butter mixture, then whisk until smooth and fully incorporated.
    5. Gradually fold the dry ingredients into the wet mixture using a spatula, mixing just until a sticky dough forms.
    6. Use a spoon or cookie scoop to portion out twelve rounded mounds of dough onto the prepared baking sheet, spacing them about 2 inches apart.
    7. Bake the cookies in the preheated oven for 12-15 minutes, until the edges are golden brown and the centers look set.
    8. Remove the baking sheet from the oven and let the cookies cool on the sheet for 5 minutes before transferring them to a wire rack to cool completely.
    9. Once cooled, the cookies will have a crispy edge with a soft, moist center, ready to serve and enjoy.
    Baking these pumpkin cookies is about celebrating the fleeting beauty of the season. They’re a great way to enjoy fresh flavors without fuss, perfect for quick gatherings or just a quiet moment of indulgence.

    Each batch reminds me why I fell in love with seasonal baking: it’s simple, nostalgic, and always a little bit surprising. As these cookies cool on the rack, I can’t help but think how they’ll bring joy to anyone lucky enough to taste them, season after season.

  • Witching Hour Pumpkin Spice Pancakes to Cozy Your Morning

    Witching Hour Pumpkin Spice Pancakes to Cozy Your Morning

    In the quiet dawn of fall, I find myself craving more than just the usual cinnamon and nutmeg in my morning pancakes. I love tossing in a hint of roasted pumpkin puree, which adds a velvety depth and a faint sweetness that whispers of chilly mornings and falling leaves. This twist transforms a simple breakfast into a comforting ritual that feels like wrapping yourself in a warm blanket.

    These pancakes are my secret weapon for busy mornings where only a splash of something warm and sweet can set the tone. They bring a nostalgic scent of autumn that fills the entire kitchen, stirring happy memories and cozy anticipation. It’s a small spell of comfort, served on a plate, that makes any start just a bit more magical.

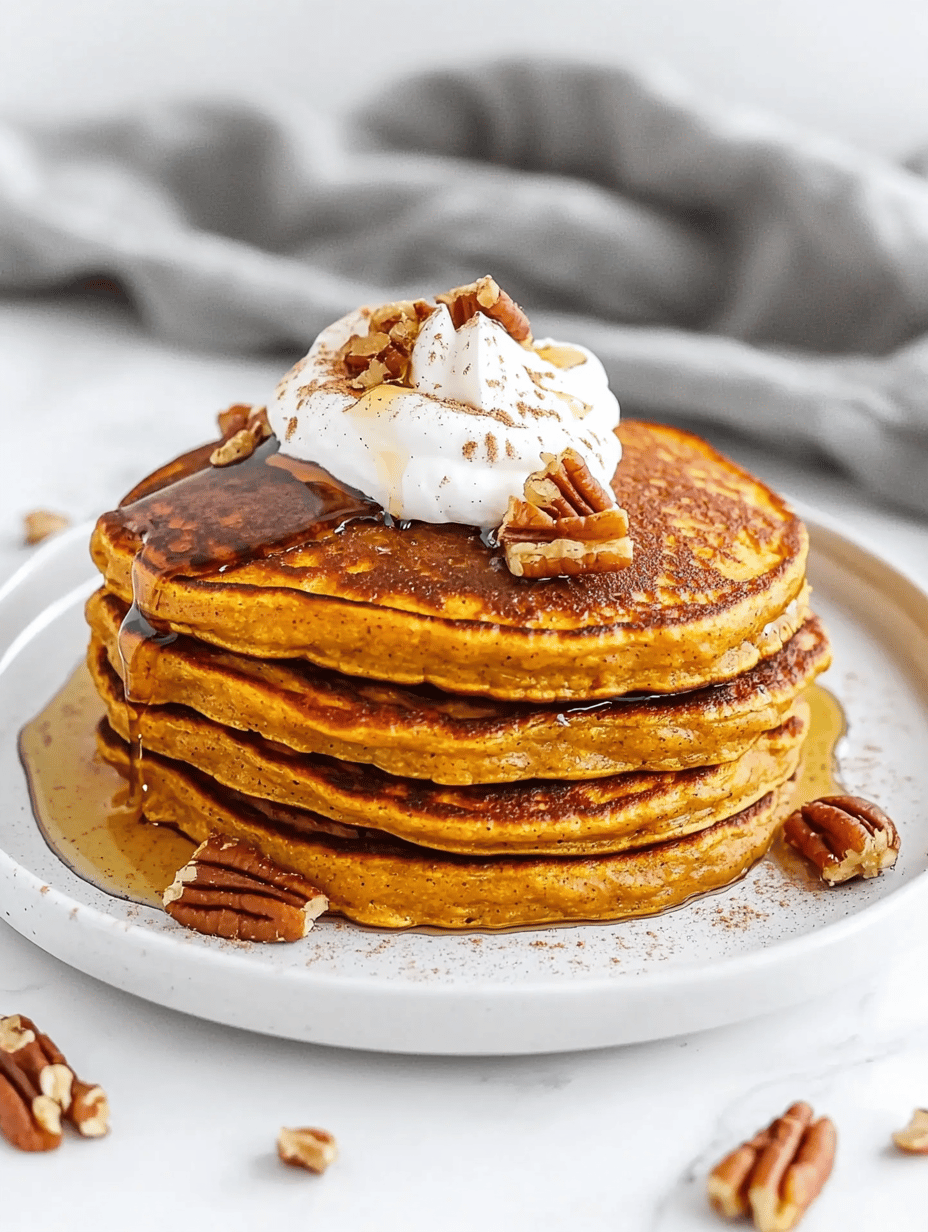
    Roasted Pumpkin Pancakes

    These pumpkin pancakes are made by mixing a batter of flour, baking powder, and spices, then folding in roasted pumpkin puree for added richness. The pancakes are cooked on a hot griddle until golden brown with a fluffy, tender interior and slightly crisp edges, creating a warm, autumn-inspired breakfast. Their vibrant orange color and inviting aroma make them both visually appealing and aromatic.
    Prep Time 10 minutes
    Cook Time 15 minutes
    Total Time 25 minutes
    Servings: 4
    Course: Main Course
    Cuisine: American
    Calories: 250

    Ingredients
      

    • 1 1/2 cups all-purpose flour
    • 2 teaspoons baking powder
    • 1/2 teaspoon ground cinnamon
    • 1/4 teaspoon ground nutmeg
    • 1/4 teaspoon salt
    • 1 cup milk
    • 1 large egg
    • 1/4 cup unsalted butter, melted
    • 3/4 cup roasted pumpkin puree

    Equipment

    • Mixing bowls
    • Whisk
    • Griddle or non-stick skillet
    • Spatula

    Method
     

    1. In a large mixing bowl, whisk together the flour, baking powder, cinnamon, nutmeg, and salt until well combined. This creates a flavorful dry base for your batter.
    2. In a separate bowl, whisk the milk, egg, and melted butter until smooth and slightly frothy. This will help incorporate air into the batter for fluffiness.
    3. Pour the wet mixture into the dry ingredients, then gently fold together just until combined. Do not over-mix; a few lumps are fine and help keep the pancakes tender.
    4. Gently fold in the roasted pumpkin puree until evenly dispersed, giving the batter a vibrant orange hue and a moist consistency.
    5. Heat a griddle or non-stick skillet over medium heat until hot. Lightly grease with butter or cooking spray to prevent sticking.
    6. Pour 1/4 cup of batter onto the hot surface for each pancake. Wait until bubbles form on the surface and the edges look set, about 2-3 minutes.
    7. Carefully flip each pancake using a spatula, cooking for another 1-2 minutes until golden brown and cooked through.
    8. Transfer the cooked pancakes to a plate and keep warm while you repeat with the remaining batter.
    9. Serve the pumpkin pancakes warm, topped with your favorite syrup, whipped cream, or additional roasted pumpkin if desired.
    Making pumpkin spice pancakes is a seasonal delight that embraces the fleeting beauty of fall. They’re perfect for weekend brunches or a quiet moment of self-care with a mug of spicy chai.

    Every fluffy bite shares a story—of crisp air, golden leaves, and the simple joy of a well-loved recipe. As the days grow cooler, these pancakes remind us to slow down and savor the cozy corners of life, one forkful at a time.